The objective of this tutorial is to describe step by step process to install Hadoop 3 on Ubuntu 18.04.4 LTS (Bionic Beaver), once the installation is completed you can run commands for HDFS and map-reduce.
Platform
- Operating System (OS). You can use Ubuntu 18.04.4 LTS version or later version, also you can use other flavors of Linux systems like Redhat, CentOS, etc.
- Hadoop. We have used Apache Hadoop 3.1.2 version you can use Cloudera distribution or other distribution as well.
Download Software
- VMWare Player for Windows
- Ubuntu
- Eclipse for windows
- Putty for windows
- Winscp for windows
- Hadoop
https://my.vmware.com/web/vmware/free#desktop_end_user_computing/vmware_player/7_0
http://releases.ubuntu.com/18.04.4/ubuntu-18.04.4-desktop-amd64
https://www.eclipse.org/downloads/
http://www.chiark.greenend.org.uk/~sgtatham/putty/download.html
http://winscp.net/eng/download.php
https://archive.apache.org/dist/hadoop/common/hadoop-3.1.2/hadoop-3.1.2.tar.gz
Steps to Install Ubuntu 18.04.4 LTS on VMware 7 64 Bit Platform
Please follow the below steps to install Ubuntu 18.04.4 LTS on VMware 7 64 Bit platform.
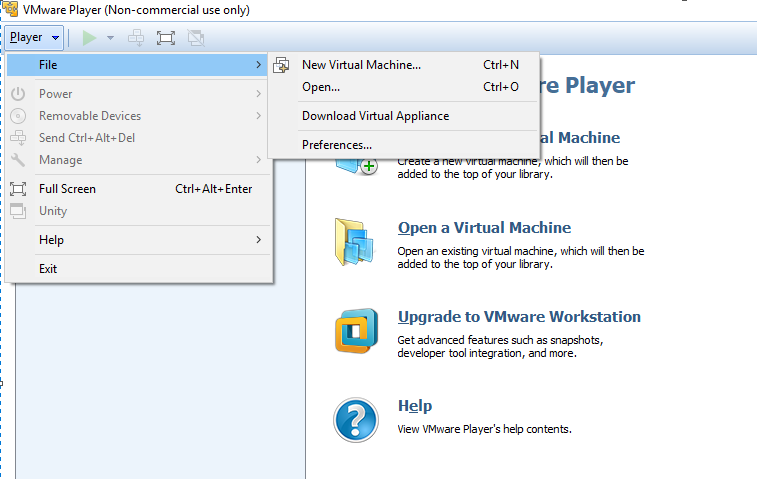
Step 1. Start the downloaded vmware_player/7_0 and click on the file and select New Virtual Machine.
Step 2. Select the downloaded Ubuntu 18.04.4 LTS image.

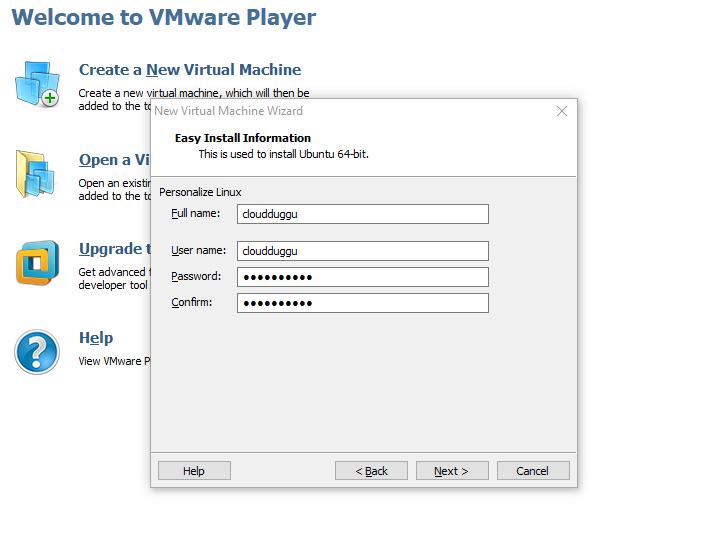
Step 3. Enter the username/password and click on next.
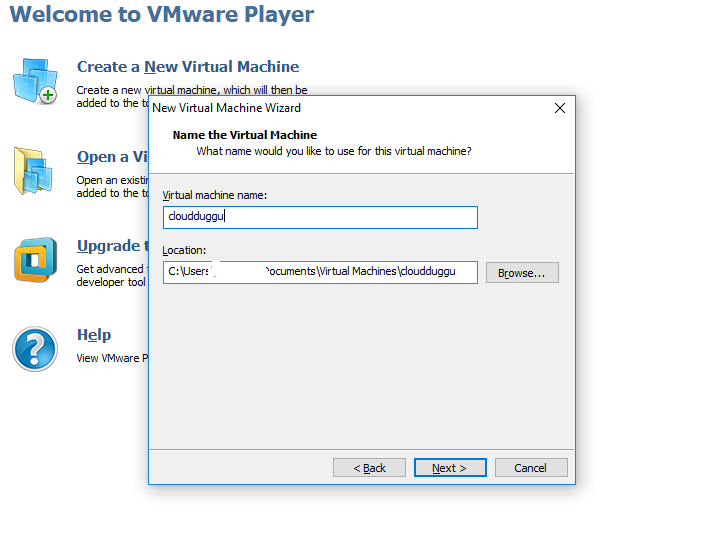
Step 4. Enter the name of Virtual Machine and click on next.
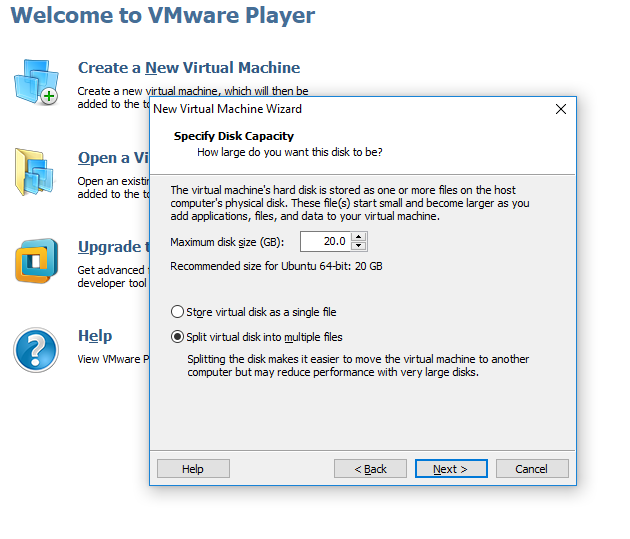
Step 5. Leave the default configuration and click on next to proceed with the installation. Now the installation of Ubuntu 18.04.4 LTS will take around 30 minutes post which system would be ready for Hadoop installation.
Please follow the below steps once the above software/ Ubuntu 18.04.4 LTS configuration on VM is completed.
Steps to Install Hadoop 3 on Ubuntu 18.04.4
- export HADOOP_HOME="/home/cloudduggu/hadoop"
- export PATH=$PATH:$HADOOP_HOME/bin
- export PATH=$PATH:$HADOOP_HOME/sbin
- export MAPRED_HOME=${HADOOP_HOME}
- export HDFS_HOME=${HADOOP_HOME}
- export YARN_HOME=${HADOOP_HOME}
Step 1. Please download Hadoop 3.1.2 from the below link.
On Windows: https://archive.apache.org/dist/hadoop/common/hadoop-3.1.2/hadoop-3.1.2.tar.gz
On Linux: $wget https://archive.apache.org/dist/hadoop/common/hadoop-3.1.2/hadoop-3.1.2.tar.gz
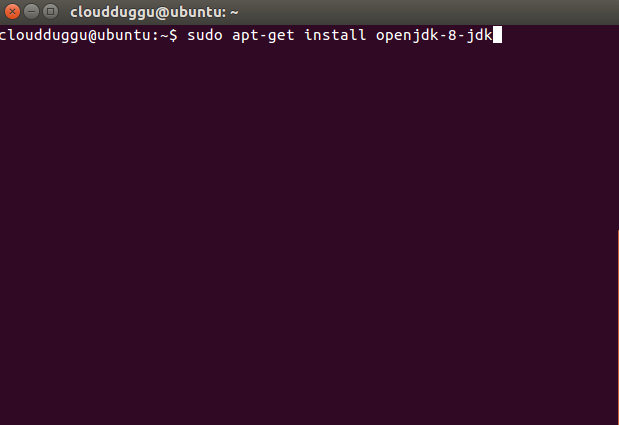
Step 2. Install Java 8 using the below command.
cloudduggu@ubuntu:-$sudo apt-get install openjdk-8-jdk
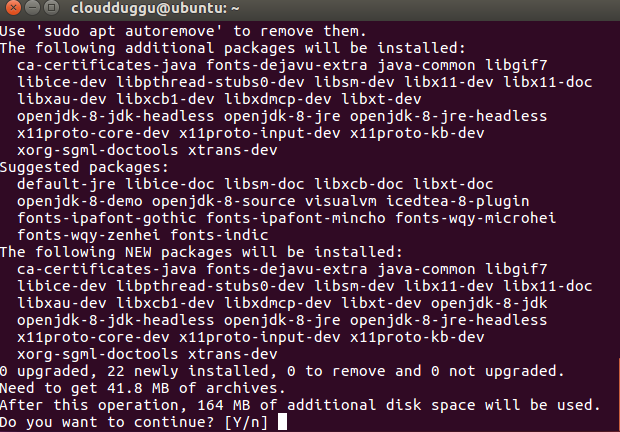
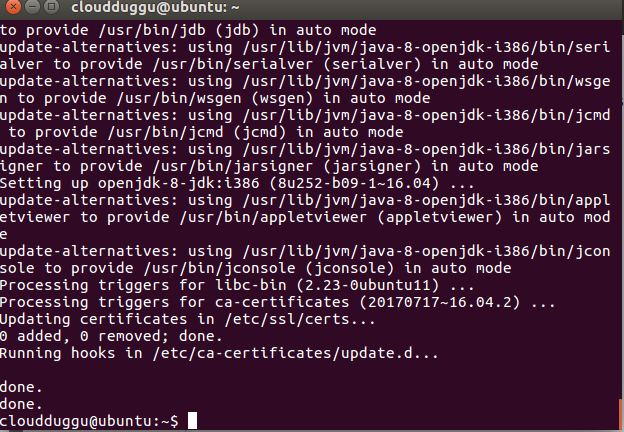
Press Y to continue the installation.
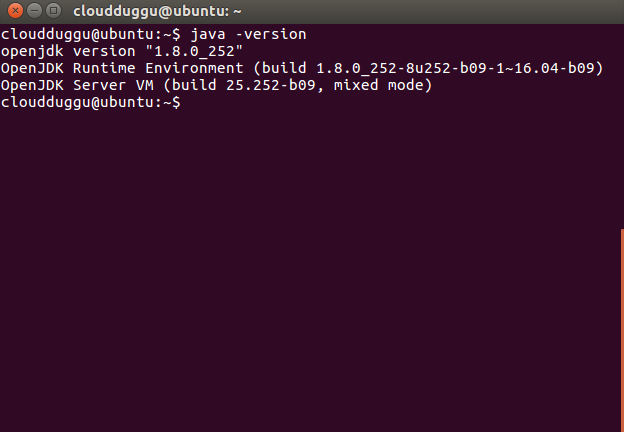
Once the java installation is completed please verify it by running the below command.
cloudduggu@ubuntu:-$java –version
SSH should be installed and in running state to use Hadoop Script also PDSH also should be installed to provide better SSH resource management.
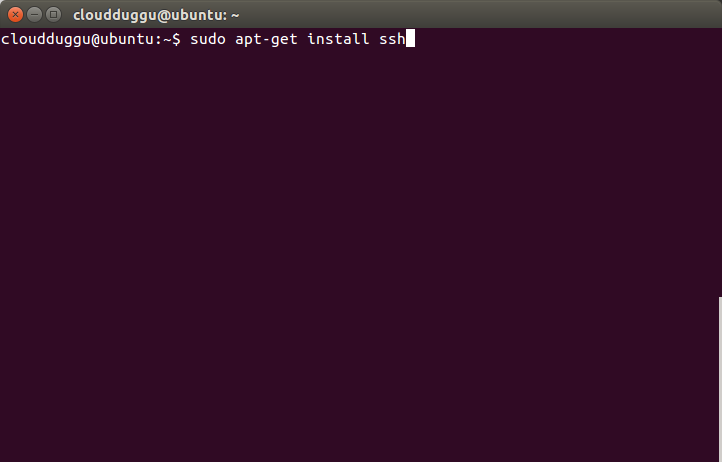
Step 3. Install SSH on your system using the below step.
cloudduggu@ubuntu:-$sudo apt-get install ssh
Please enter the password for the sudo user and press enter.
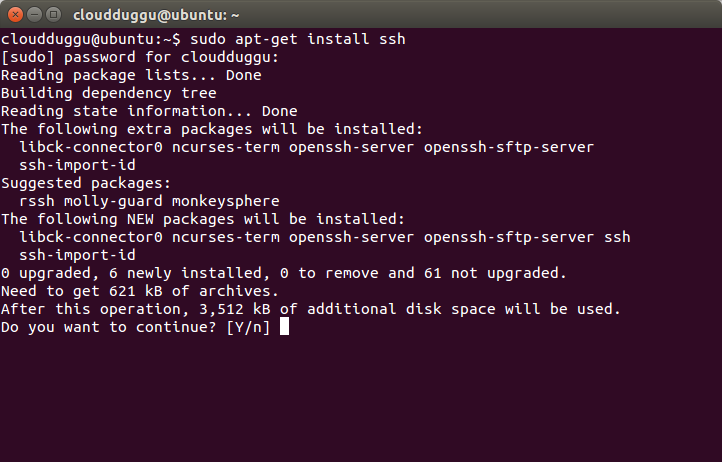
Press Y to continue the installation.
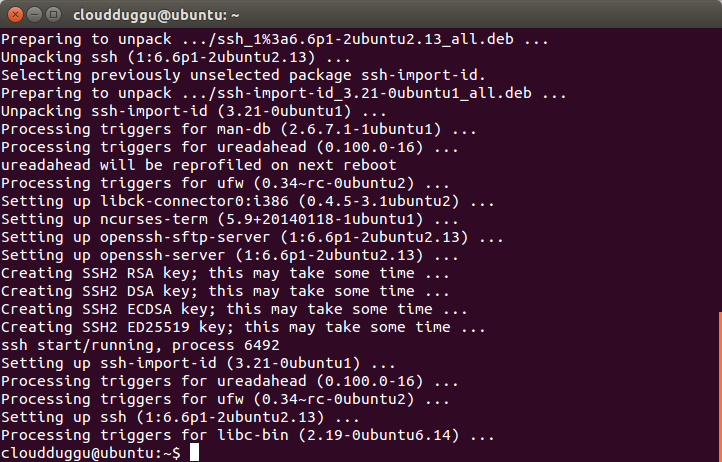
Once the installation is completed, the above notification will come.
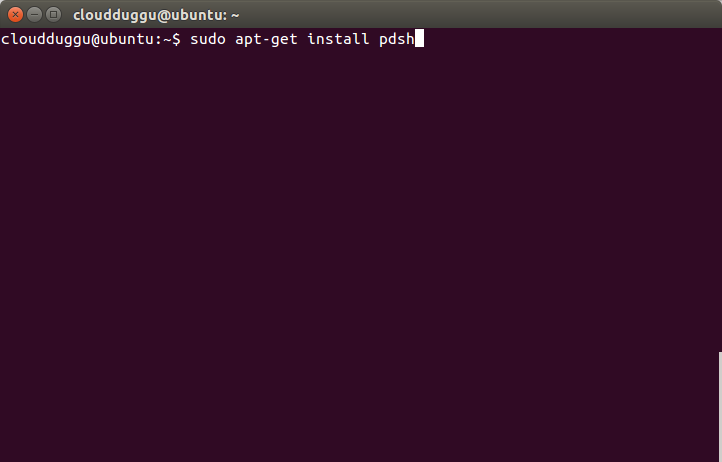
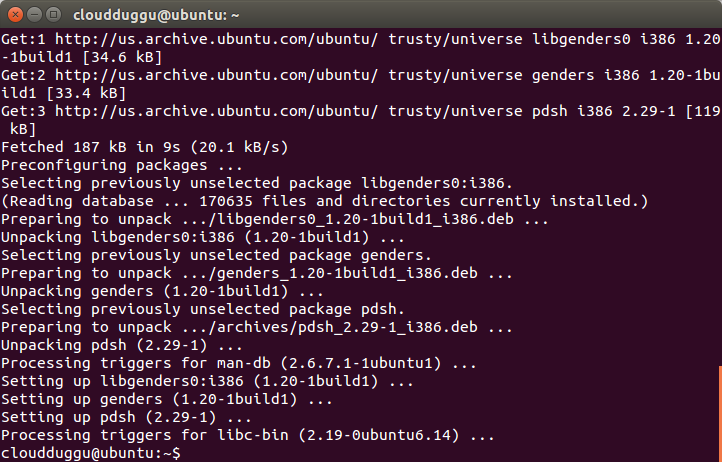
Step 4. Now install PDSH using the below command.
cloudduggu@ubuntu:-$sudo apt-get install pdsh
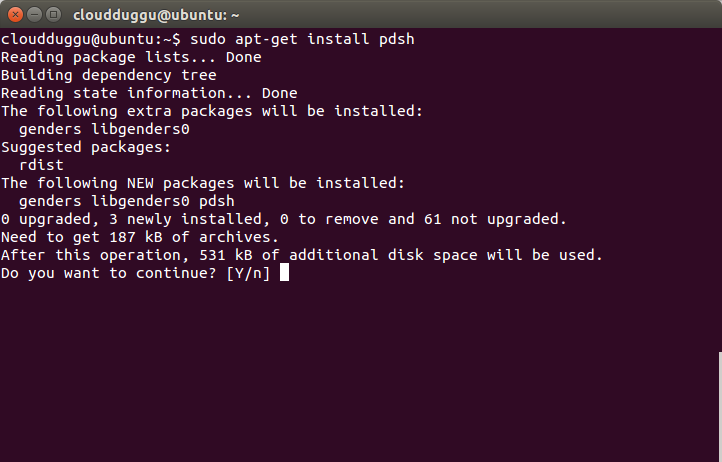
Press Y to continue installation.
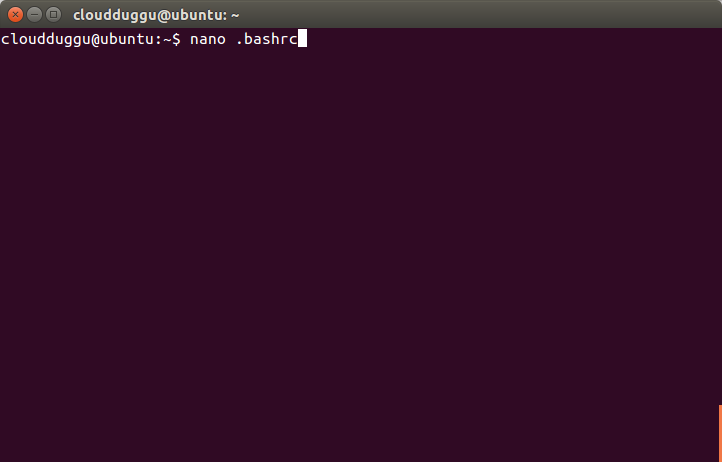
Step 5. Now open the .bashrc file using any editor, we will use nano to edit the .bashrc file and enter export PDSH_RCMD_TYPE=ssh.
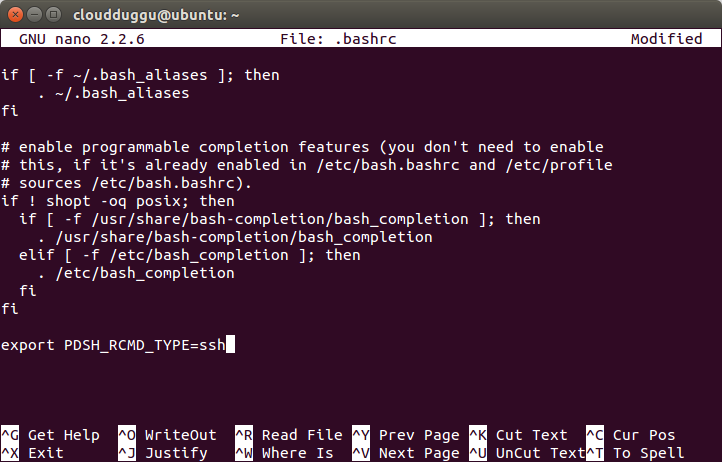
Press CTRL + O to save the file. Once the file is saved press CTRL+X to exit from the editor.
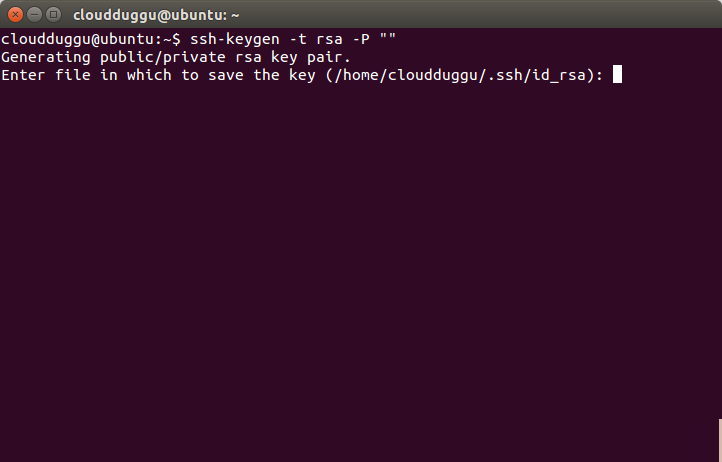
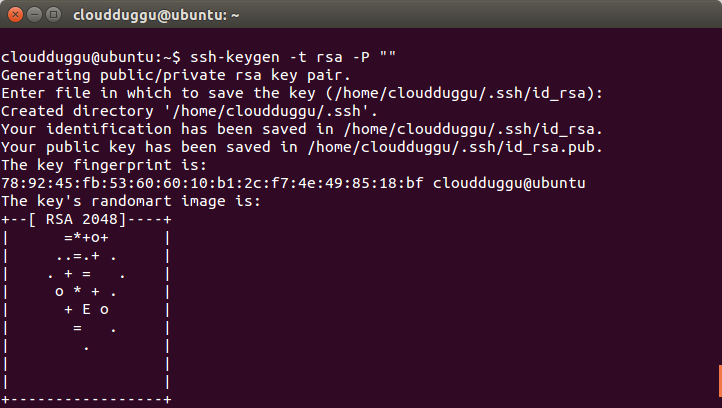
Step 6. Now we will configure SSH by running the below command.
cloudduggu@ubuntu:-$ssh-keygen -t rsa -P ""
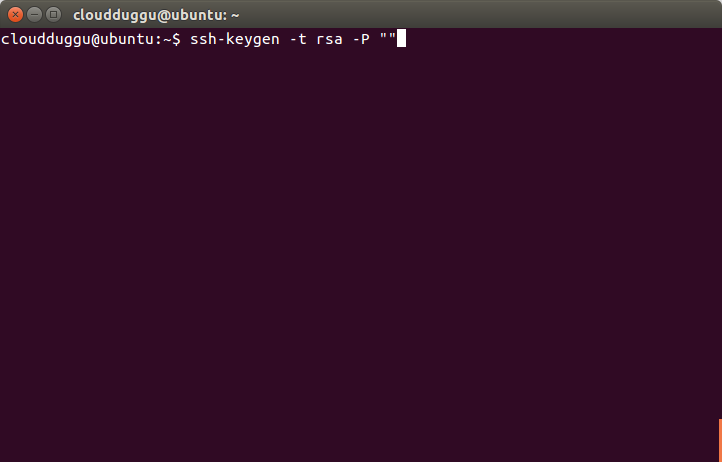
Press Enter when it asks for a filename.
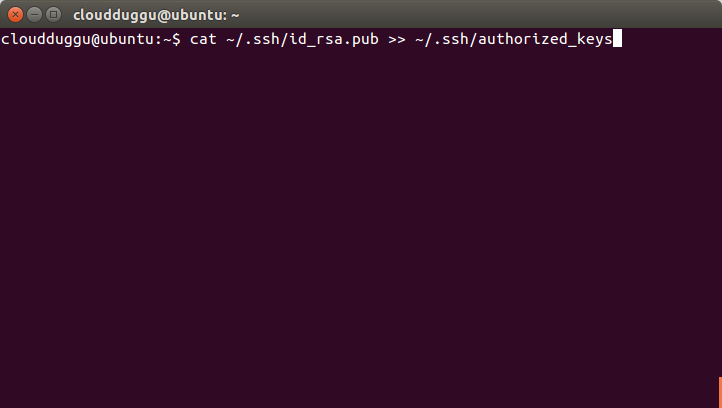
Step 7. Now copy the public key to the authorized key using the below command.
cloudduggu@ubuntu:-$cat ~/.ssh/id_rsa.pub >> ~/.ssh/authorized_keys
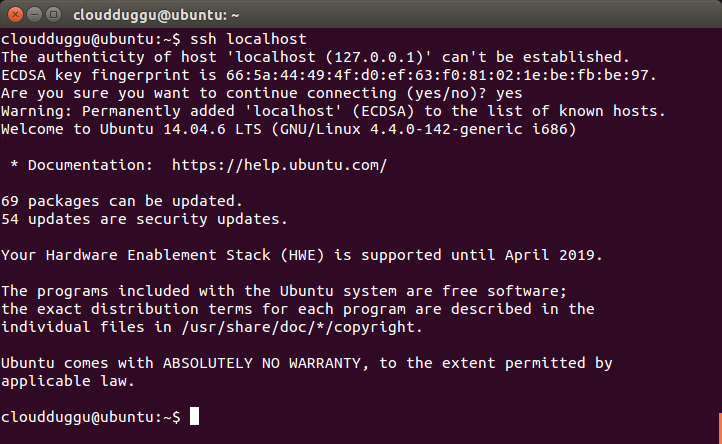
Step 8. Please verify SSH setup by running the below command.
cloudduggu@ubuntu:-$ssh localhost
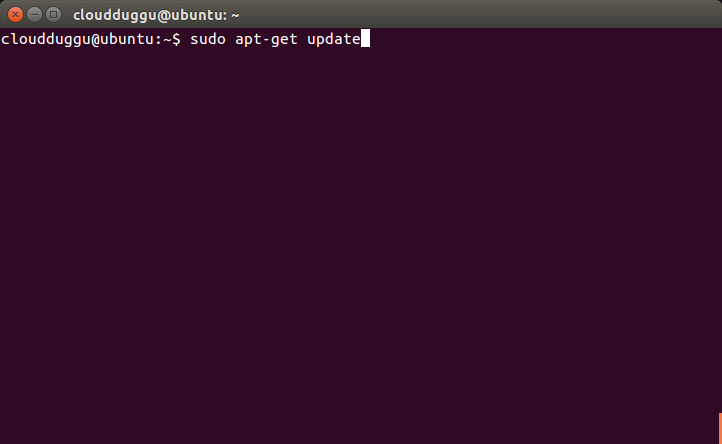
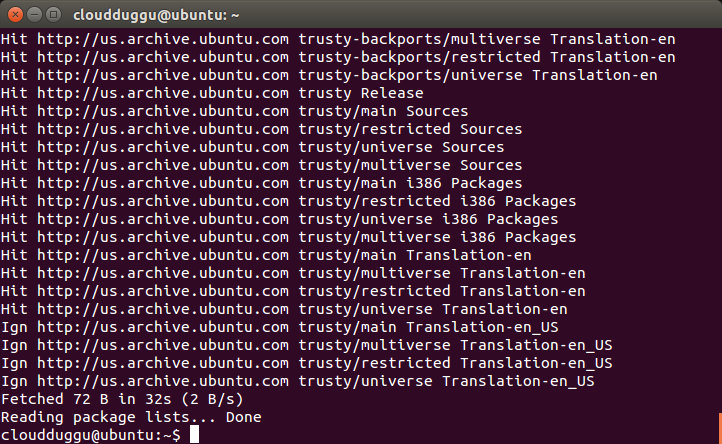
Step 9. Now update the source file using the below command.
cloudduggu@ubuntu:-$sudo apt-get update
Step 10. Now we are ready to install Hadoop. In our case, it is present at the below location.
Please check your download folder to locate the Hadoop tar file.
/home/cloudduggu/hadoop-3.1.2.tar.gz
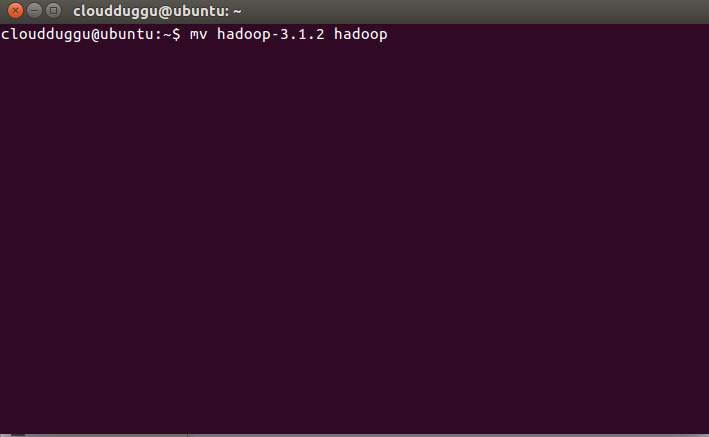
Step 11. Let us extract it by using the below command and rename the folder to Hadoop to make it meaningful.
cloudduggu@ubuntu:-$tar xzf hadoop-3.1.2.tar.gz
cloudduggu@ubuntu:-$mv hadoop-3.1.2 hadoop

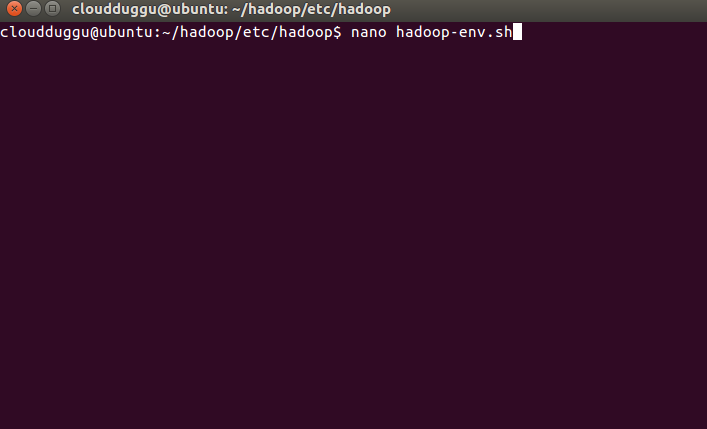
Step 12. Now we will set up a java home in the Hadoop-env. sh file.
Hadoop-env.sh file location:/home/cloudduggu/hadoop/etc/hadoop/
JAVA file location: /usr/lib/jvm/java-8-openjdk-i386/
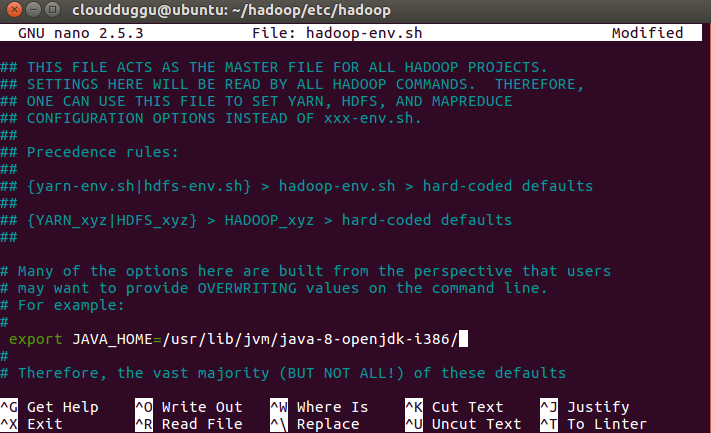
Enter java home location in Hadoop-env. sh file and save it (use CTRL+O).
Step 13. Now open the .bashrc file from the user’s home and add the below parameters to update the location of Hadoop.
cloudduggu@ubuntu:-$nano .bashrc
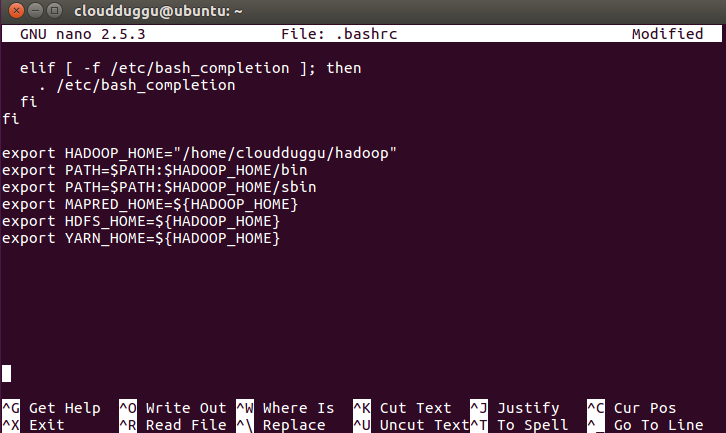
Now save the changes by pressing CTRL + O and exit from nano editor by pressing CTRL + X.
Step 14. Now open the core-site.xml file which is located under /hadoop/etc/hadoop and follow the below commands.
cloudduggu@ubuntu:~/hadoop/etc/hadoop/nano core-site.xml
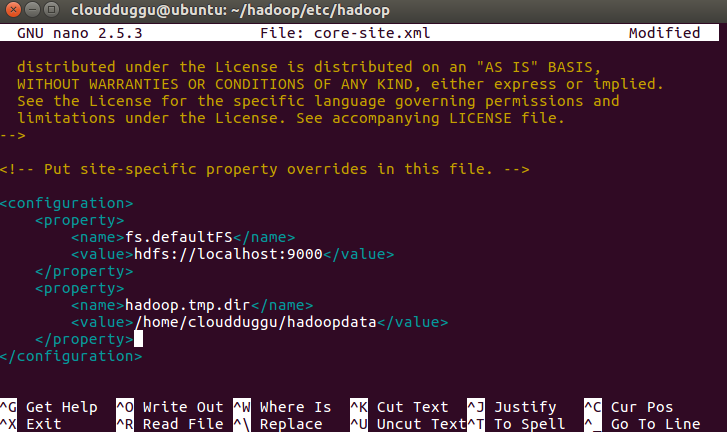
Now save the changes by pressing CTRL + O and exit from nano editor by pressing CTRL + X.
Step 15. Open mapred-site.xml file which is located under /hadoop/etc/hadoop and follow the below command.
cloudduggu@ubuntu:~/hadoop/etc/hadoop/nano mapred-site.xml

Now save the changes by pressing CTRL + O and exit from nano editor by pressing CTRL + X.
Step 16. Open hdfs-site.xml file which is located under /hadoop/etc/hadoop and follow the below command.
cloudduggu@ubuntu:~/hadoop/etc/hadoop/nano hdfs-site.xml
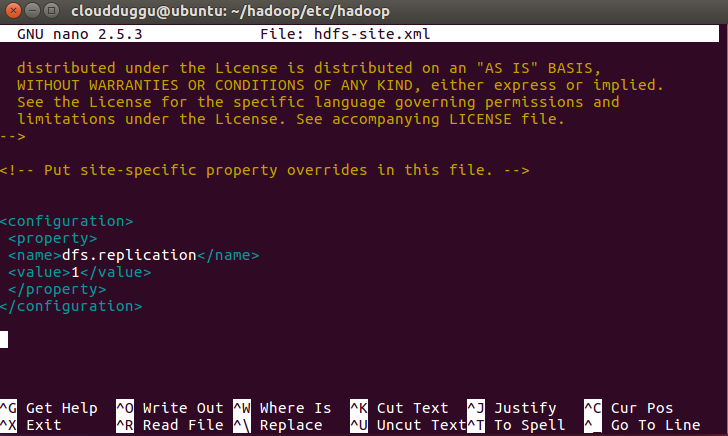
Now save the changes by pressing CTRL + O and exit from nano editor by pressing CTRL + X.
Step 17. Open yarn-site.xml file which is located under /hadoop/etc/hadoop and follow the below command.
cloudduggu@ubuntu:~/hadoop/etc/hadoop/nano yarn-site.xml
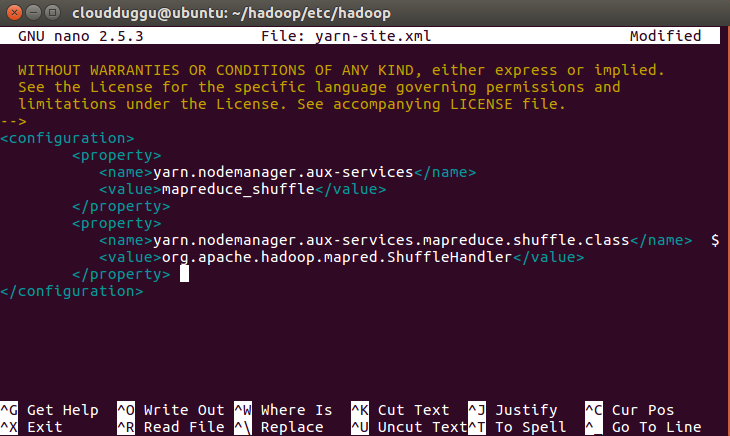
Now save the changes by pressing CTRL + O and exit from nano editor by pressing CTRL + X.
Step 18. Since this is the first time installation we need to format HDFS using the below command.
cloudduggu@ubuntu:~/hadoop$ bin/hdfs namenode –format
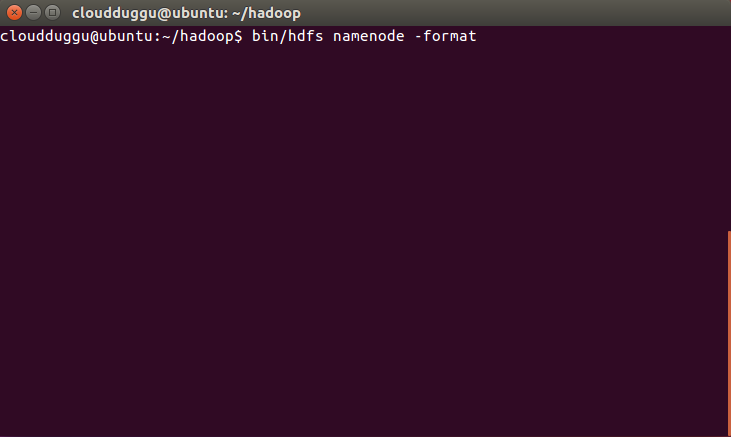
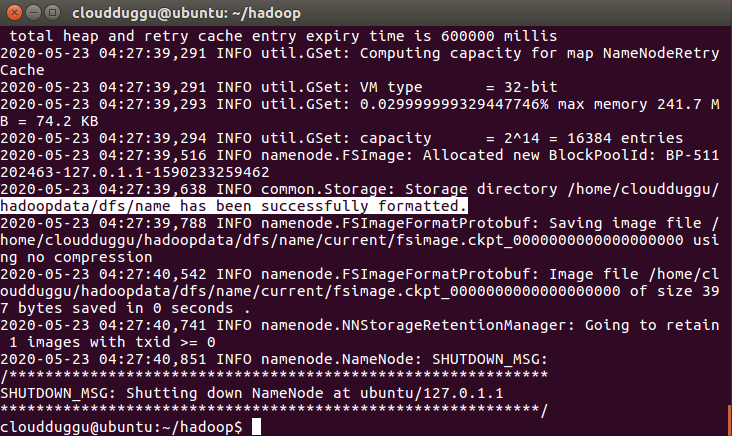
Once HDFS is formatted you will see a highlighted message.
Step 19. Now start HDFS and YARN services using the below command and verify it using the command line and web browser.
For HDFS cloudduggu@ubuntu:~/hadoop$ sbin/start-dfs.sh

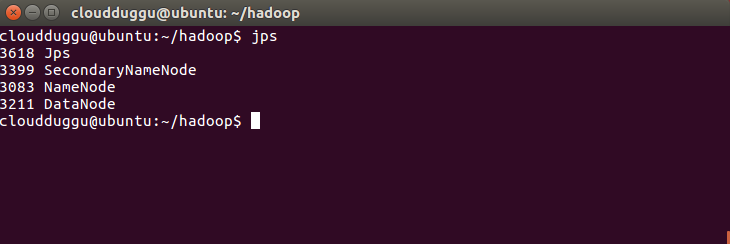
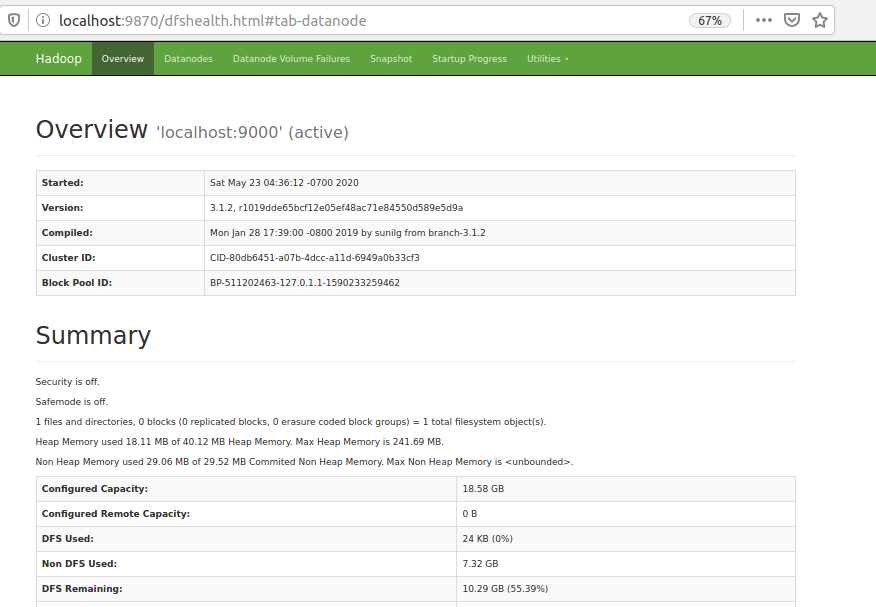
Once HDFS services are started you can verify it by running the JPS command on the command prompt and by putting localhost:9870 in the web browser.
For YARN cloudduggu@ubuntu:~/hadoop$ sbin/start-yarn.sh
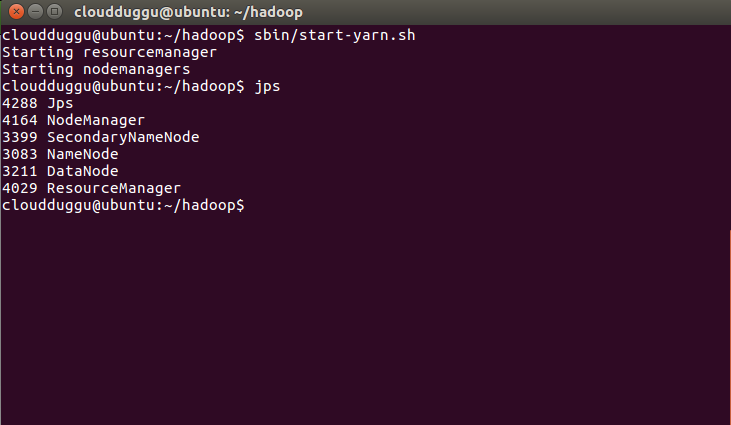
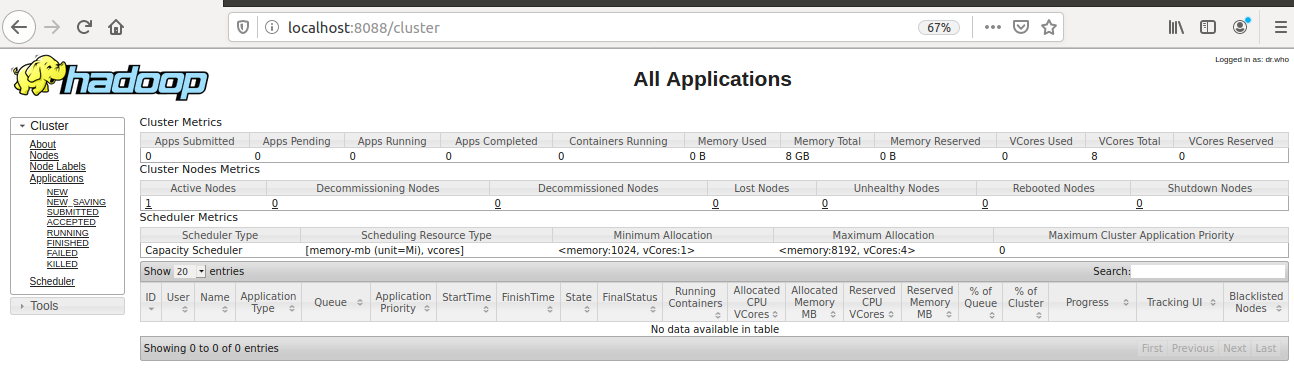
Verify it from a web browser by putting localhost:8088.
So now we have completed Hadoop 3 installation on Ubuntu 18.04.4 Version.