The objective of this tutorial is to create an Apache Sqoop project to import data from MySQL database to Hadoop HDFS. We have taken Movie data set for this project. After processing the data from the Sqoop system, we will push the result information to the client system and after that, we will show data in a tabular format.
So readers ... are you ready to create an Apache Sqoop project. (Import-Data-Sqoop-Job)
1. Idea Of Project
| a. Download movie data from the Client System and inserts it into the MySQL Database System. | 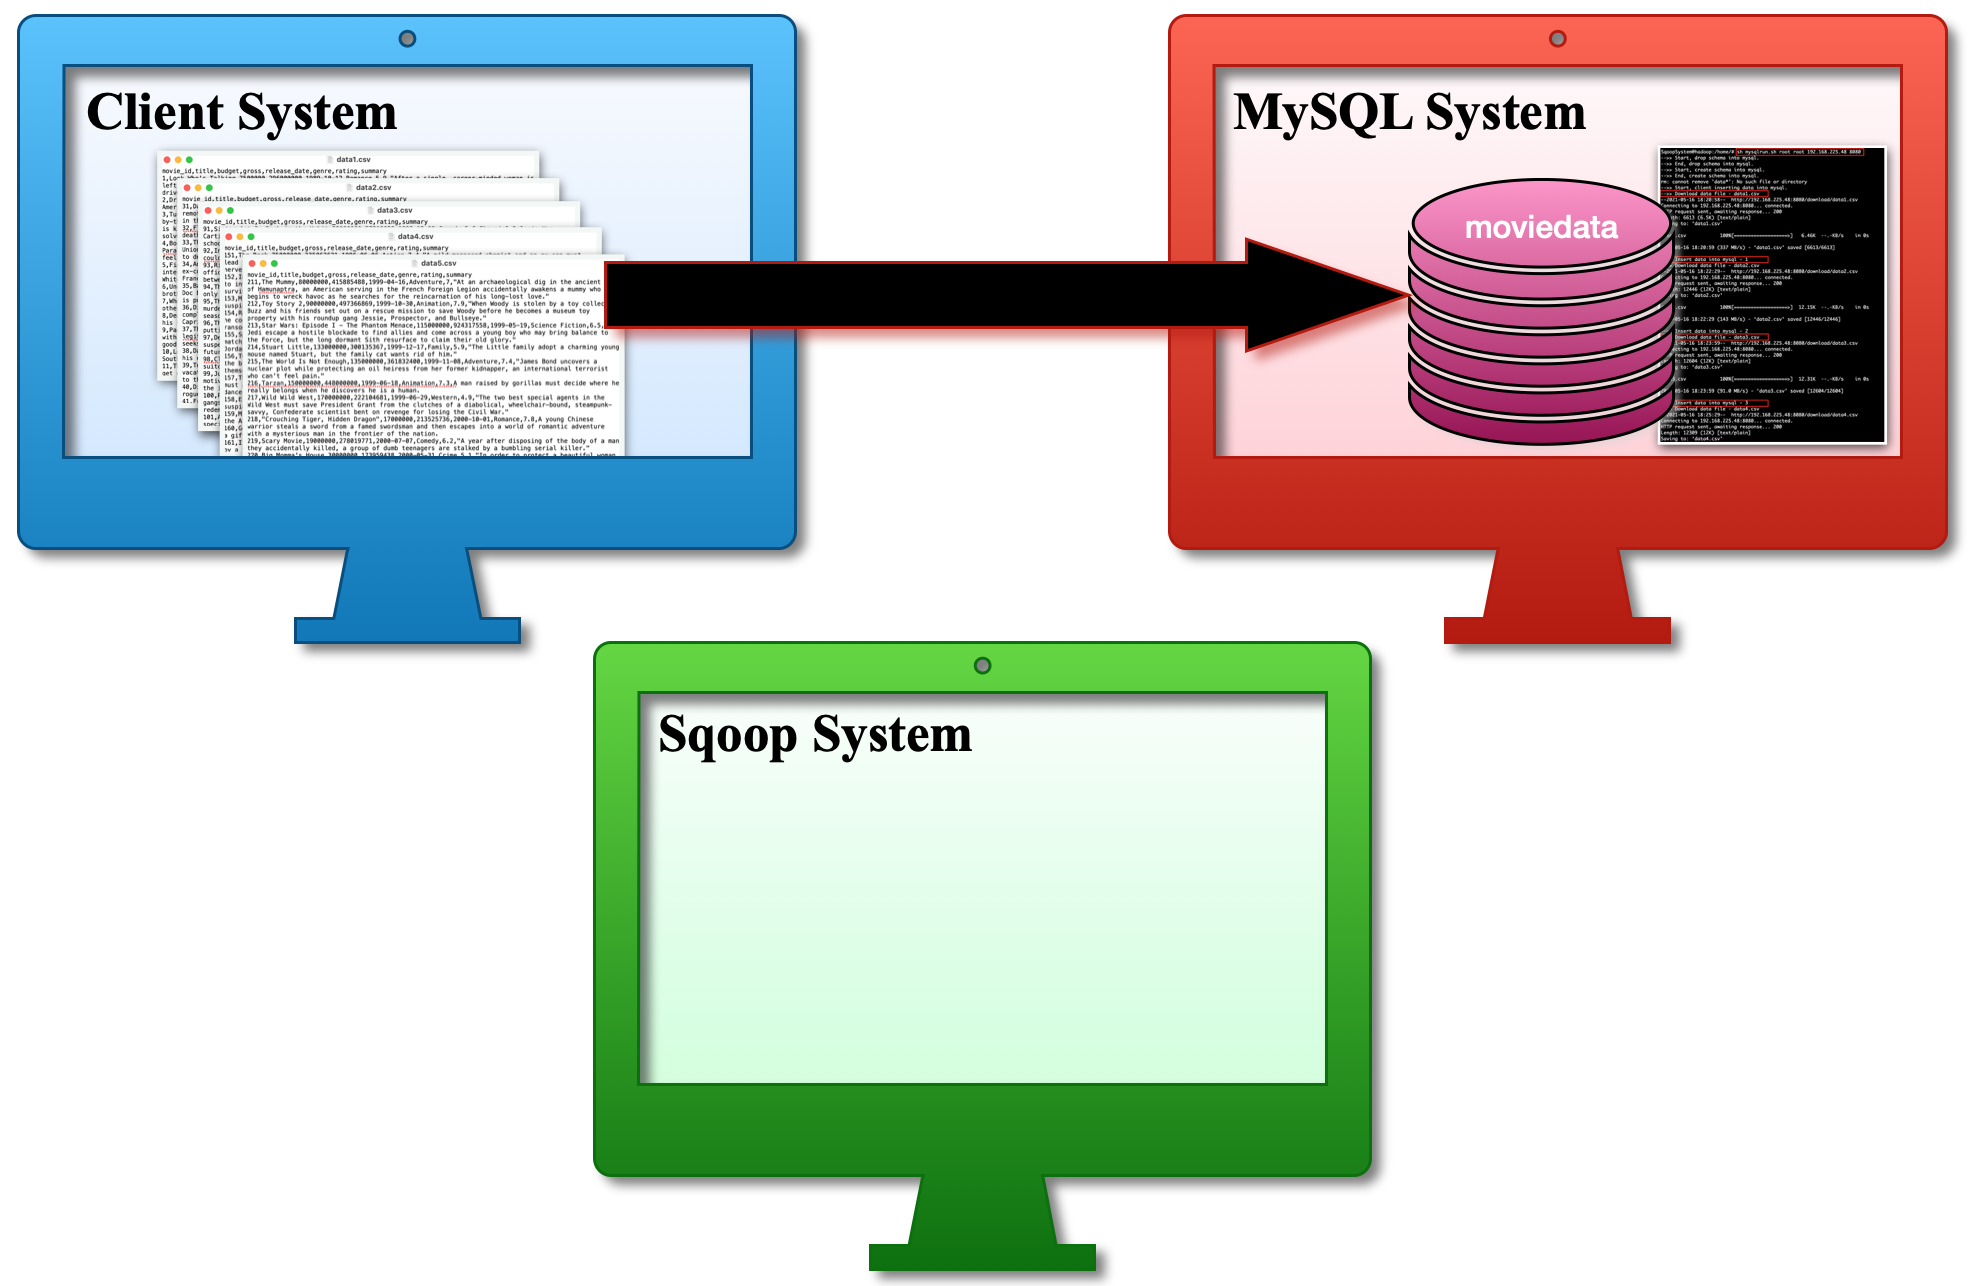 |
| b. The Sqoop Job runs on the Sqoop System and looks for newly inserted data in the MySQL Database System. | 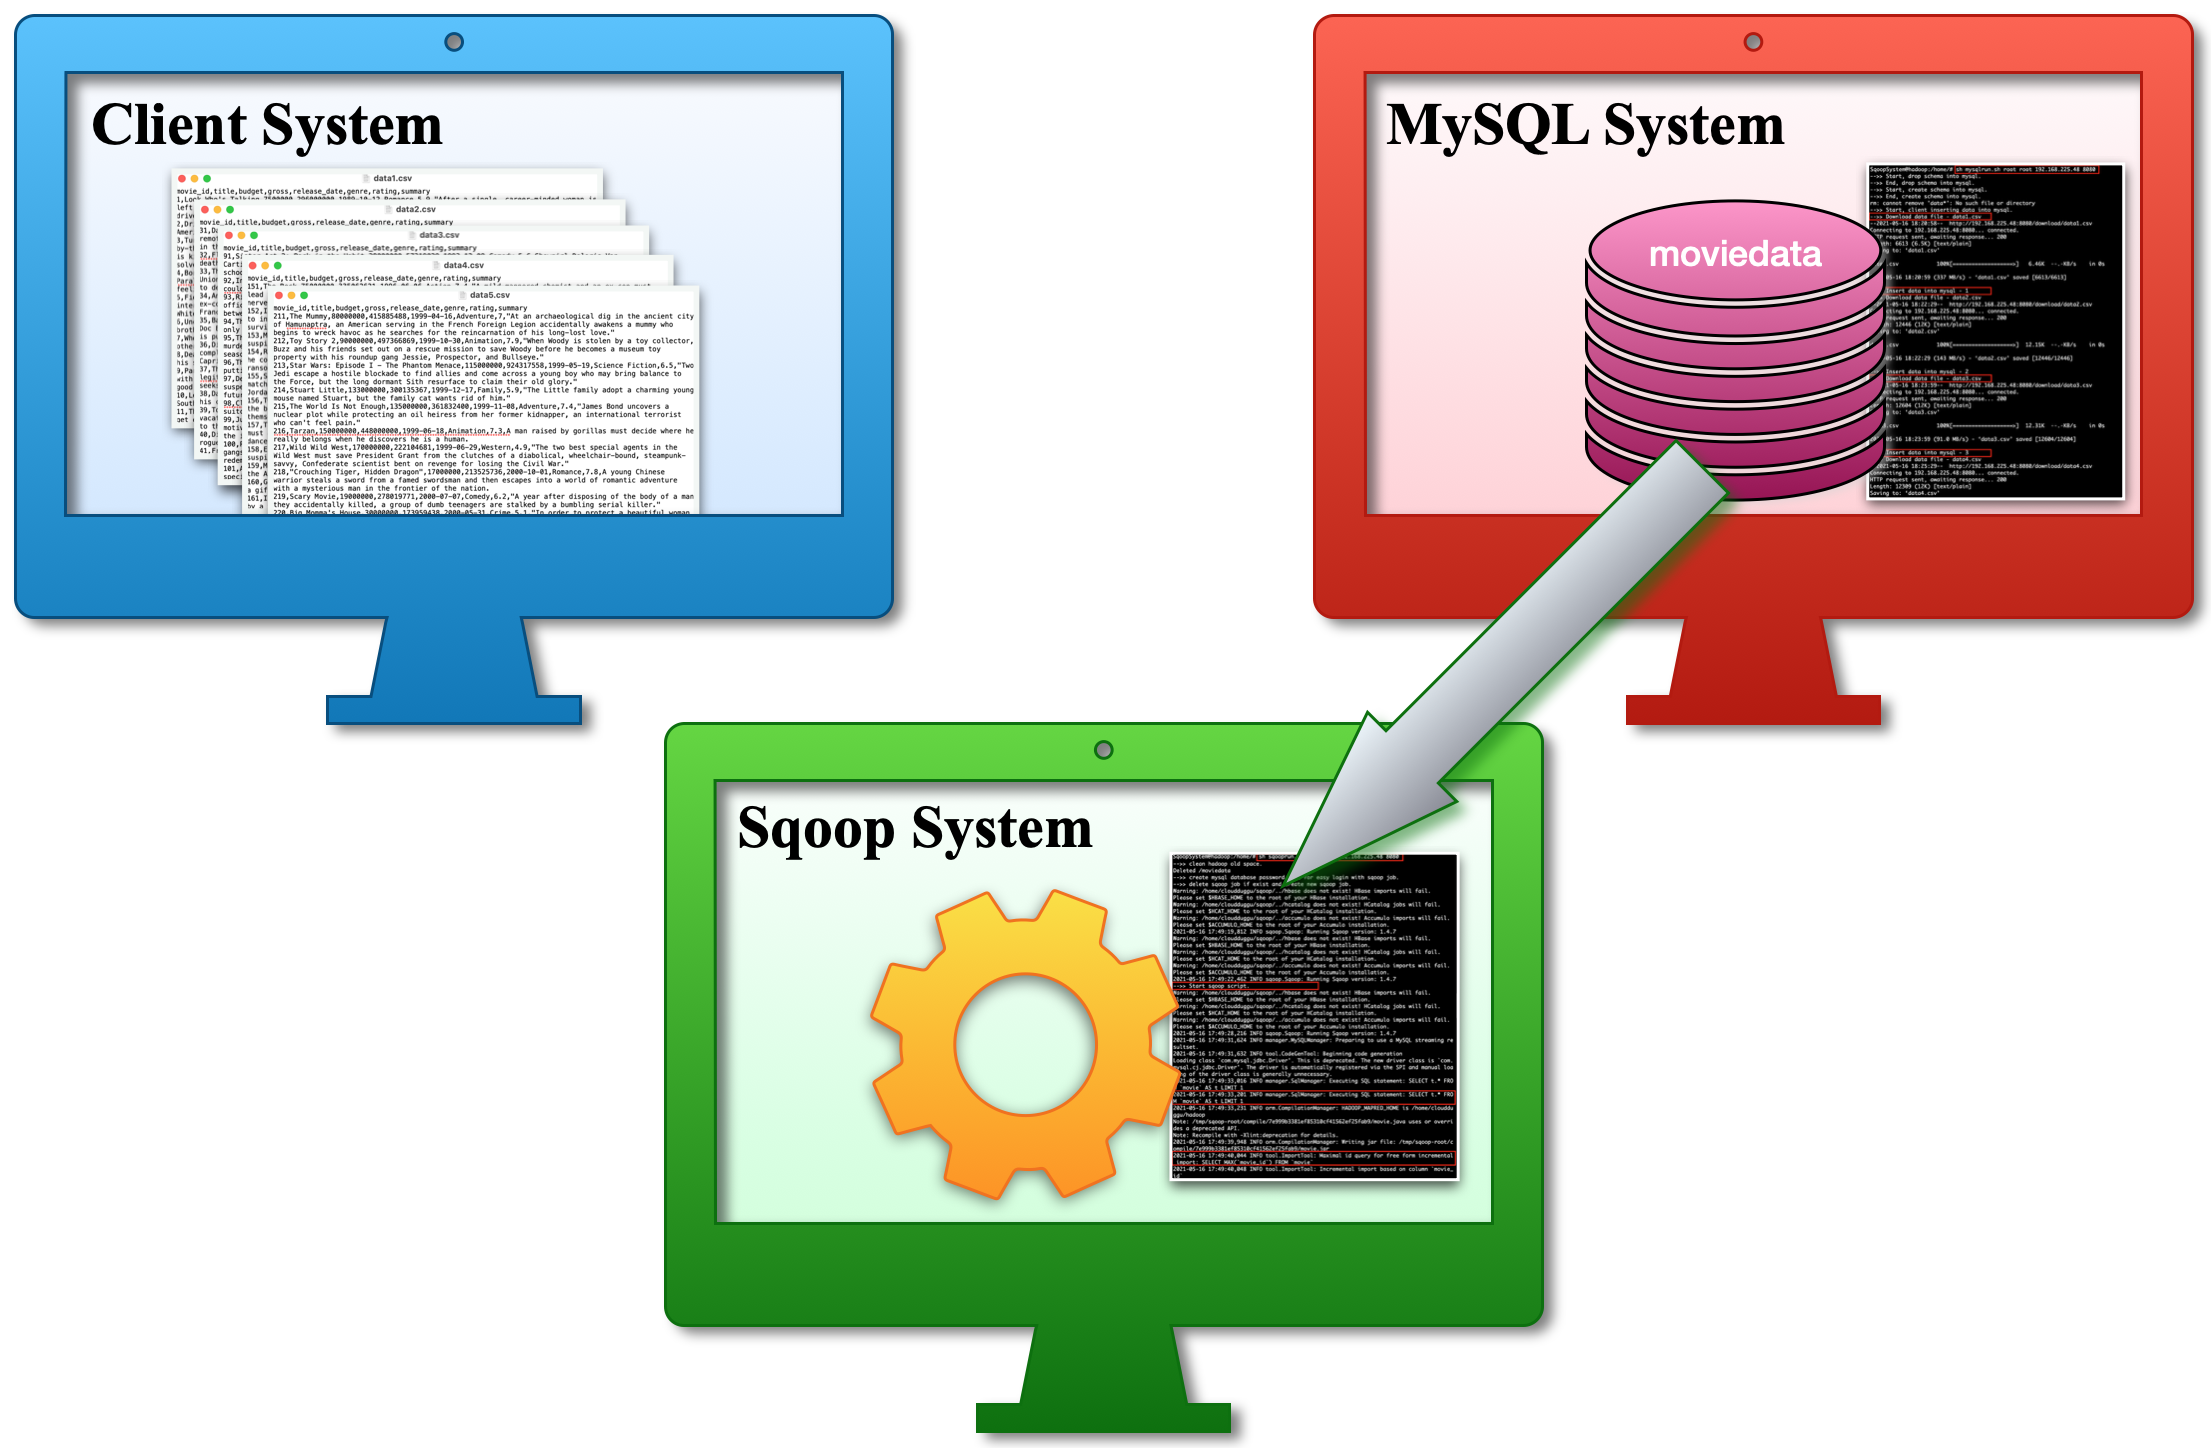 |
| c. After finding the newly inserted data, Sqoop Job puts all those data in the Hadoop HDFS. | 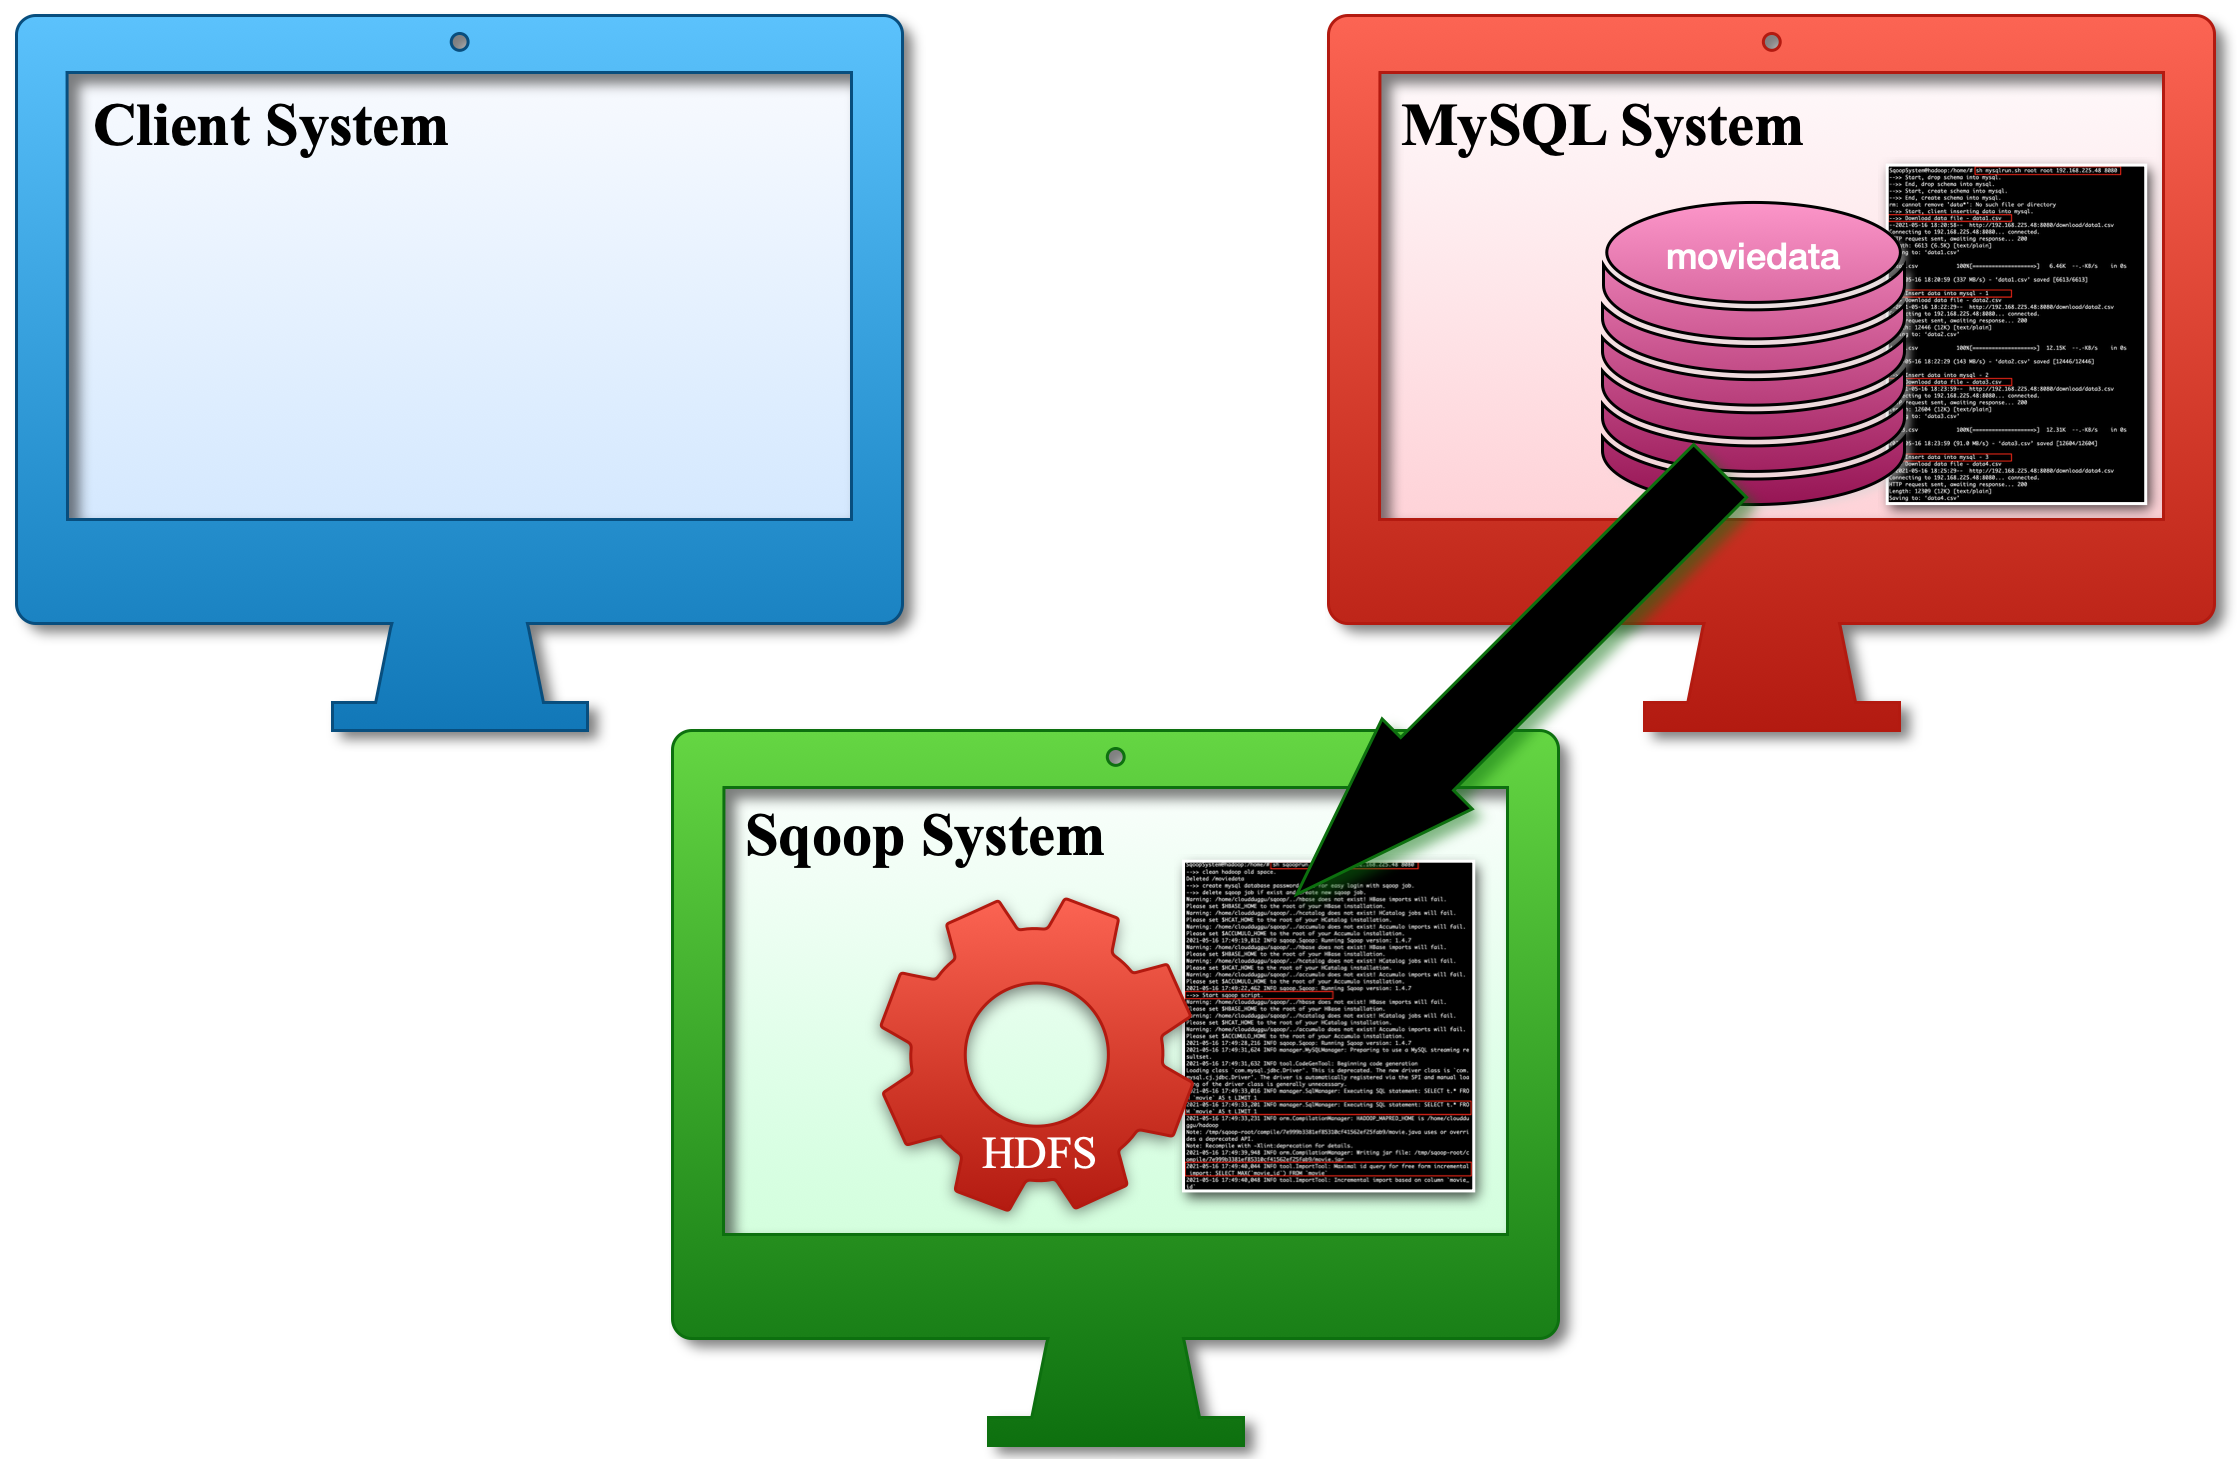 |
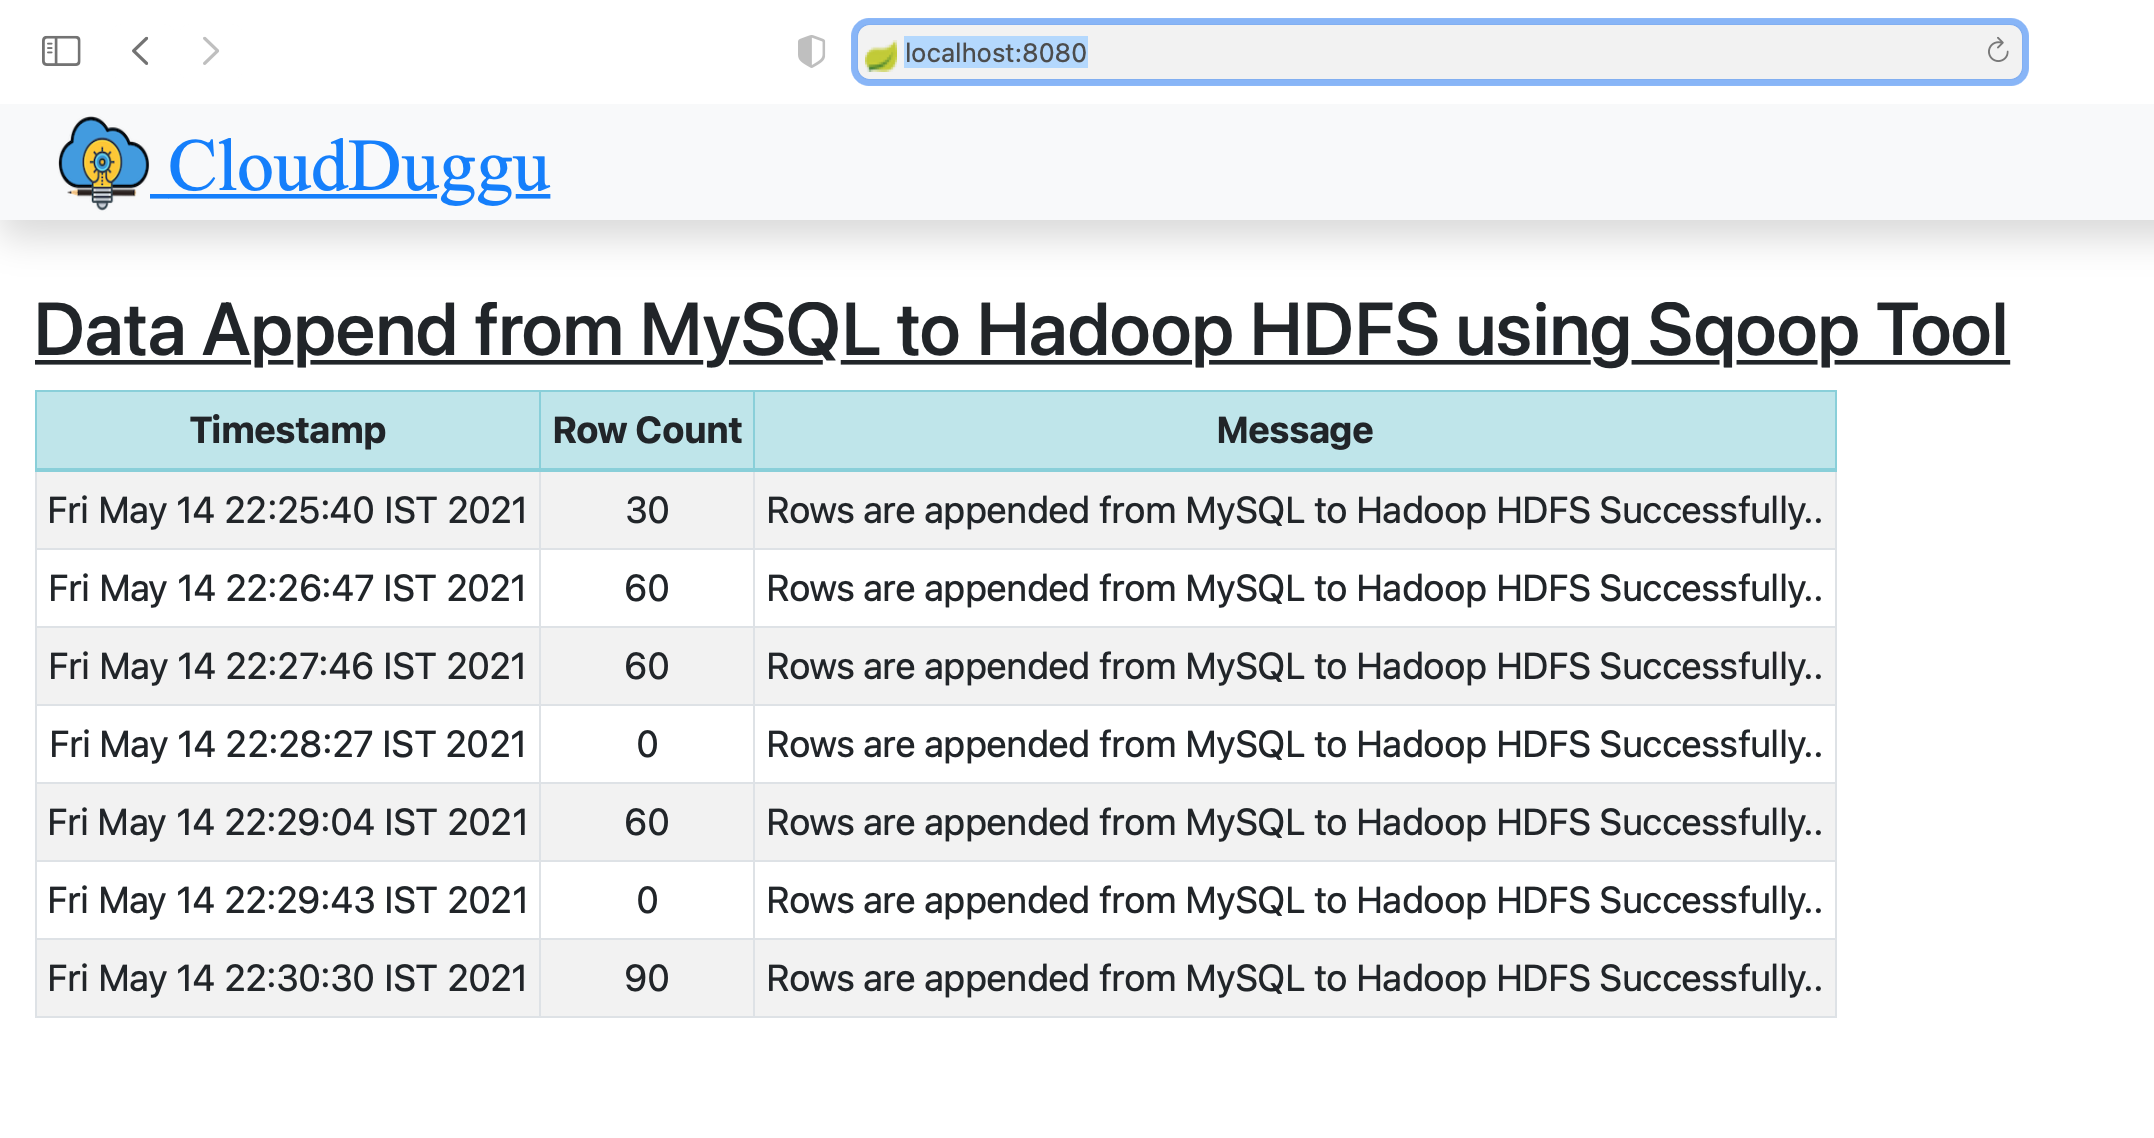
| d. Once the job is finished in the Sqoop System, the Sqoop System sends the result values to the Client System and the Client System displays the results in a tabular format. | 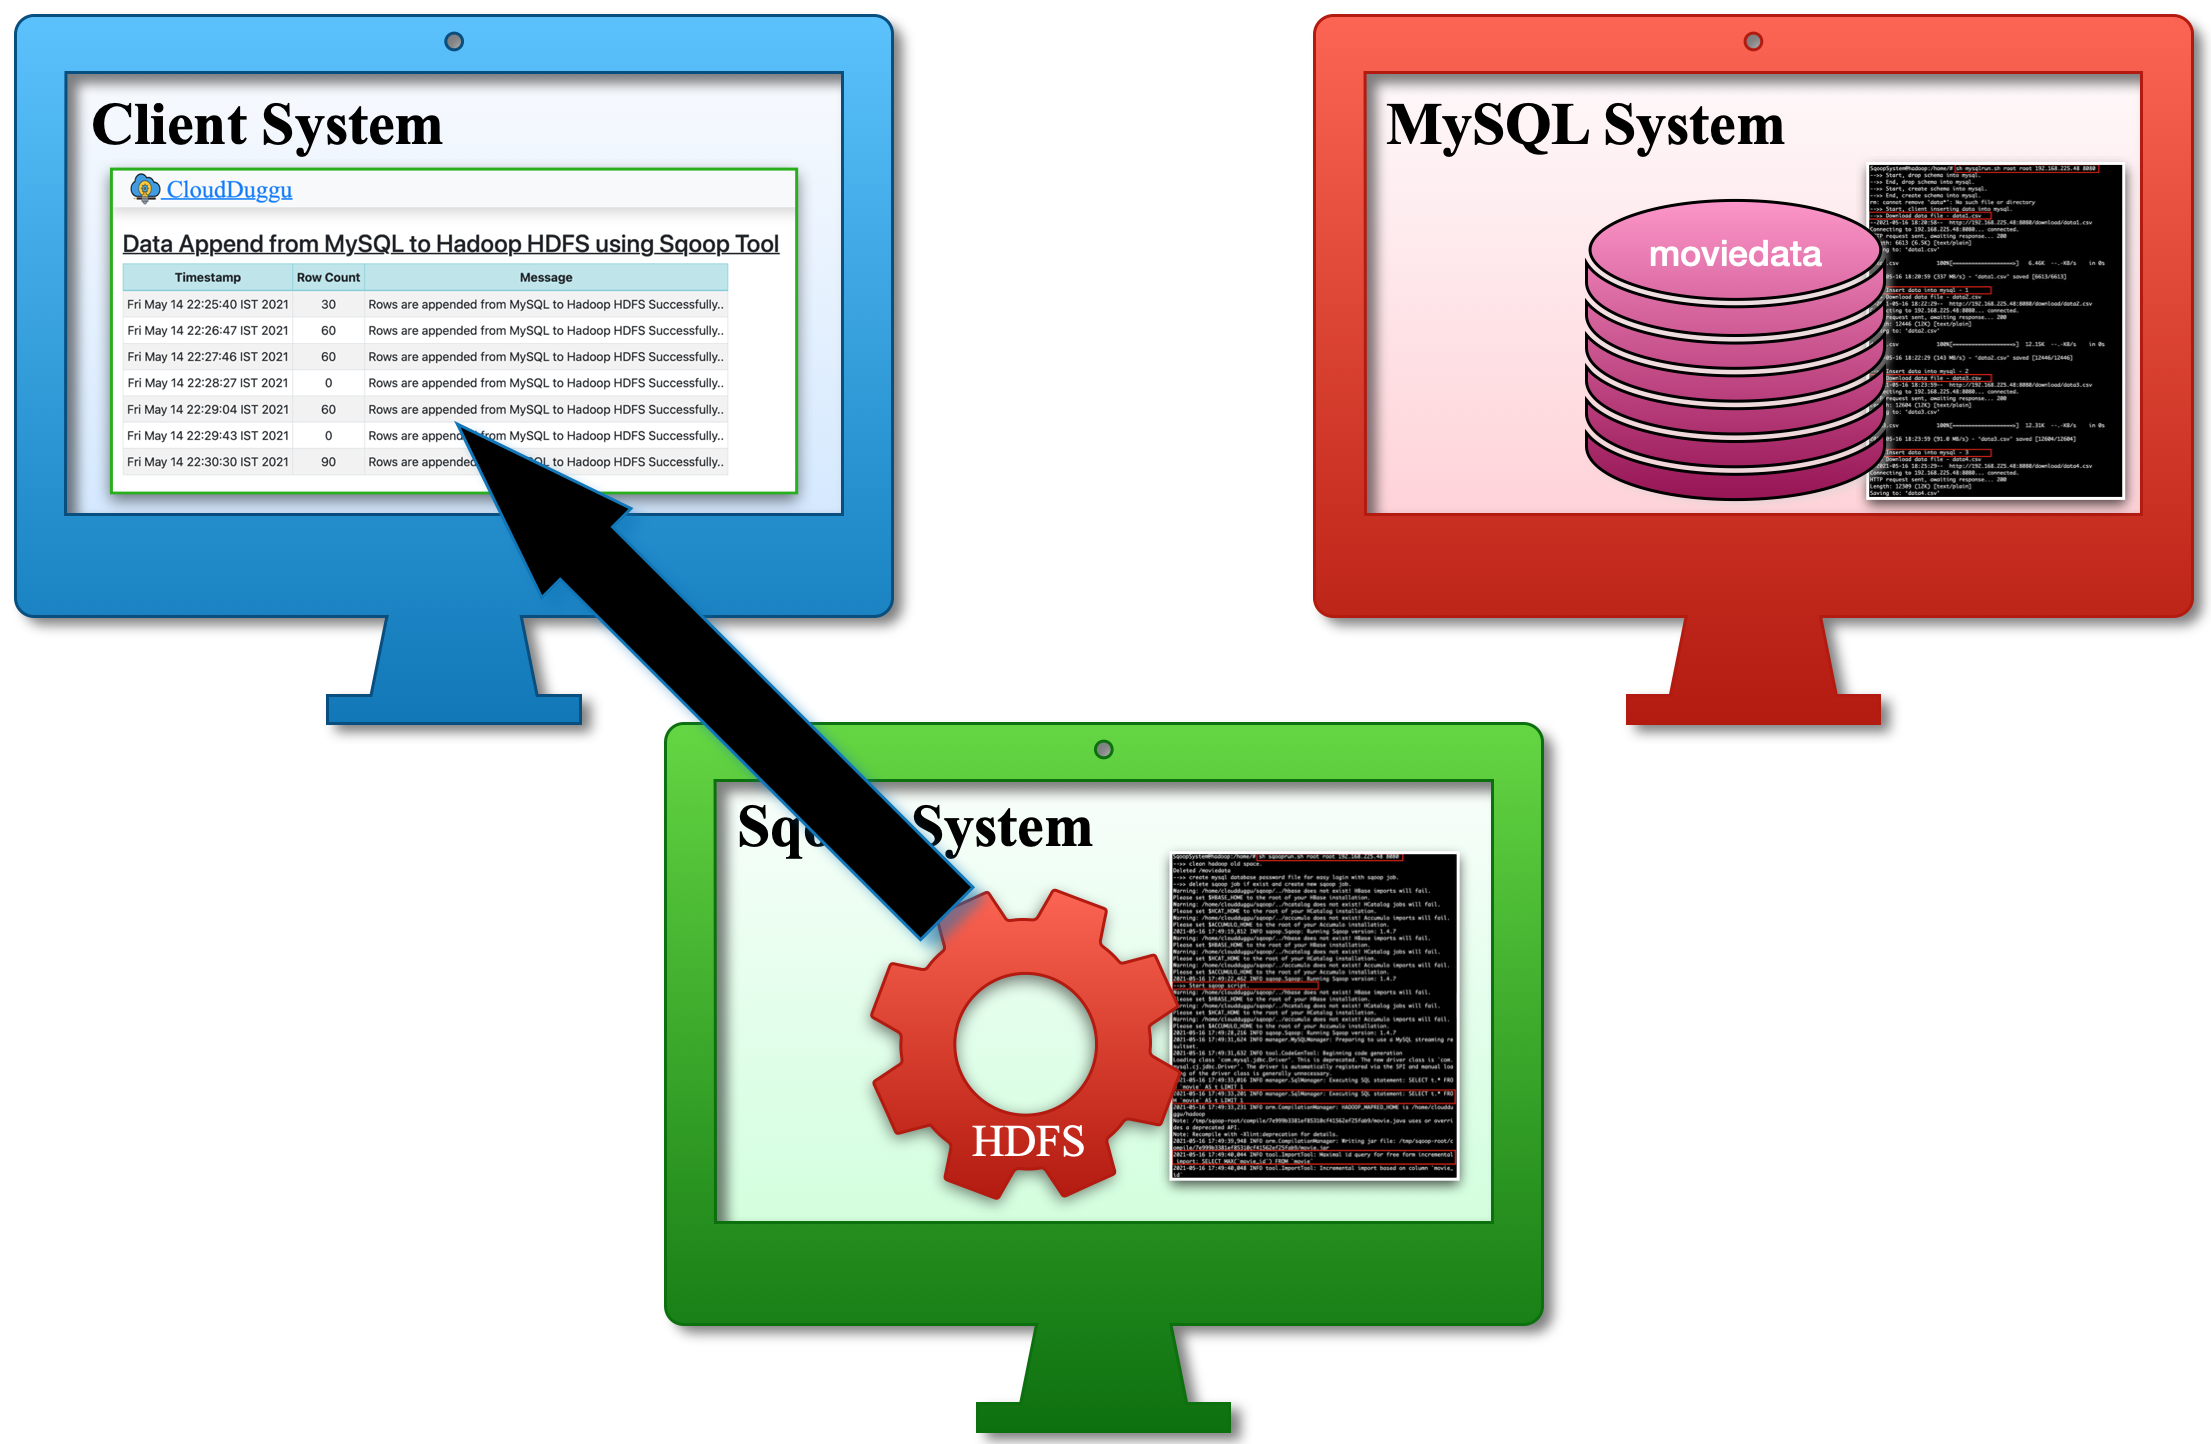 |
2. Building Of Project
To run this project you can install VM (Virtual Machine) on your local system and configured Sqoop, Hadoop, and MySQL on that. After this configuration, your local system will work as a Client System on which MySQL is installed that will work as MySQL System and Sqoop VM will work as a Sqoop System. Alternative you can take two systems which are communicating with each other and on one of the system Sqoop is configured.
Let us see this project in detail and run it using the below steps.
| a. The Client System | ||
|---|---|---|
| It is an example of the Spring Boot JAVA Framework. When we will build this project then it will create a "client.jar" executable file. | 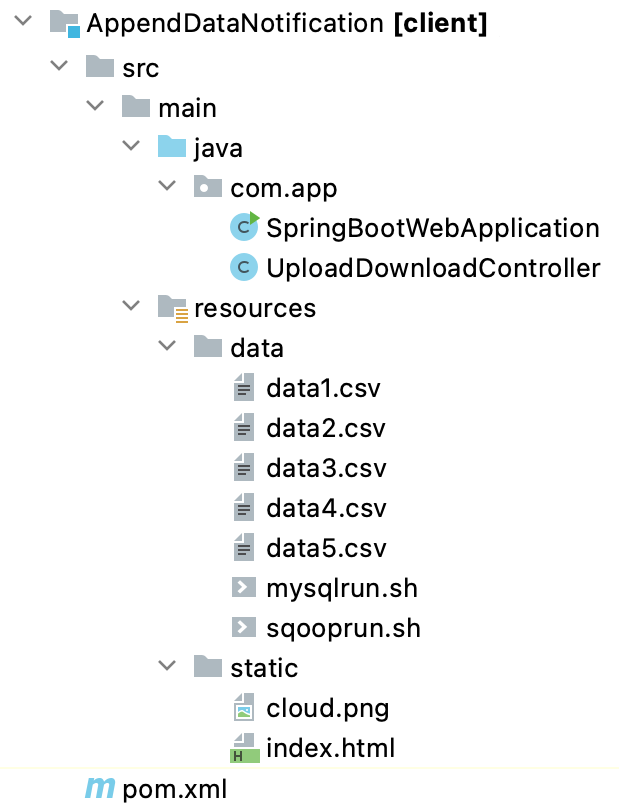 |
|
| It has java code, data files, and static HTML pages. | ||
| Java code has 2 files, SpringBootWebApplication.java and UploadDownloadController.java | ||
| SpringBootWebApplication.java is the main project file, which is responsible for building code and running it on an embedded server. | ||
| UploadDownloadController.java is used to provide download & upload URL HTTP services. For downloading data files it uses the download client URL and for uploading result files it uses the upload client URL. | ||
| data folder has movies data CSV files (data1.csv, data2.csv, data3.csv ...) for MySQL table and shell script files (mysqlrun.sh, sqooprun.sh). | ||
| The Static folder has HTML page code (index.html). This is the main client view page which shows the Sqoop process result data. | ||
| pom.xml is a project build tool file. This file has java dependencies and builds configuration details. | ||
| For creating the “client.jar” file we use the command "mvn clean package". | ||
| Click Here To Download the "AppendDataNotification" project zip file. | ||
| b. Apache Sqoop System | ||
|---|---|---|
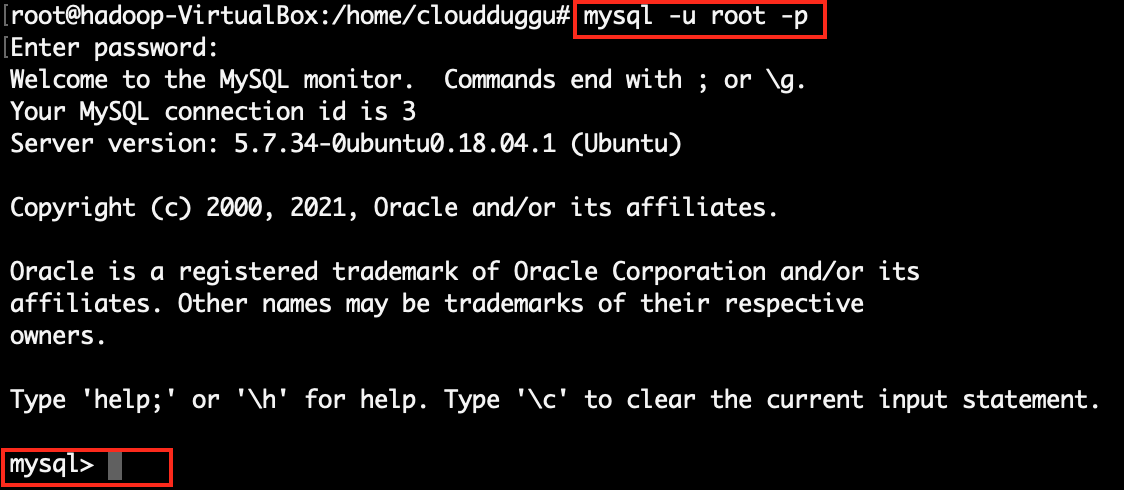
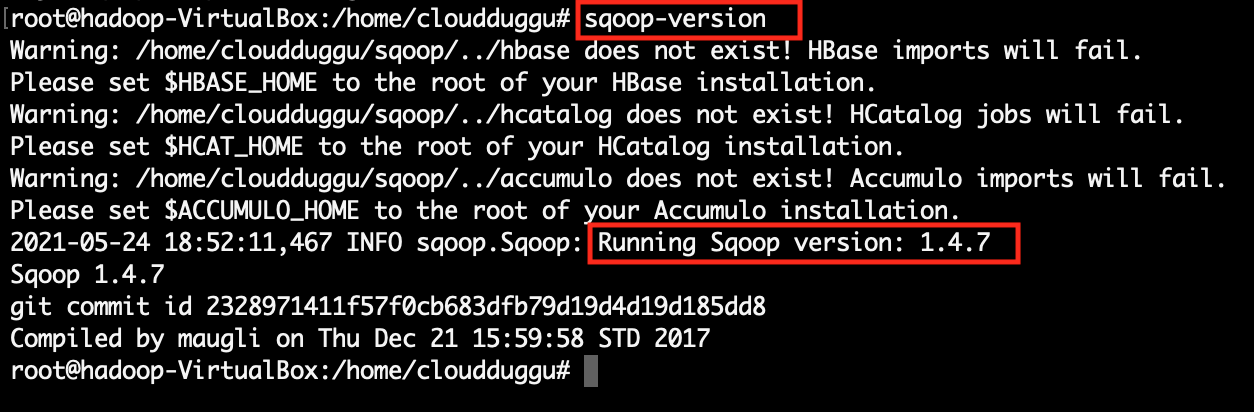
| The Sqoop system has Hadoop HDFS, Mysql, and Sqoop setup. To easily execute the project we will use all these services on one machine and we will use another machine to run the client application. | ||
| Download mysqlrun.sh shell script file that will use the downloaded CSV data files to insert data into MySQL database in continuous form. The Script file automatically deletes and create MySQL schema and also load download CSV data files into created table. | ||
| Download sqooprun.sh shell script file that is used to create Sqoop Job and execute created Job. This Script file automatically executes the job and sends the result data to the Client system. | ||
3. Run The Project
| a. Client System | b. Sqoop System | |
|---|---|---|
| 1. | Download client.jar in the Client System. Click Here To Download the "client.jar" executable jar file. |
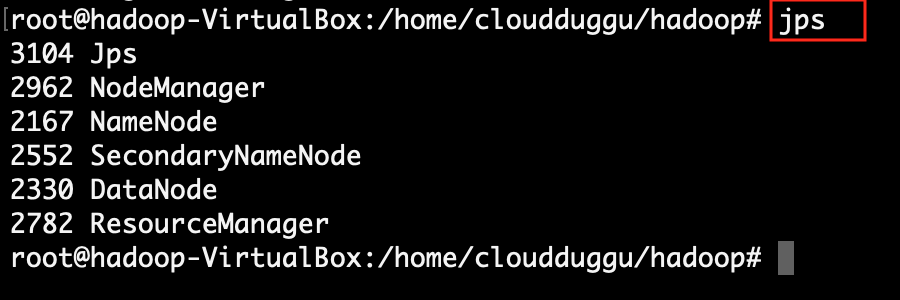
Check all configurations of Hadoop, MySQL, and Sqoop in the Sqoop System. |

|
|
|
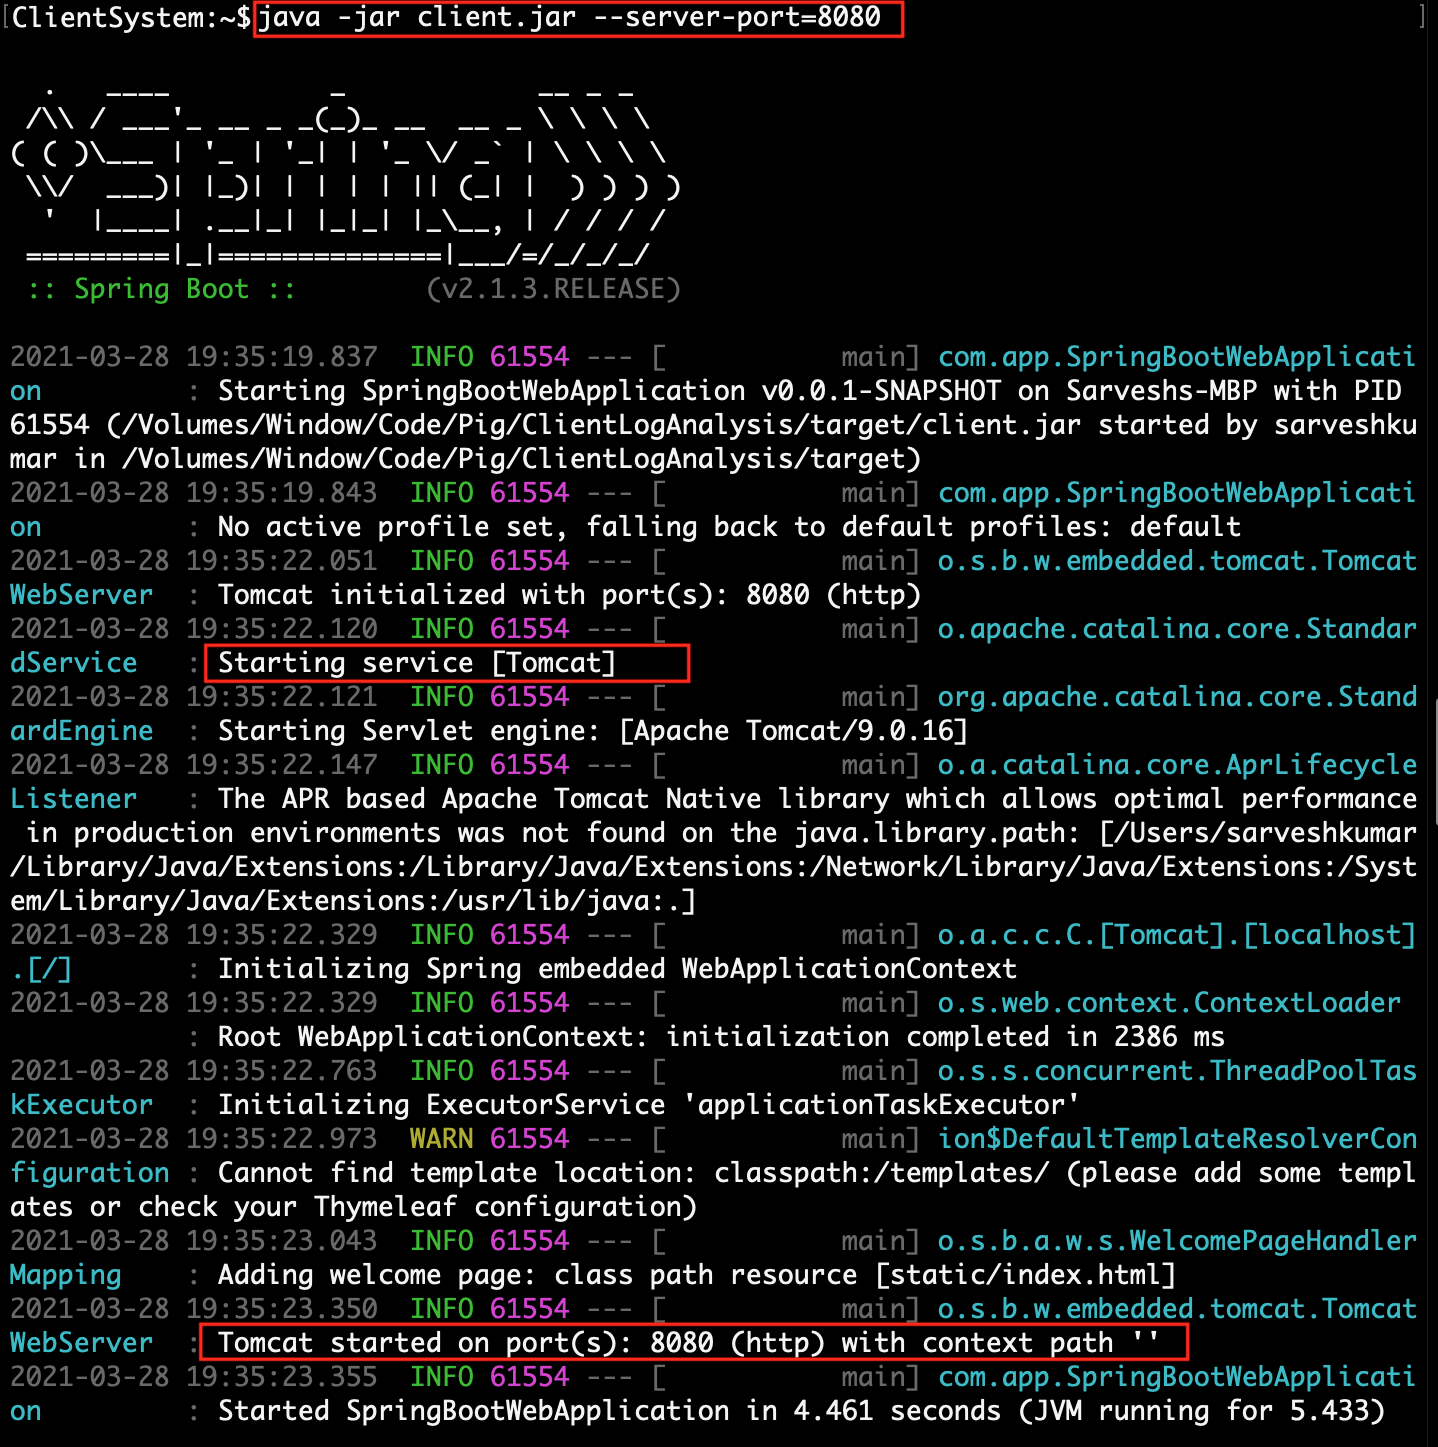
| 2. | Run client.jar in the client system. At execution time pass server port 8080.
Here we can use a different port if the port already uses in the client system.java -jar client.jar --server.port=8080
|
|
 |
||
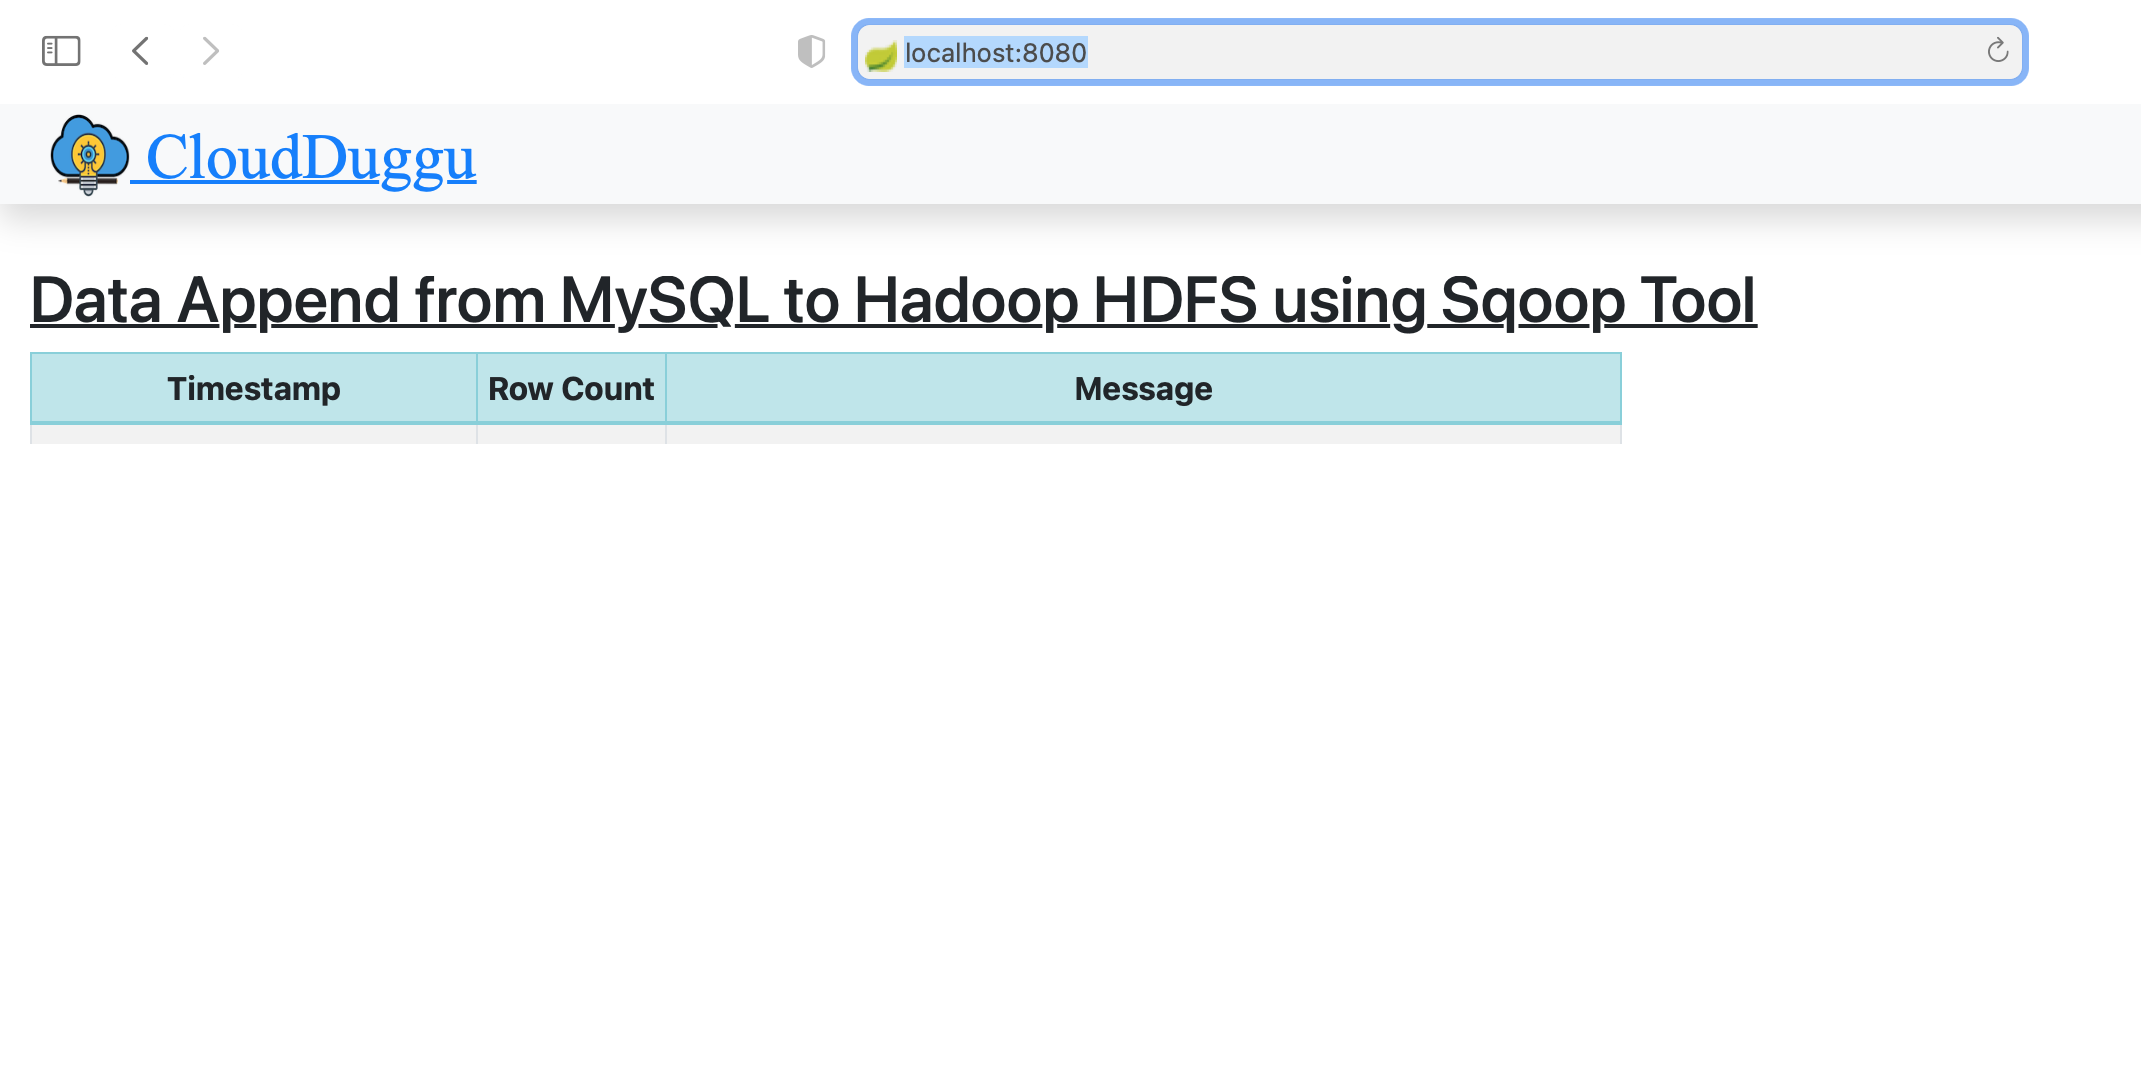
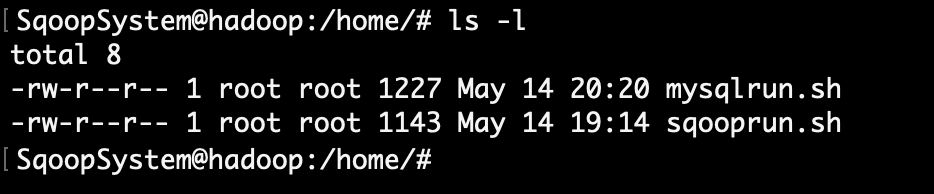
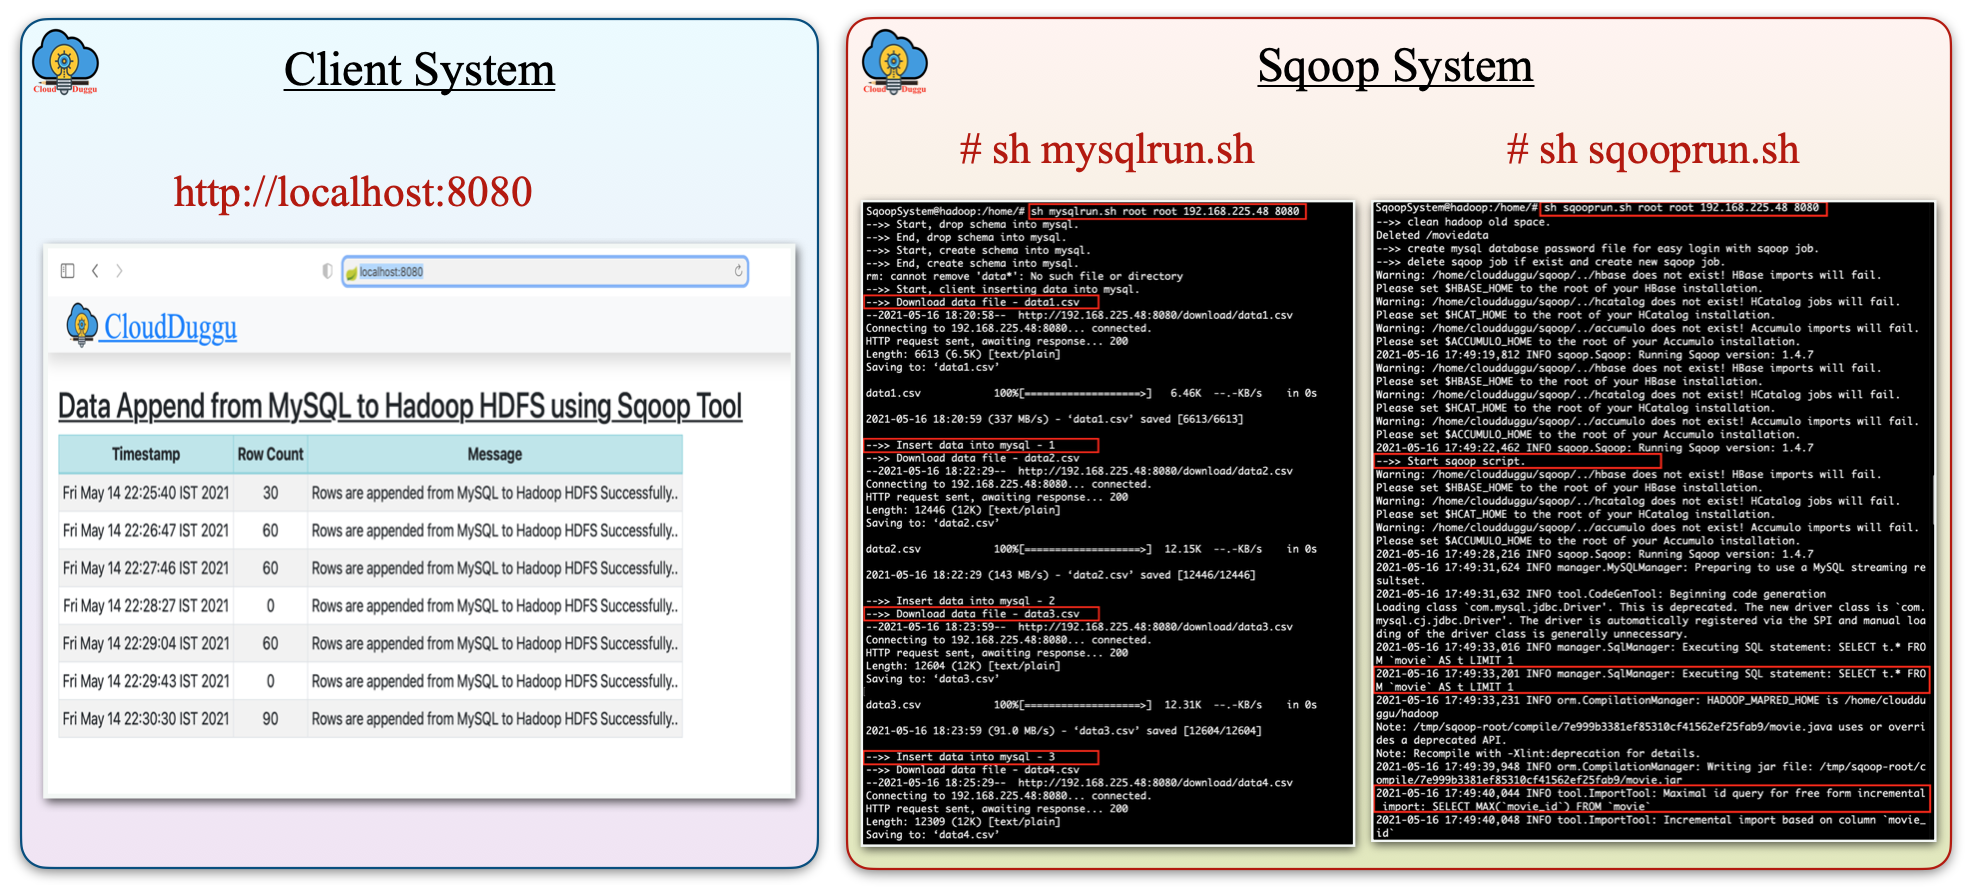
| 3. | Check the Client page on the browser using URL: http://localhost:8080 | Download mysqlrun.sh and sqooprun.sh script file in the Sqoop System. |
 |
 |
|
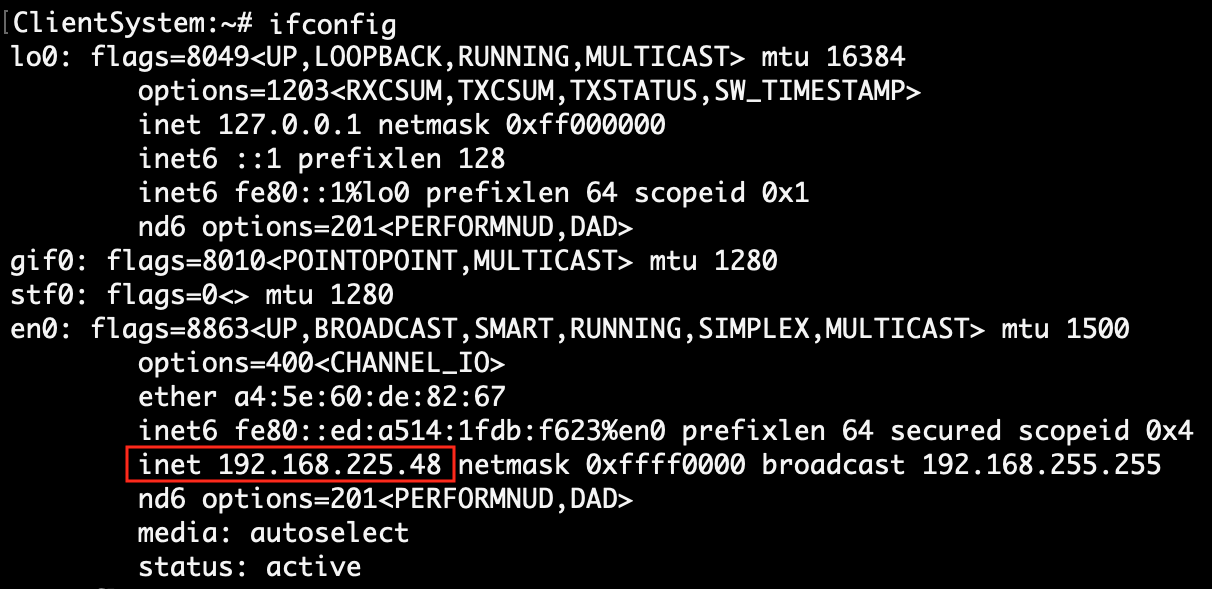
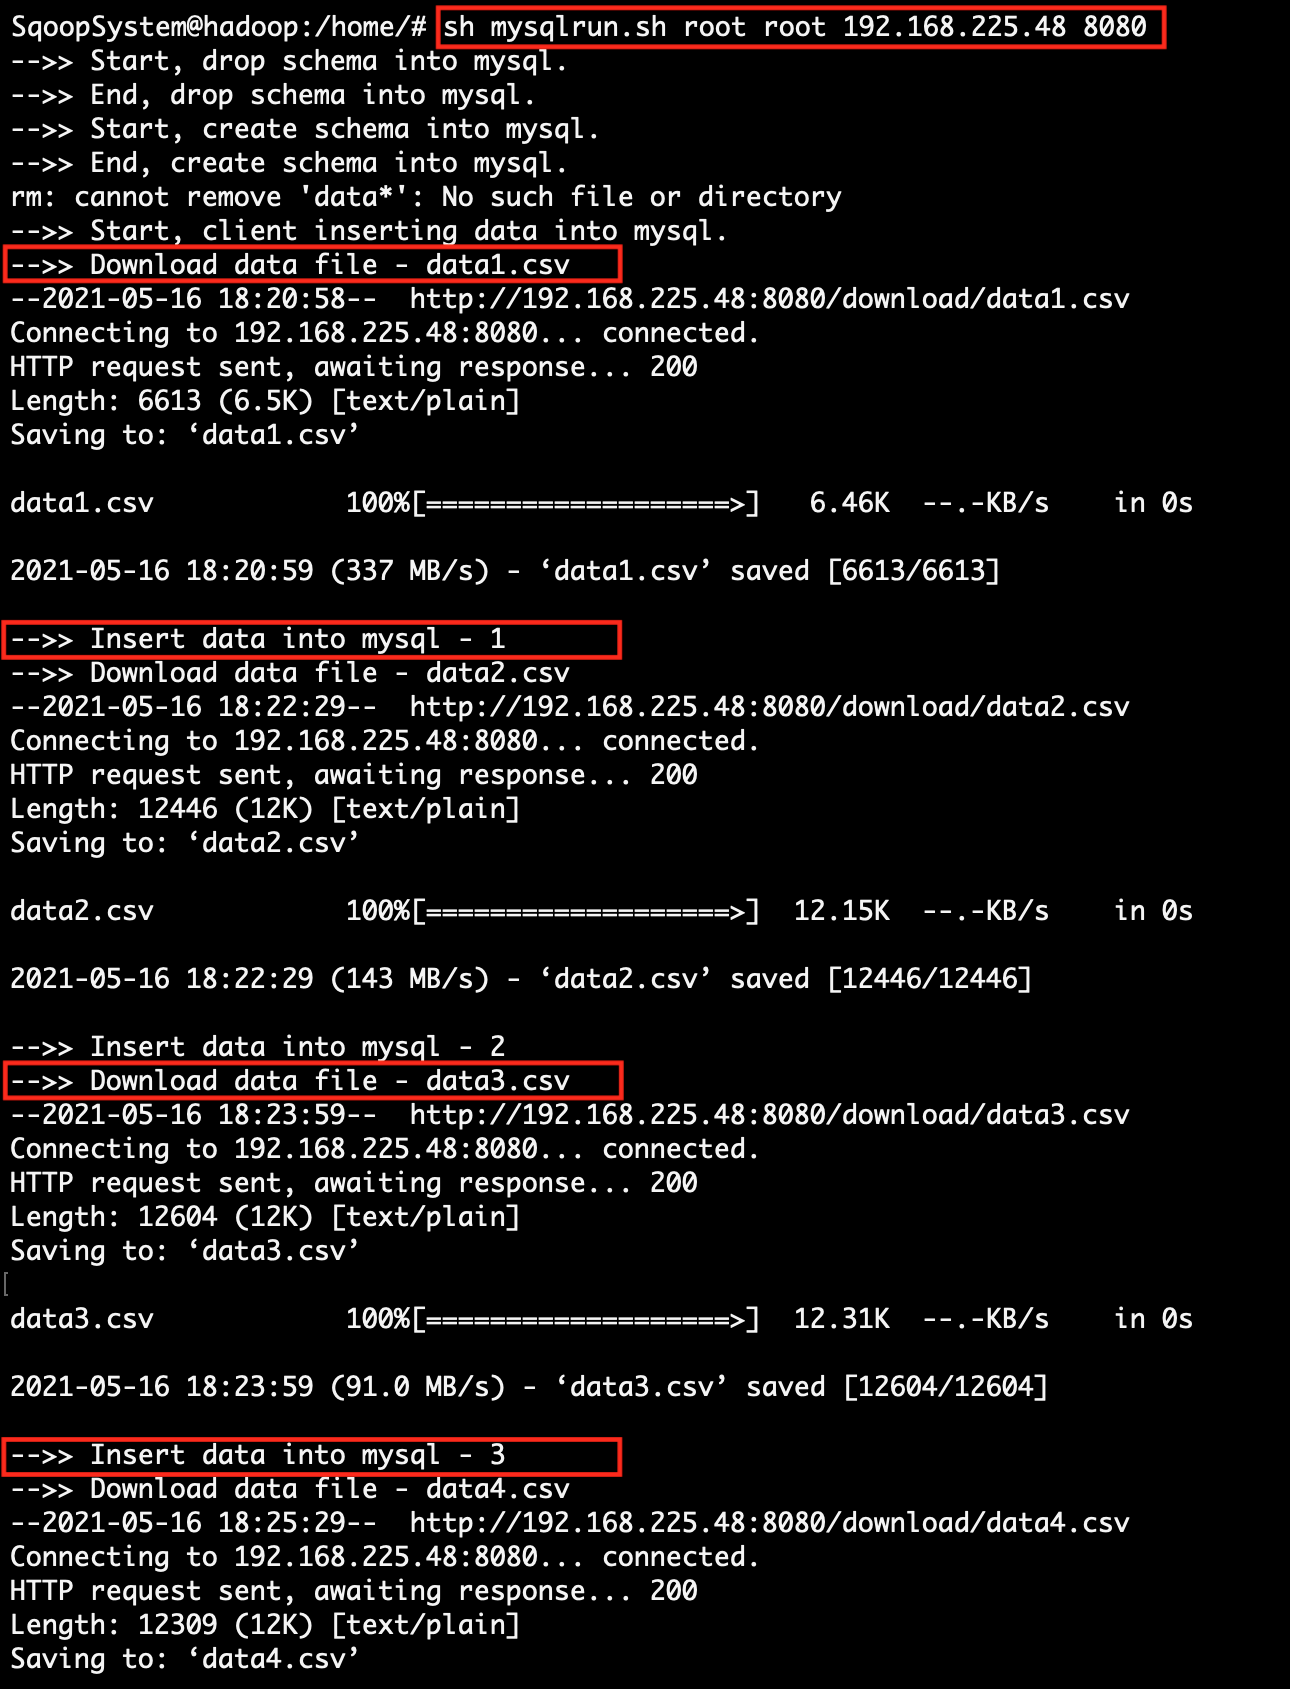
| 4. | Find client system IP, which will be accessible to the Sqoop system. | Execute the script file mysqlrun.sh. At the time of running the script, pass the mysql-username, mysql-password, client-ip-address and client-port-number.
sh mysqlrun.sh <mysql-username> <mysql-password> <client-ip> <client-port> sh mysqlrun.sh root root 192.168.225.48 8080
|
 |

|
|
| 5. | Open another terminal in the Sqoop system and execute the script file sqooprun.sh. At the time of running the script, pass the mysql-username, mysql-password, client-id-address, and client-port-number.
sh sqooprun.sh <mysql-username> <mysql-password> <client-ip> <client-port> sh sqooprun.sh root root 192.168.225.48 8080
|
|
 |
||
| 6. | The client system will automatically show all the results in the table once the Sqoop system will complete its processing. | mysqlrun.sh and sqooprun.sh both script has the loop function that executes paralleling in two different terminals. So once the loop is finished, the execution of files is automatically ended. The mysqlrun.sh script continually inserts data into MySQL within a specific time interval and sqooprun.sh execute the Sqoop job and monitoring the new row of MySQL. After successful execution, the Sqoop job sends result data to the client. |
 |
|
4. Project Files Description In Details
(i). mysqlrun.sh
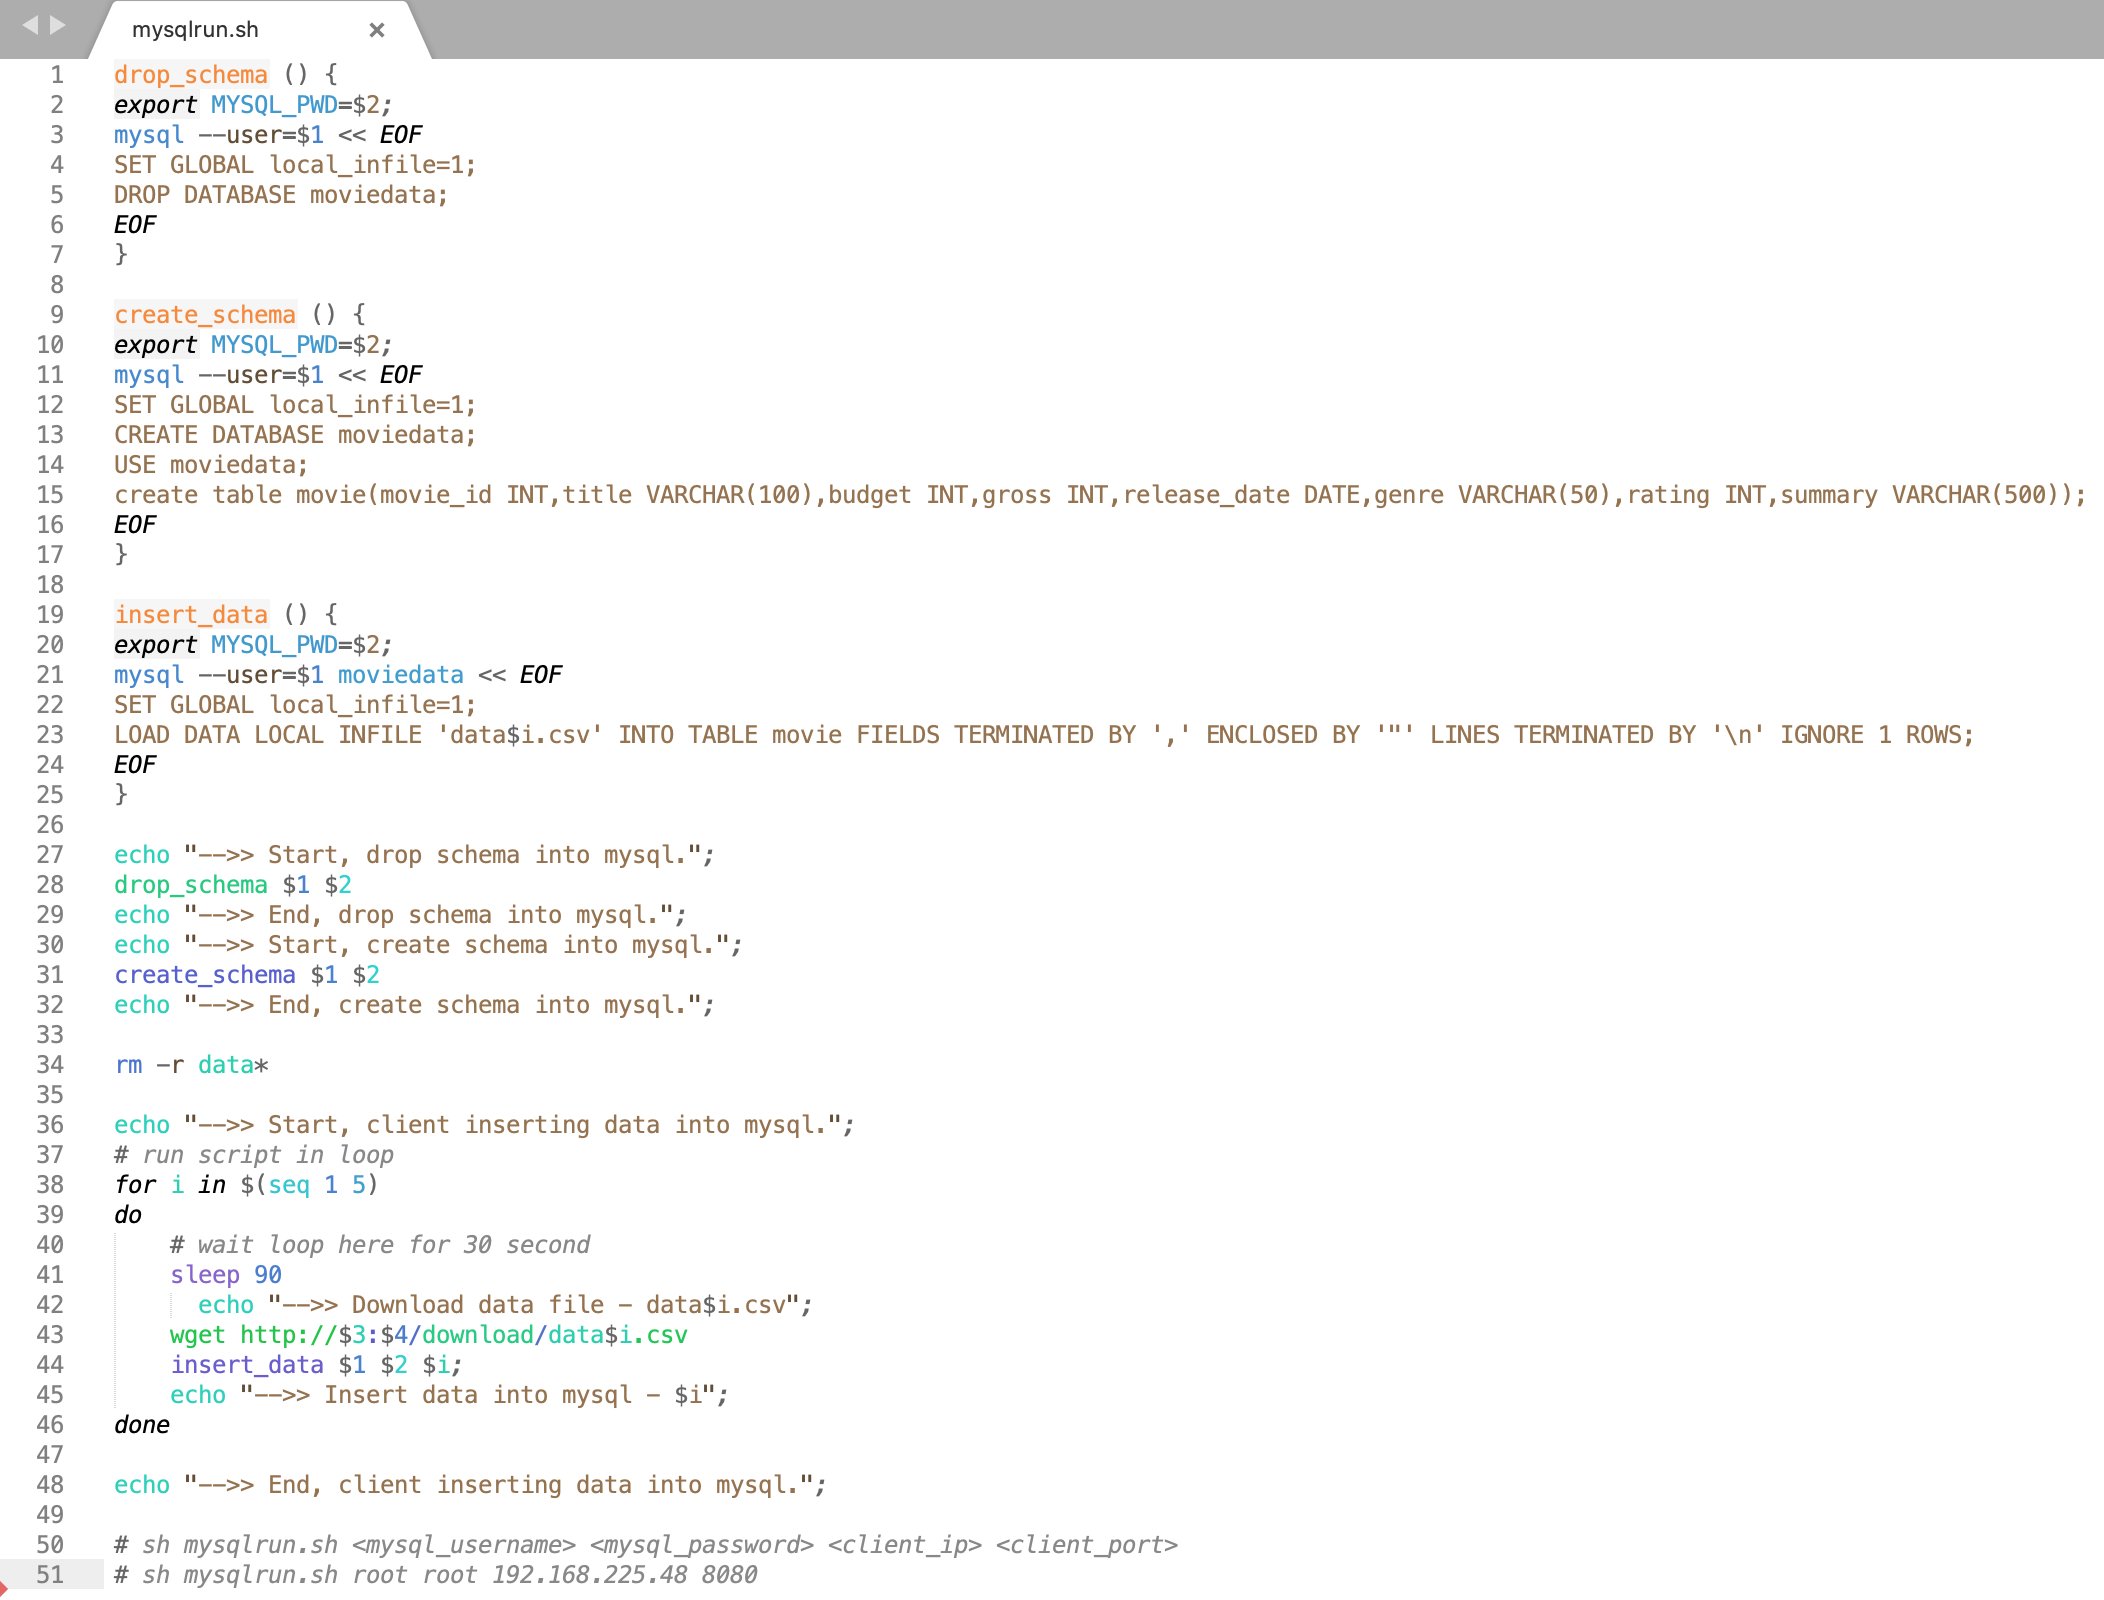
Using this project shell script (mysqlrun.sh), we can easily download raw CSV files and load them into the MySQL database in the Sqoop System.
The explanation of each line of shell script (mysqlrun.sh) code is mention below.
mysqlrun.sh file has Linux scripts.
(line 1,7) Function for deleting all existing schema into MySQL of the Sqoop System.
(line 9,17) Function to creates schema into MySQL of the Sqoop System.
(line 19,25) Function for loading CSV file data into MySQL table.
(line 28) Call function to delete MySQL schema.
(line 31) Call function to create MySQL schema.
(line 34) Delete old data existing into the current Sqoop System directory.
(line 38) Execute the loop in the local Sqoop System.
(line 43) Download CSV file into local Sqoop System from Client System.
(line 44) Call function to load downloaded CSV file data into MySQL table.
(ii). sqooprun.sh
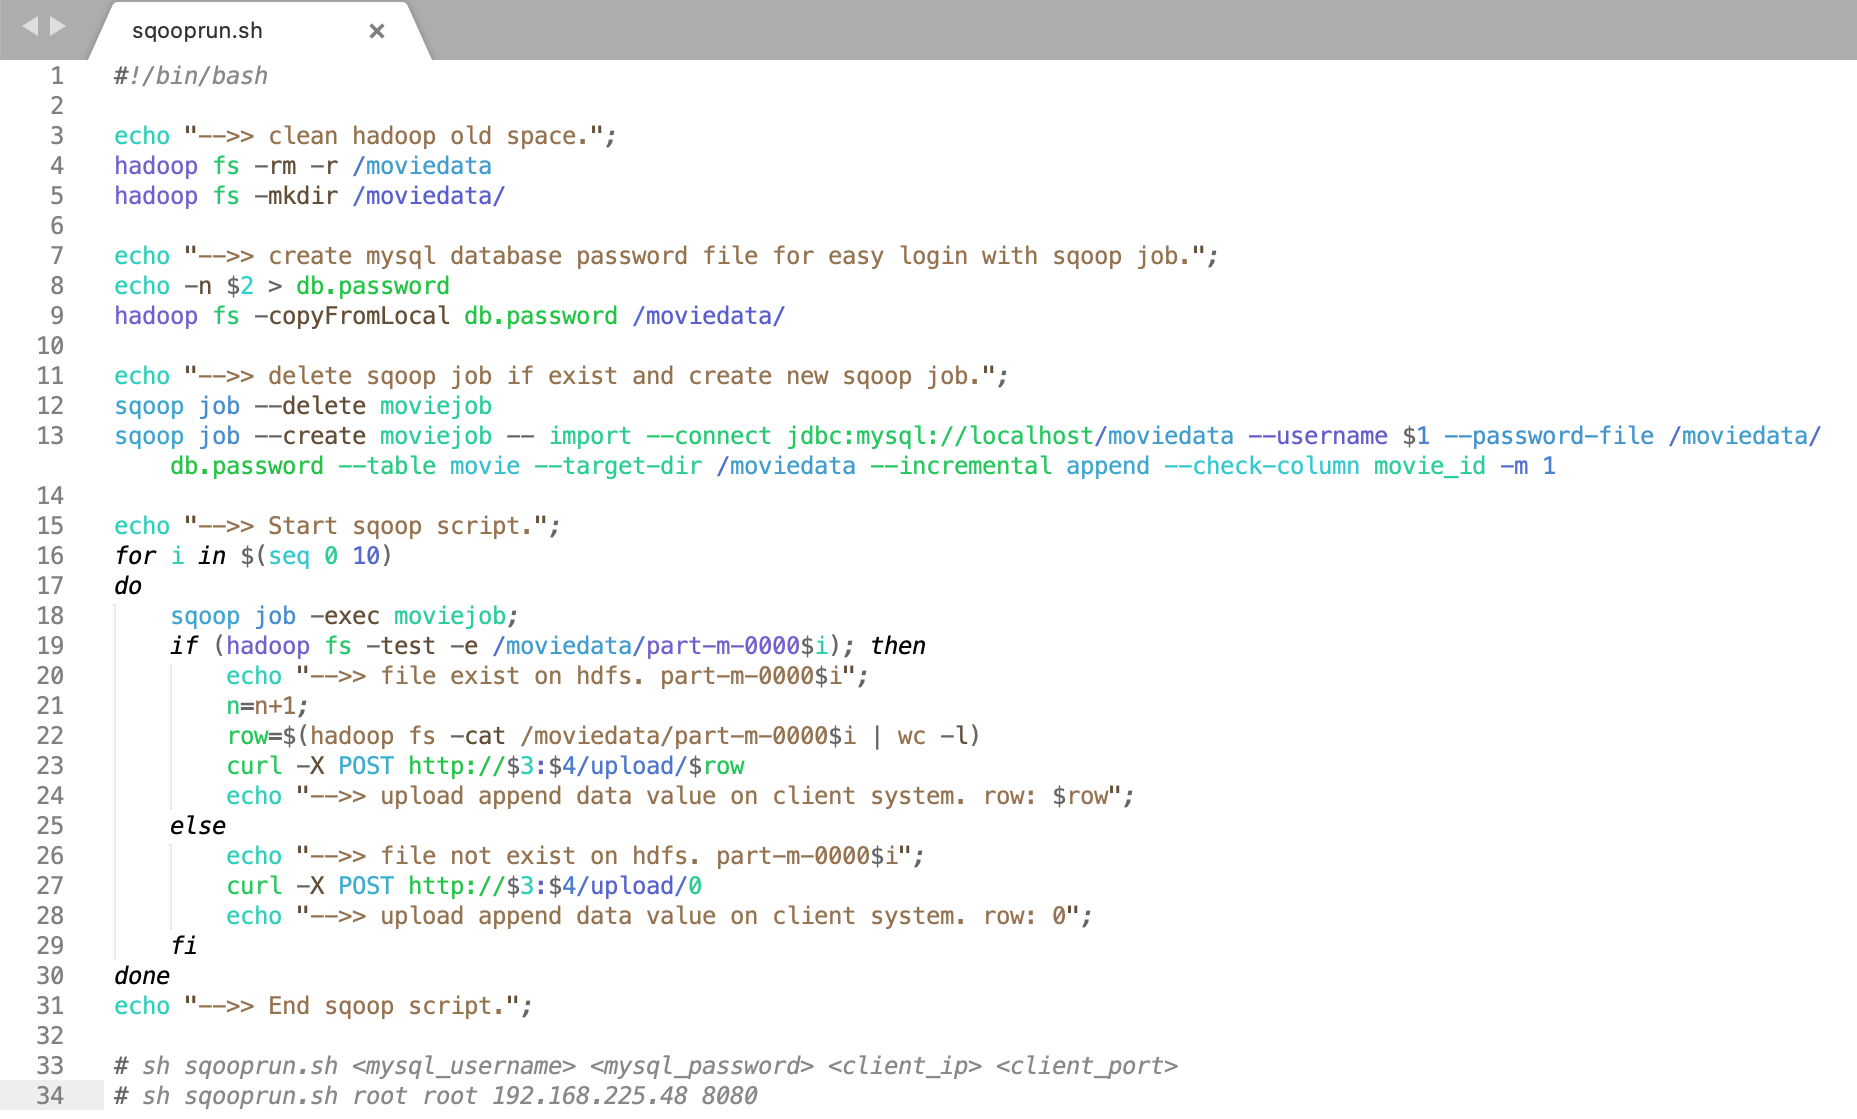
Using this script file (sqooprun.sh) we can easily create Sqoop Job and execute it on the Sqoop System.
The following is the line-by-line explanation of the sqooprun.sh script file.
sqooprun.sh file has Linux scripts.
(Line 4 & 5) Remove the old existing folder and create the same empty folder into the Hadoop HDFS.
(Line 8 & 9) Create a file that contains a MySQL password. This file is used to easily execute the Sqoop job in Hadoop HDFS. After creating the password file, copy the file to the Hadoop HDFS directory.
(Line 12 & 13) Delete the Sqoop job if it is existing and create a new Sqoop Job with the same name.
(Line 16) Execute the loop in the local Sqoop System.
(Line 18) Execute created Sqoop job.
(Line 19,24) If the Sqoop job executes your logic then Hadoop creates a result file in the HDFS directory and if the result file exists then it counts the result data and upload the result to the Client System.
(Line 25,29) If the result file does not exist then upload the empty result to the Client System.
The Sqoop Project, after the end of the project finally.
:) ...enjoy the Sqoop project.