The objective of this tutorial is to describe step by step process to install Apache HBase (Version 2.3.0 ) using Apache Hadoop 3.1.2 on Ubuntu 18.04.4 LTS (Bionic Beaver). Once the installation is completed then you can work with Apache HBase.
Platform
- Operating System (OS). We have used Ubuntu 18.04.4 LTS version, You can use other flavors of Linux systems such as Redhat, CentOS, etc.
- Hadoop. We have already installed Hadoop 3.1.2 version on which we will run Apache HBase (Please refer to the "Hadoop Installation on Single Node” tutorial and install Hadoop first before proceeding for Apache HBase installation.)
- HBase. We have used the Apache HBase-2.3.0 version for installation.
Download Software
- HBase.
https://downloads.apache.org/hbase/2.3.0/hbase-2.3.0-bin.tar.gz
Steps to Install Apache HBase version(2.3.0) on Ubuntu 18.04.4 LTS
Please follow the below steps to install HBase.
Step 1. Please verify if Hadoop is installed.
Step 2. Please verify if Java is installed.
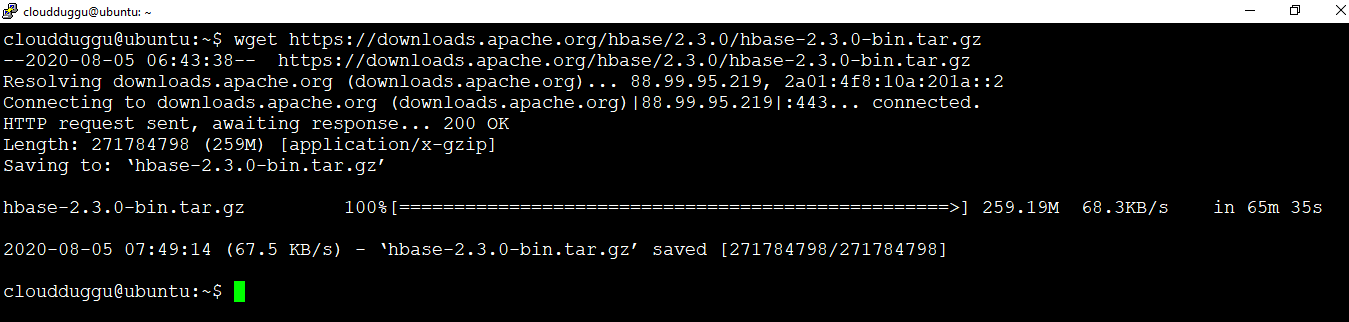
Step 3. Please download HBase 2.3.0 from the below link.
On Linux: $wget https://downloads.apache.org/hbase/2.3.0/hbase-2.3.0-bin.tar.gz
On Windows: https://downloads.apache.org/hbase/2.3.0/hbase-2.3.0-bin.tar.gz
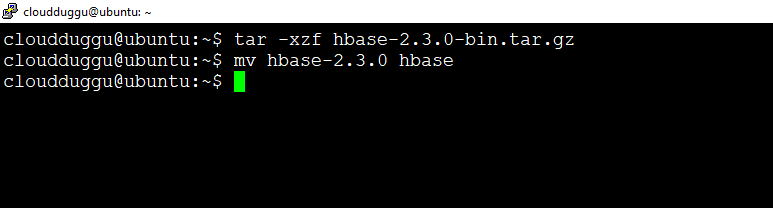
Step 4. Let us extract the tar file using the below command and rename the folder to HBase to make it meaningful.
$tar -xzf hbase-2.3.0-bin.tar.gz
$mv hbase-2.3.0 hbase
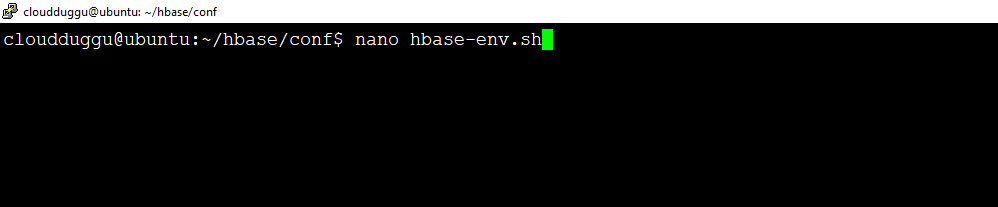
Step 5. Now edit (hbase-env.sh) configuration file which is present under(/home/cloudduggu/hbase/conf) and add JAVA path as mentioned below.
cloudduggu@ubuntu:~ /hbase/conf$ nano hbase-env.sh
Now put JAVA path.
export JAVA_HOME=/usr/lib/jvm/java-8-openjdk-amd64/
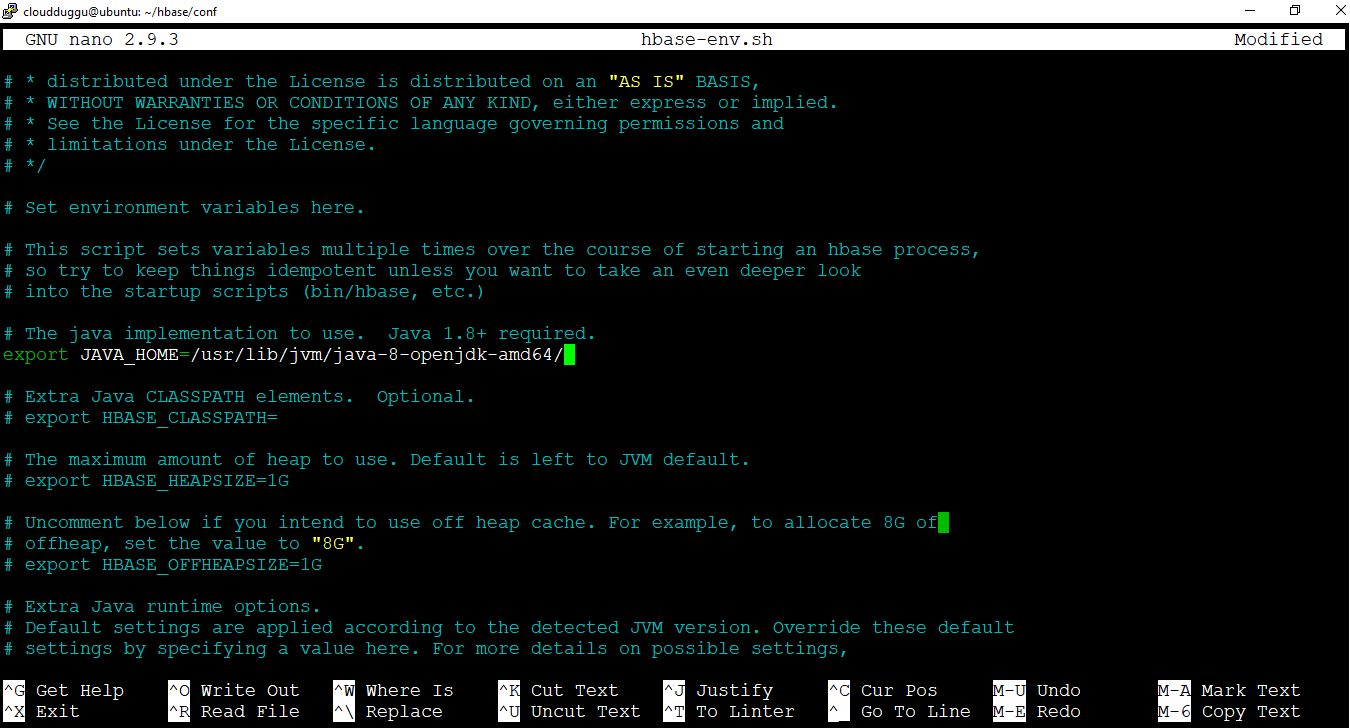
Save the changes by pressing CTRL + O and exit from the nano editor by pressing CTRL + X.
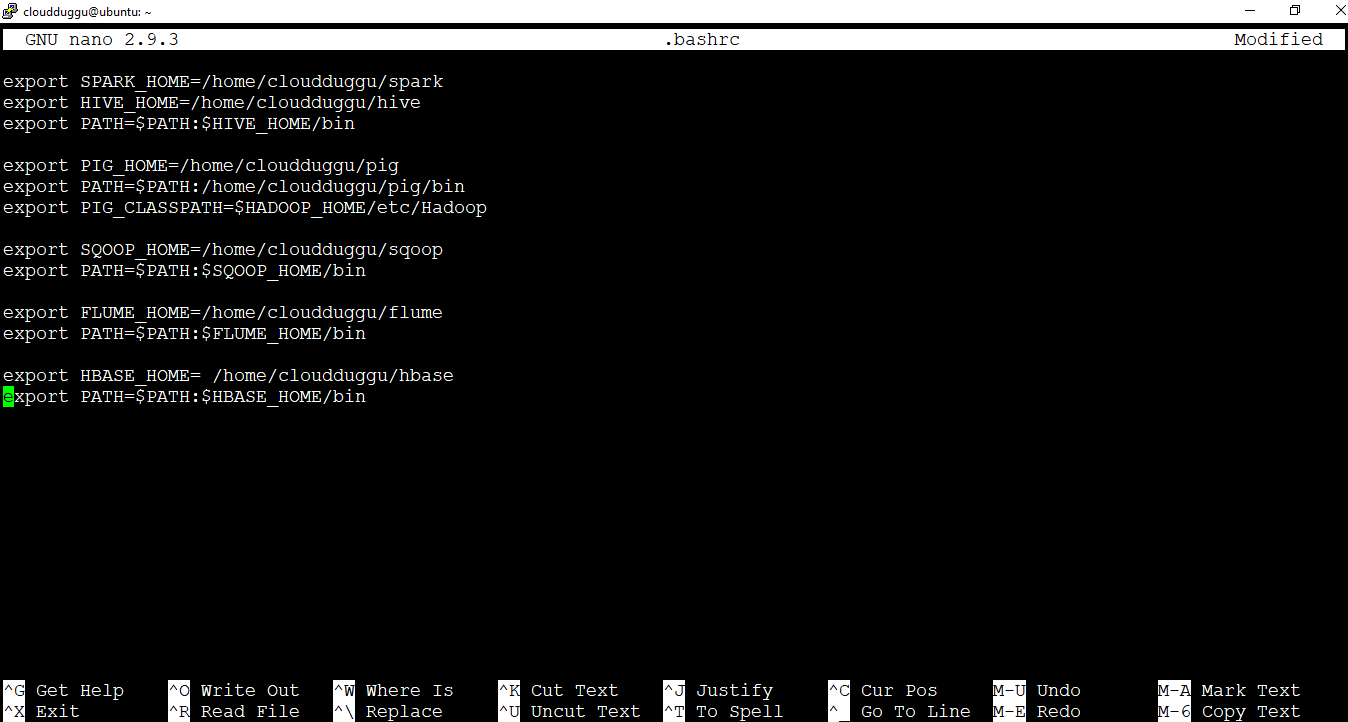
Step 6. After this edit (.bashrc) file to update the environment variable of Apache HBase so that it can be accessed from any directory.
cloudduggu@ubuntu:~$ nano .bashrc
Add below path.
export HBASE_HOME= /home/cloudduggu/hbase
export PATH=$PATH:$HBASE_HOME/bin
Step 7. Now start Apache HBase and verify it using the below commands.
cloudduggu@ubuntu:~/hbase$ bin/start-hbase.sh
cloudduggu@ubuntu:~/hbase$ jps
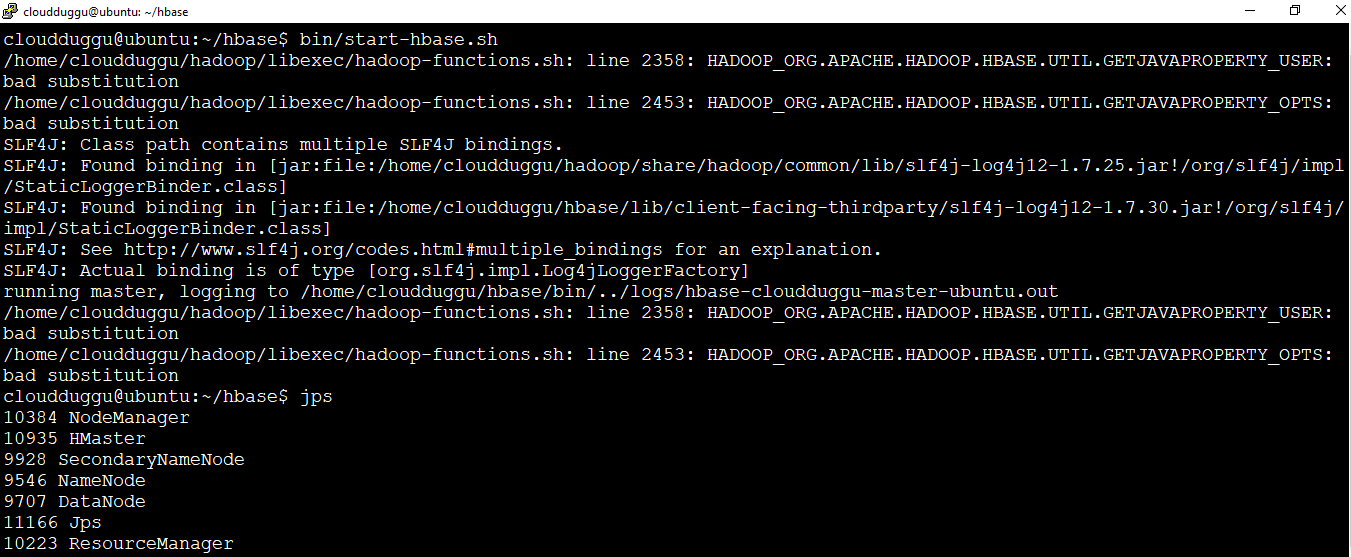
Step 8. After this we can see Hbase services are running from the JPS command, now let us start the HBase shell using the below command.
cloudduggu@ubuntu:~/hbase$ bin/hbase shell
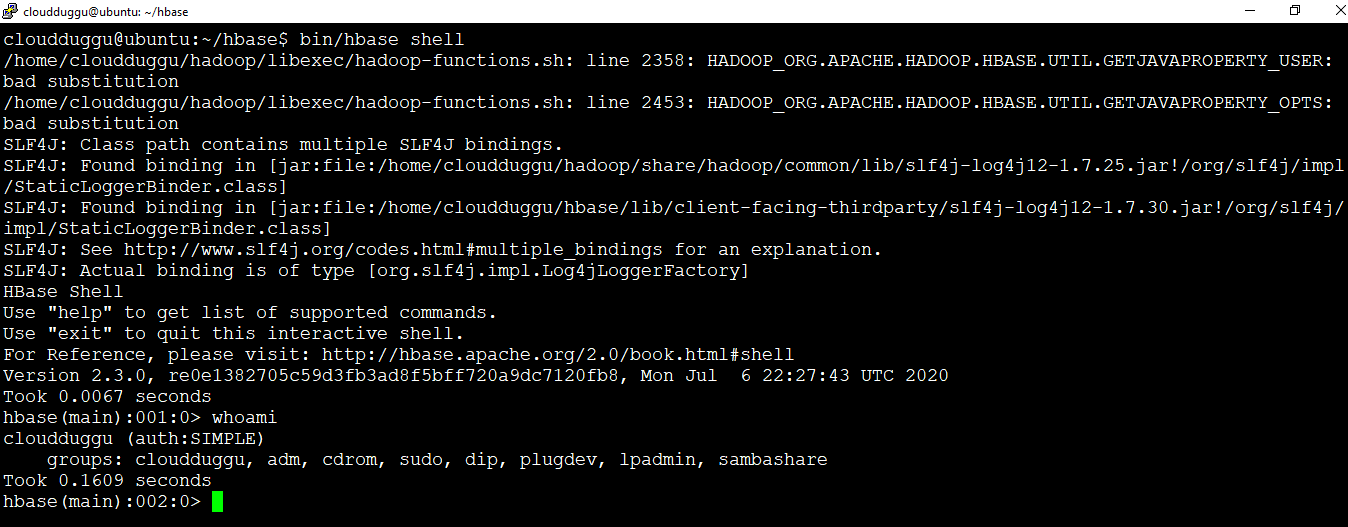
Apache HBase installation is completed on Ubuntu 18.04.4 LTS (Bionic Beaver).