This tutorial provides the end-to-end installation process of Apache Drill version 1.18.0. on Ubuntu 18.04.4 LTS (Bionic Beaver) system. Also, we will see the Drill installation mode which is the embedded mode, and the distributed mode.
Platform
- Operating System (OS). Ubuntu 18.04.4 LTS version operating system has been used for this tutorial.
- Drill. Apache Drill version(1.18.0) has been used in this tutorial.
Download Software
Now let us see the Apache Drill installation process for both embedded mode and distributed mode in the following section.
Drill Embedded Mode Installation
In embedded mode, Apache Drill can be installed on a single(local) machine. Installing Apache Drill on a single node requires no such installation and configuration of Apache Zookeeper also this mode requires no such configuration to start Drill. Once the Drill is installed in embedded mode, we can start the Drill shell that automatically starts the Drillbit service locally.
Steps to Install Apache Drill Version(1.18.0) In Embedded Mode
Step 1. Please verify the Java installation using the below command and install the JAVA 8 or the upper version. Please refer to the "Hadoop Installation on Single Node” for Java installation.
cloudduggu@ubuntu:~$ java –version
Step 2. Download the Apache Drill 1.18.0 from the below link.
On Linux: $wget https://archive.apache.org/dist/drill/drill-1.18.0/apache-drill-1.18.0.tar.gz
On Windows: https://archive.apache.org/dist/drill/drill-1.18.0/apache-drill-1.18.0.tar.gz


Step 3. Untar the Apache Drill tar file using the below command and name it to drill.
cloudduggu@ubuntu:~$ tar -xzf apache-drill-1.18.0.tar.gz
cloudduggu@ubuntu:~$ mv apache-drill-1.18.0 drill

Step 4. Now go to the drill directory and start the Drill in Embedded modes using the below command.
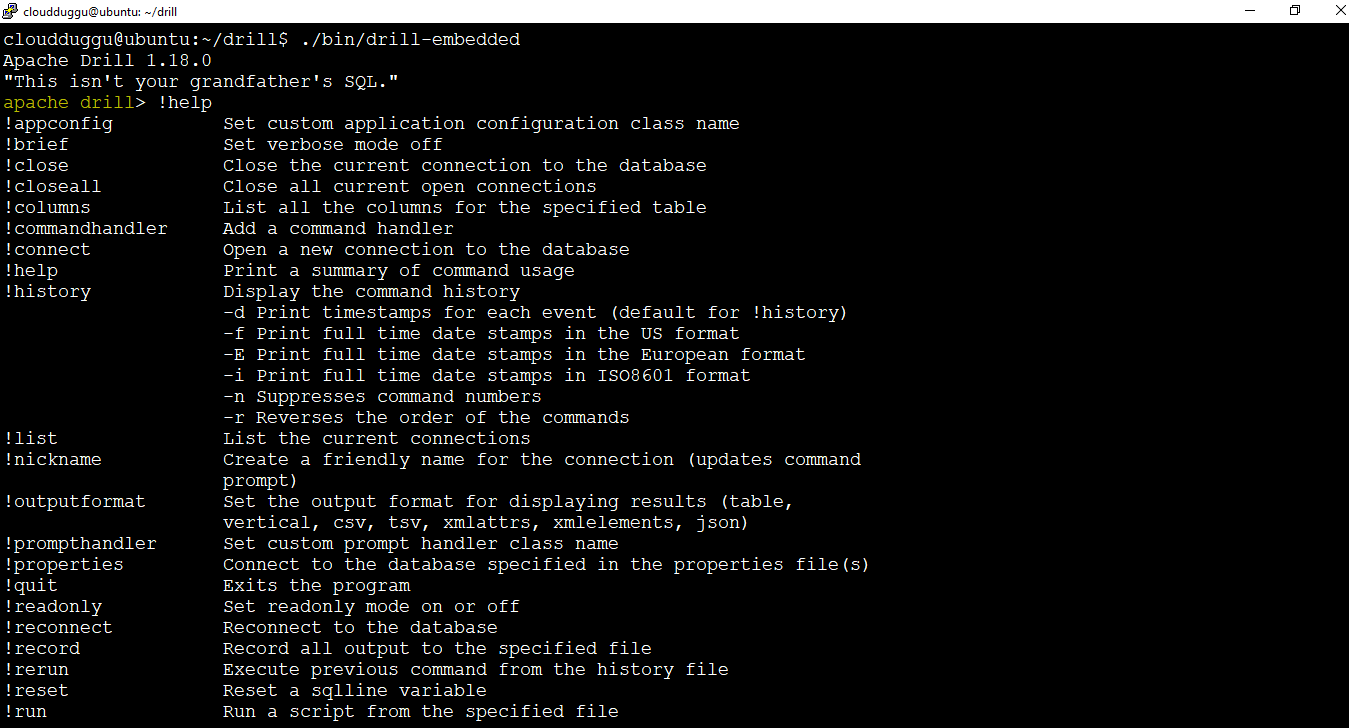
cloudduggu@ubuntu:~/drill$ ./bin/drill-embedded
Once the Apache Drill is started, we will see the below output and run queries. We can verify it by using the !help command.
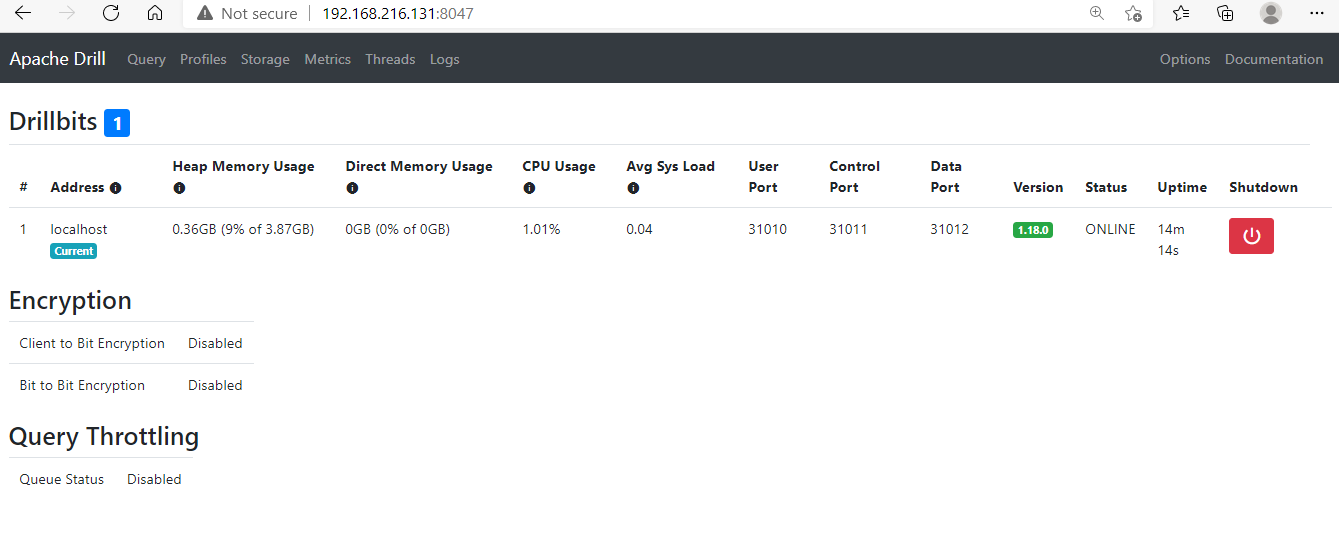
Step 5. We can start the Apache Drill web interface using the URL http://localhost:8047. We have used our system IP http://192.168.216.131:8047/ in the place of localhost.
Step 6. Once we are done with the query execution, after that we can exit from the Apache Drill command line prompt using the below command.
apache drill> !quit

In the above section, we saw Apache Drill Installation in an Embedded mode. Now we will see the Apache Drill Installation in the Distributed mode in the below section.
Drill Distributed Mode Installation
In Distributed mode, Drill can be installed over the cluster of nodes such as the Hadoop cluster. One of the prerequisites of Drill installation over cluster mode is Zookeeper installation. The Zookeeper should be installed to manage Apache Drill.
Steps to Install Apache Drill Version(1.18.0) In Distributed Mode
Step 1. Please refer the steps 1,2 and step 3 of Drill installation in the embedded mode section and verify Java installation and download the Apache Drill 1.18.0 version. Once Apache Drill download is completed post that renames the Drill directory and makes it a meaningful name.
Step 2. Now please install the Zookeeper in case it is not already installed. Please refer to the "Apache Kafka Installation” for zookeeper installation.
Once the Zookeeper installation has been completed post that starts the zookeeper server using the below command.

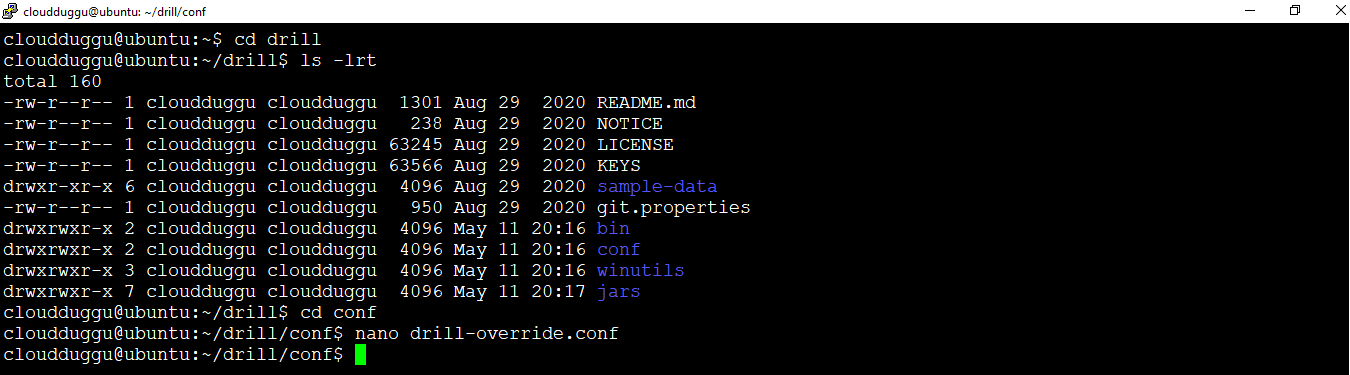
Step 3. Open the drill-override.conf configuration file that is located in the drill home directory and put the below command. In our case, it is located at "/home/cloudduggu/drill/conf".
cloudduggu@ubuntu:~/drill/conf$ nano drill-override.conf
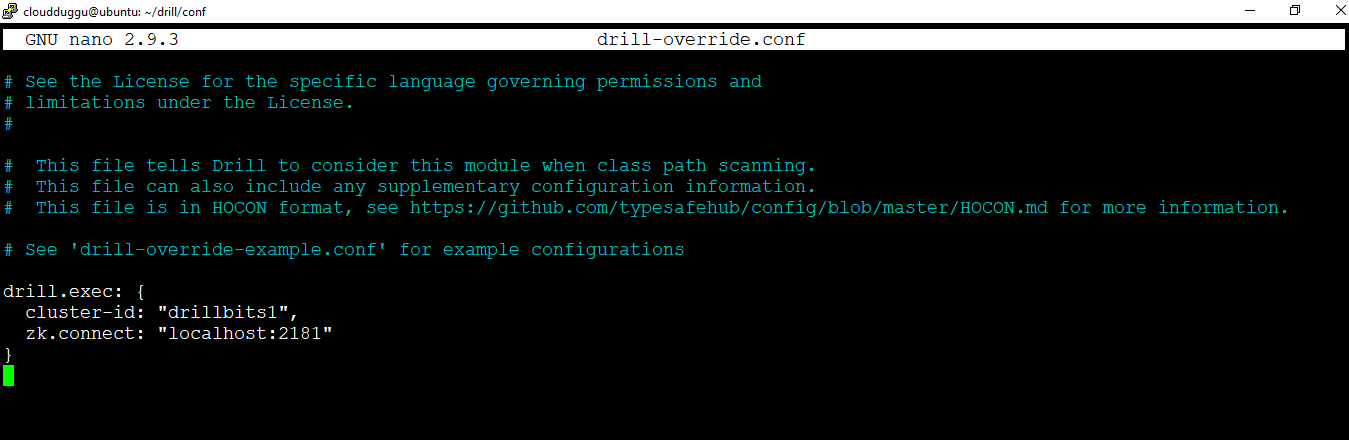
Now put the following configuration detail in the Apache Drill drill-override.conf file.
    drill.exec: {
        cluster-id: "drillbits1",
        zk.connect: "localhost:2181"
    }
The "drillbits1" is the instance name and it is indicating a single instance name. In case there is more than 1 instance then that count will be mentioned here.
To save the file press CTRL + O and to exit from the nano editor press CTRL+X.
Step 4. Now start the Drillbit shell using the following command.
cloudduggu@ubuntu:~/drill$ ./bin/drillbit.sh start

Step 5. Use the following command to stop the Drillbit. Go to the home directory of Apache Drill and run the below command.
cloudduggu@ubuntu:~/drill$ ./bin/drillbit.sh stop
