In this tutorial we will see step by step process to install the Apache Oozie version (5.2.0) on Ubuntu 18.04.4 LTS (Bionic Beaver), once the installation is completed you can play with Oozie.
Platform
- Apache Oozie: We have used the Apache Oozie-5.2.0 version for installation.
- Operating System (OS): We have used Ubuntu 18.04.4 LTS version. You can use other flavors of Linux systems like Redhat, CentOS, etc.
Download Software
Steps to Install Apache Oozie version(5.2.0) on Ubuntu 18.04.4 LTS
Please follow the following steps for Apache Oozie installation.
Step 1.
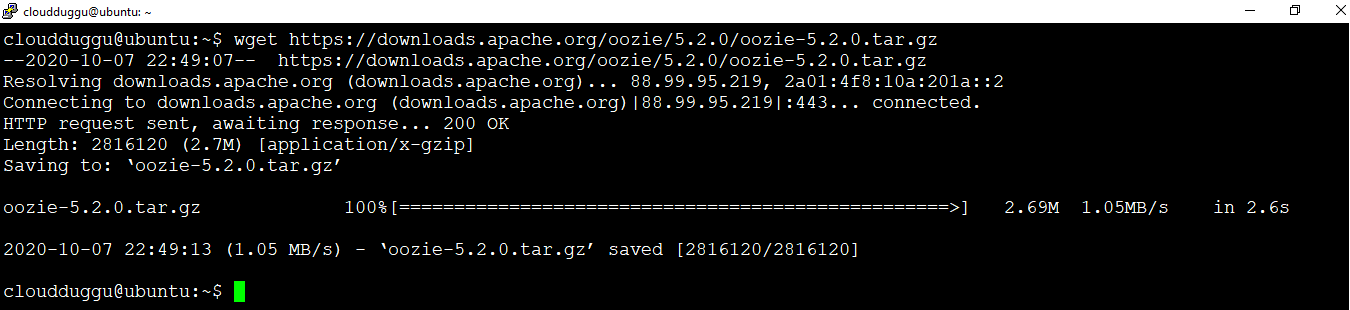
Please download Apache Oozie 5.2.0 from the below link.
On Linux: wget https://downloads.apache.org/oozie/5.2.0/oozie-5.2.0.tar.gz
On Windows: https://downloads.apache.org/oozie/5.2.0/oozie-5.2.0.tar.gz
Step 2.
Now let us extract the downloaded Apache Oozie tar using the below command.
cloudduggu@ubuntu:~$ tar -xzf oozie-5.1.0.tar.gz

Step 3.
After this, we will install the Maven tool to compile the Apache Oozie source. Use the below command to install Maven.
cloudduggu@ubuntu:~$ sudo apt-get install maven

Once Maven is installed, verify the version of Maven using the below command.
cloudduggu@ubuntu:~$ mvn -version

Step 4.
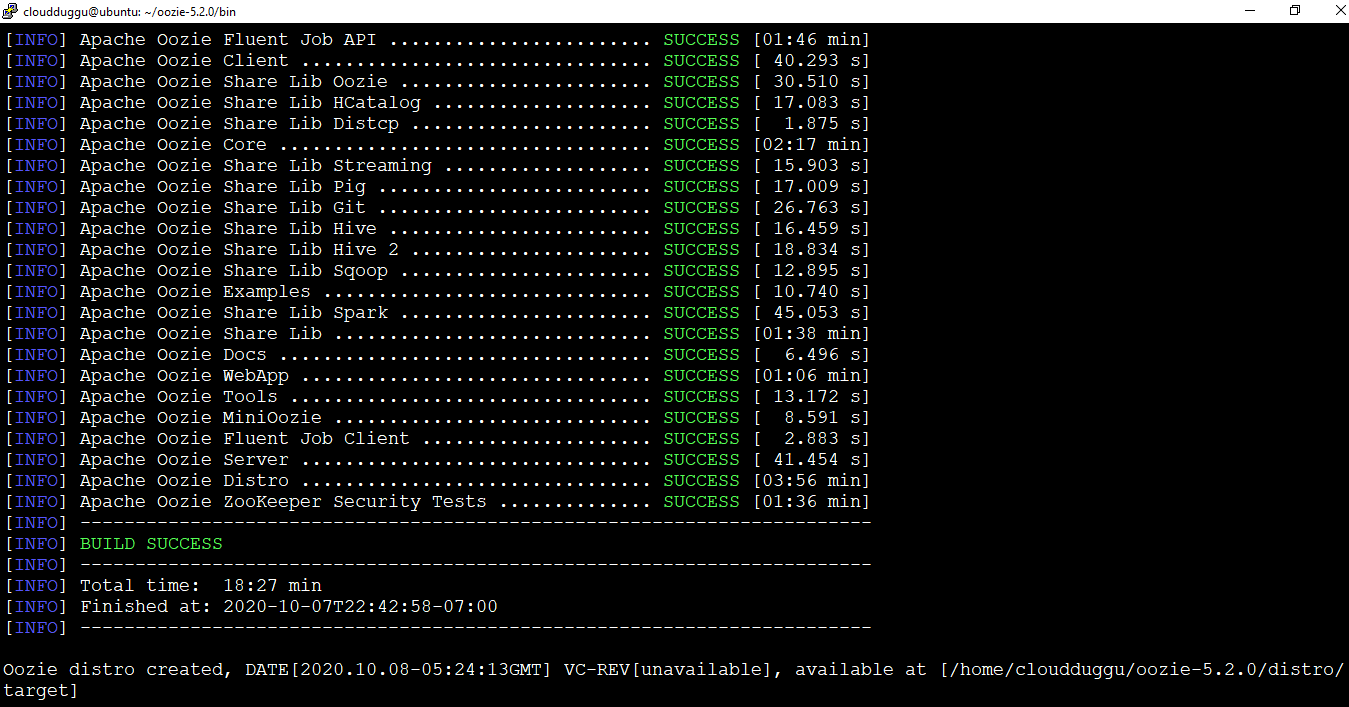
Now we will compile Apache Oozie to create binary files for the distro. Go to “/bin” directory of Oozie home and run the below command.
cloudduggu@ubuntu:~/oozie-5.2.0$ cd bin
cloudduggu@ubuntu:~/oozie-5.2.0/bin$ ./mkdistro.sh -DskipTests


Once the Apache Oozie distro build is completed then we will receive the below output.
Step 5.
After this create a "libext" directory under the Oozie directory using the below command. The location of the file is mentioned below.
cloudduggu@ubuntu:~$ cd /home/cloudduggu/oozie-5.2.0/distro/target/oozie-5.2.0-distro/oozie-5.2.0
cloudduggu@ubuntu:~/oozie-5.2.0/distro/target/oozie-5.2.0-distro/oozie-5.2.0$ mkdir libext

Now go to the “libext” directory and download the “ext-2.2.zip” file from the below link.
cloudduggu@ubuntu:~/oozie-5.2.0/distro/target/oozie-5.2.0-distro/oozie-5.2.0/libext/$ wget http://archive.cloudera.com/gplextras/misc/ext-2.2.zip

After this copy all Hadoop libraries into the “libext” folder.


Step 6.
Now we will get Oozie binary file in the target directory. The location of the target directory is mentioned below.
/home/cloudduggu/oozie-5.2.0/distro/target
Create a directory name “oozie” under “/usr/local” using the below command.
cloudduggu@ubuntu:~$ mkdir /usr/local/oozie
Go to target directory and move “oozie-5.2.0” directory into “/usr/local/oozie” directory using below commands.
cloudduggu@ubuntu:~$ cd oozie-5.2.0/distro/target/oozie-5.2.0-distro
cloudduggu@ubuntu:~/oozie-5.2.0/distro/target/oozie-5.2.0-distro$ mv oozie-5.2.0 /usr/local/oozie
Step 7.
Now we will set OOZIE_HOME and JAVE_HOME path on the “.bashcr” file.
cloudduggu@ubuntu:~$ nano .bashrc
Export location of Oozie and Java in ".bashrc" file.
export OOZIE_HOME=/usr/local/oozie/oozie-5.2.0
export JAVA_HOME=/usr/lib/jvm/java-8-openjdk-amd64/
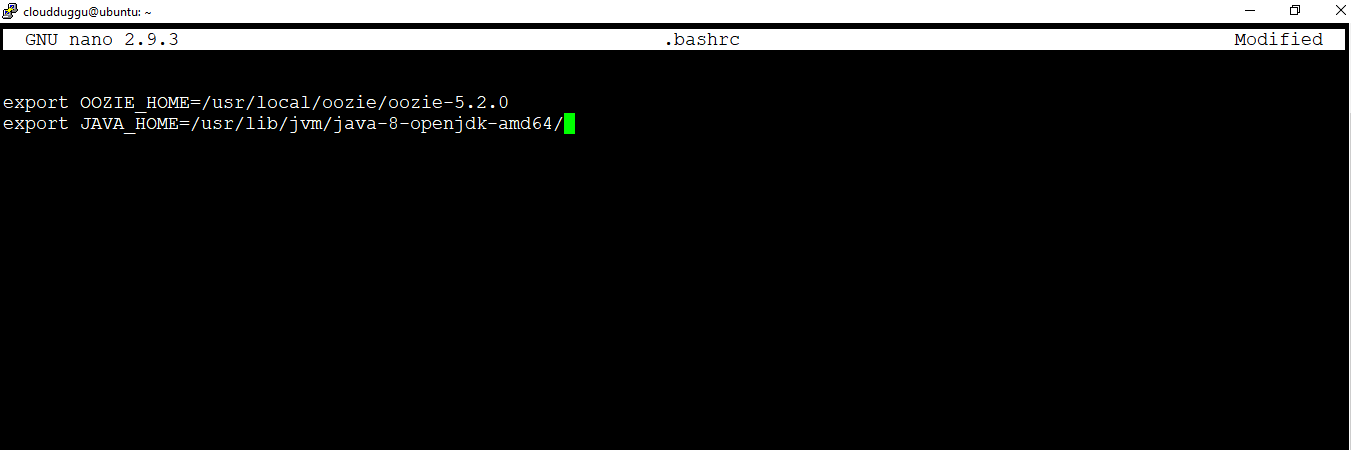
Save the changes by pressing CTRL + O and exit from the nano editor by pressing CTRL + X.
Step 8.
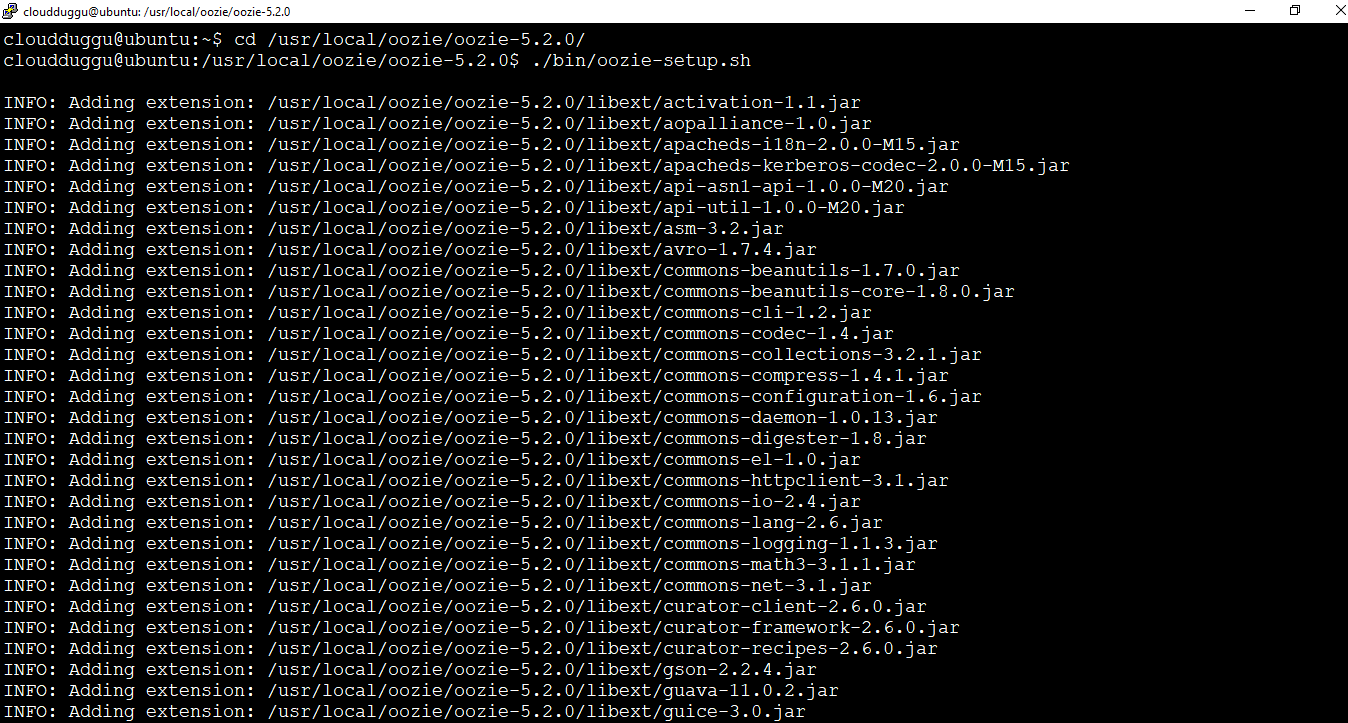
After this go to oozie home directory and supply below command to setup oozie.
cloudduggu@ubuntu:~$ cd /usr/local/oozie/oozie-5.2.0/
cloudduggu@ubuntu:/usr/local/oozie/oozie-5.2.0$ ./bin/oozie-setup.sh
Step 9.
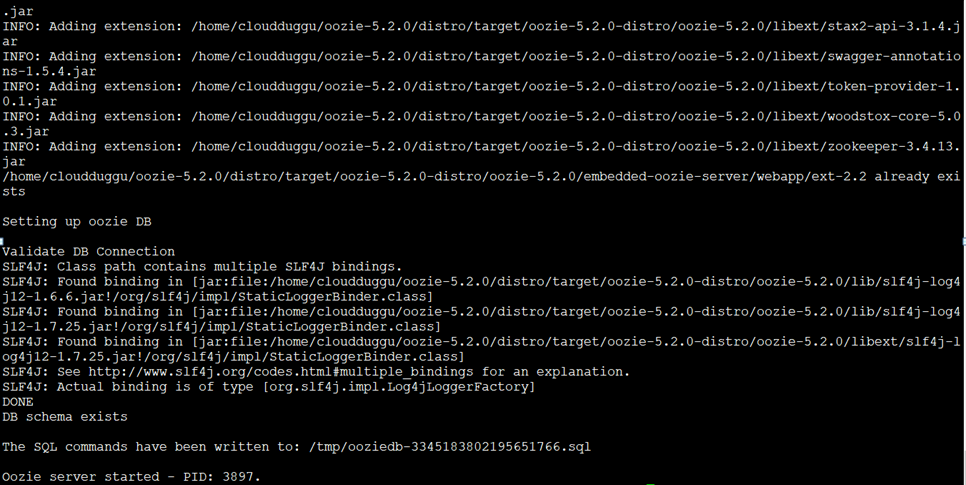
Now start the Oozie server using the below command.
cloudduggu@ubuntu:/usr/local/oozie/oozie-5.2.0$ ./bin/oozied.sh start
Once the Oozie server is started we will receive the below message.
Step 10.
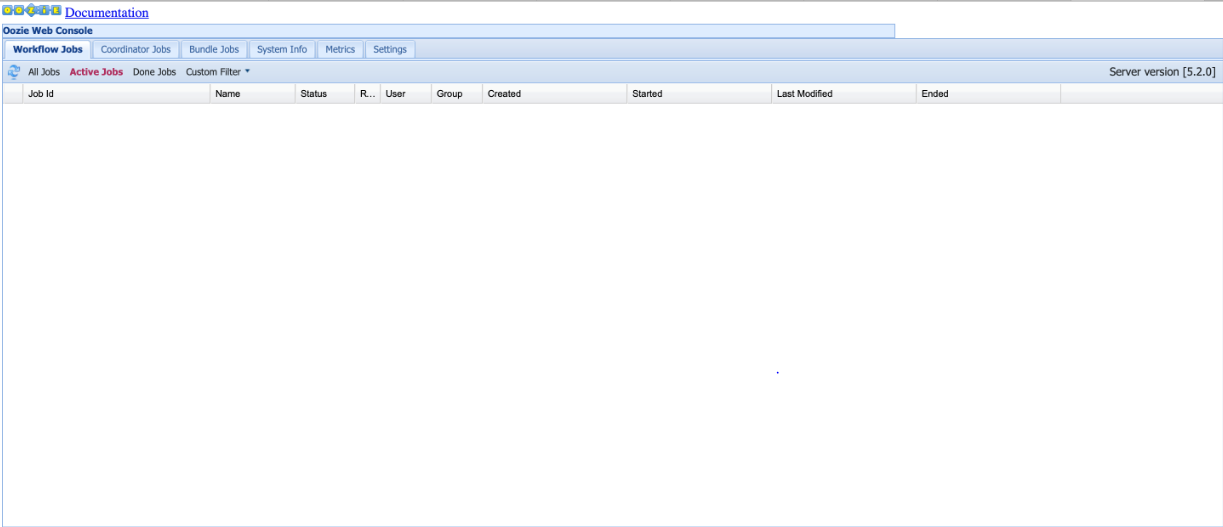
Once the Oozie server is started, we can verify it from the web browser. Open a browser and type http://localhost:11000/oozie, 11000 is the default port for Oozie.
Alternatively, you can run the below command to check Oozie services.
cloudduggu@ubuntu:/usr/local/oozie/oozie-5.2.0$ ./bin/oozie admin -oozie http://localhost:11000/oozie -status