The objective of this tutorial is to create an Apache Storm project to analyze sales data. We have taken the Sales data set for this project. After processing the data from the Storm System, we will push the result information to the Client System and after that, the Client System will show data in a chart format.
So readers ... are you ready to create an Apache Storm project.(Sales Data Analysis)
1. Idea Of Project
| a. The Client System has raw data files that are used for sales analysis through the Storm System. | 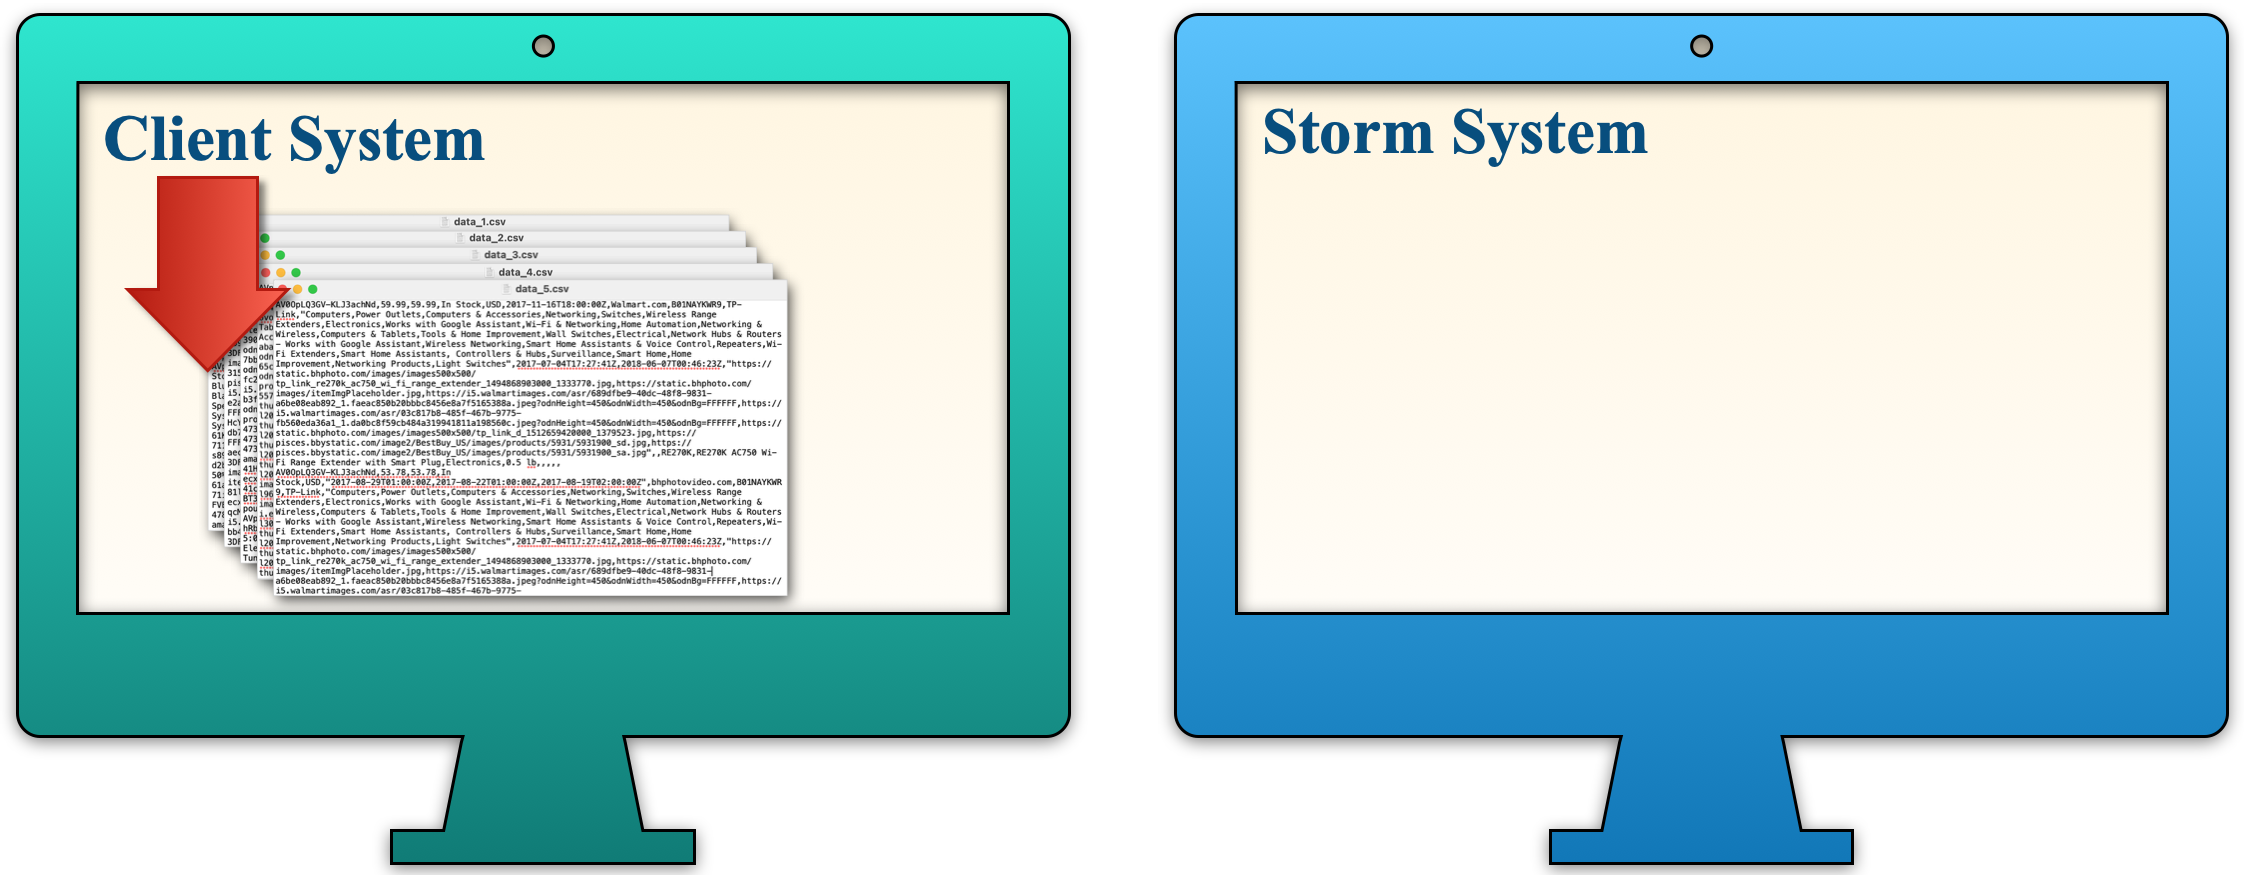 |
| b. The Storm System downloads raw sales data files from the Client System and starts processing that data files. | 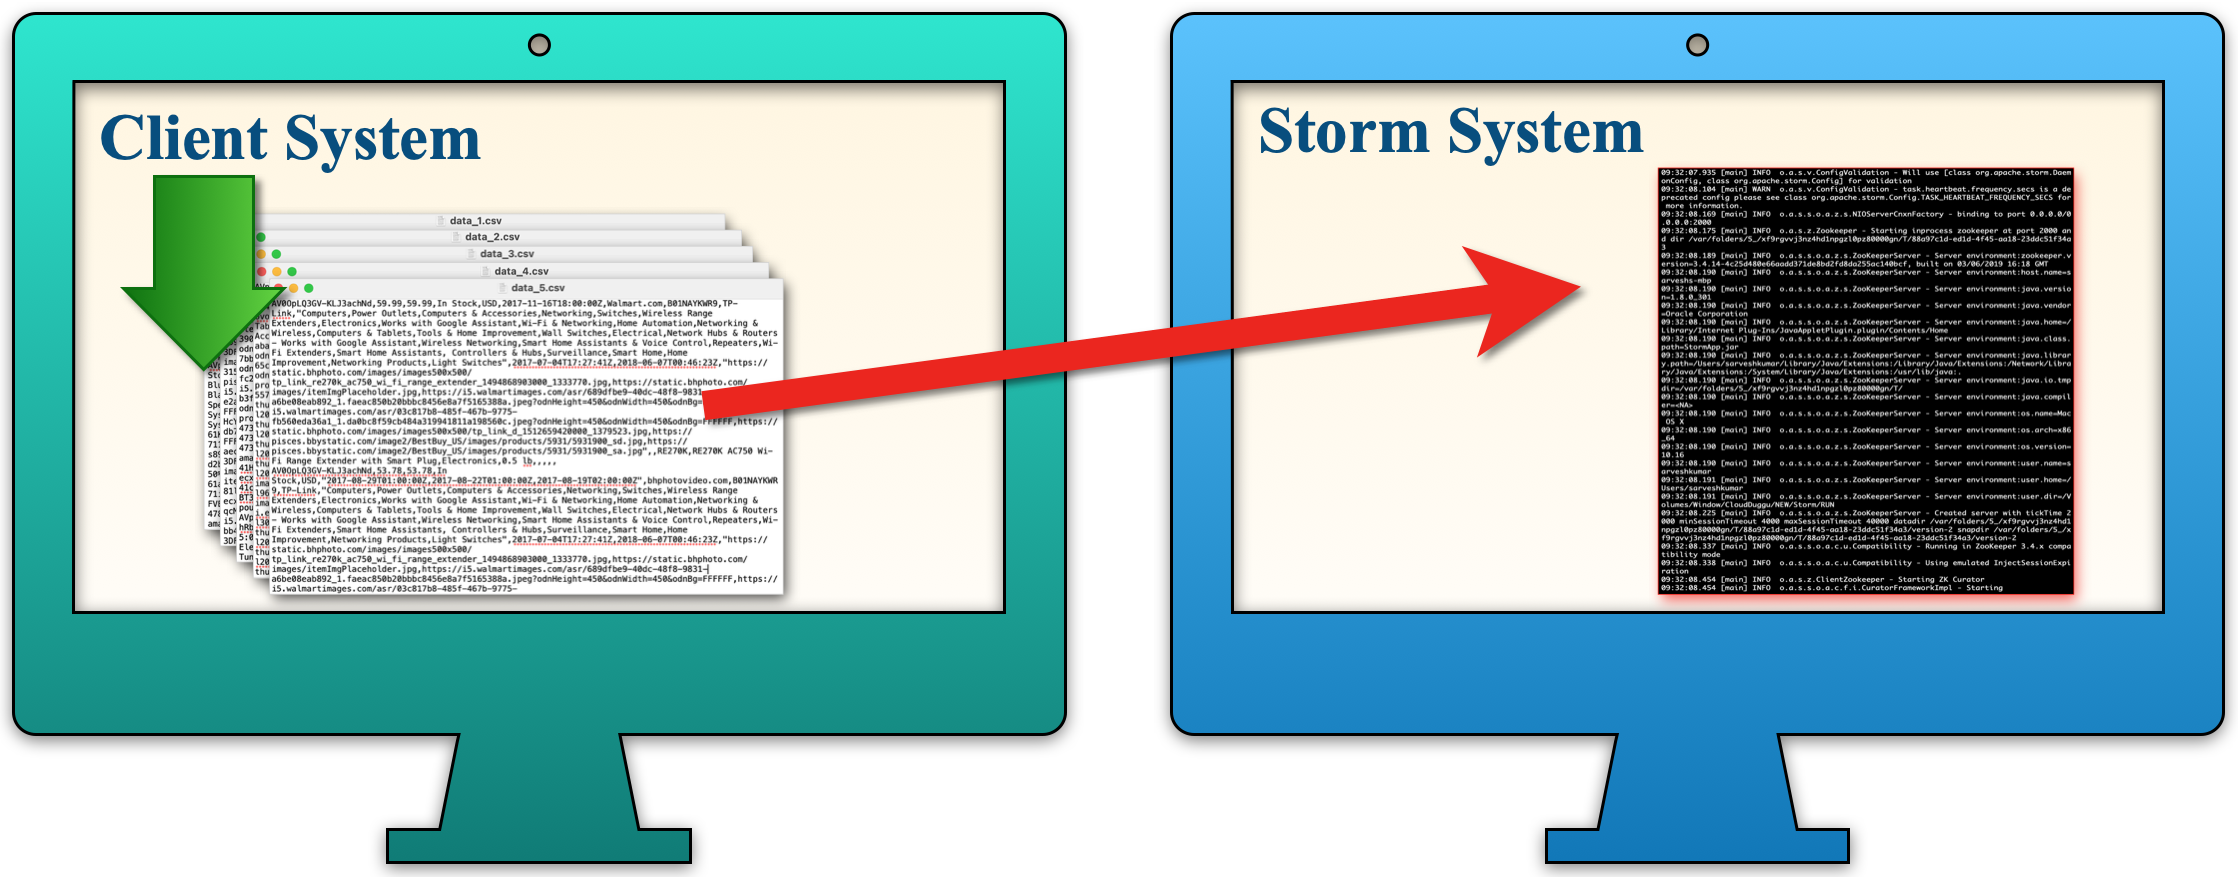 |
| c. The Storm System generates the result file after the analysis of sales data is completed. | 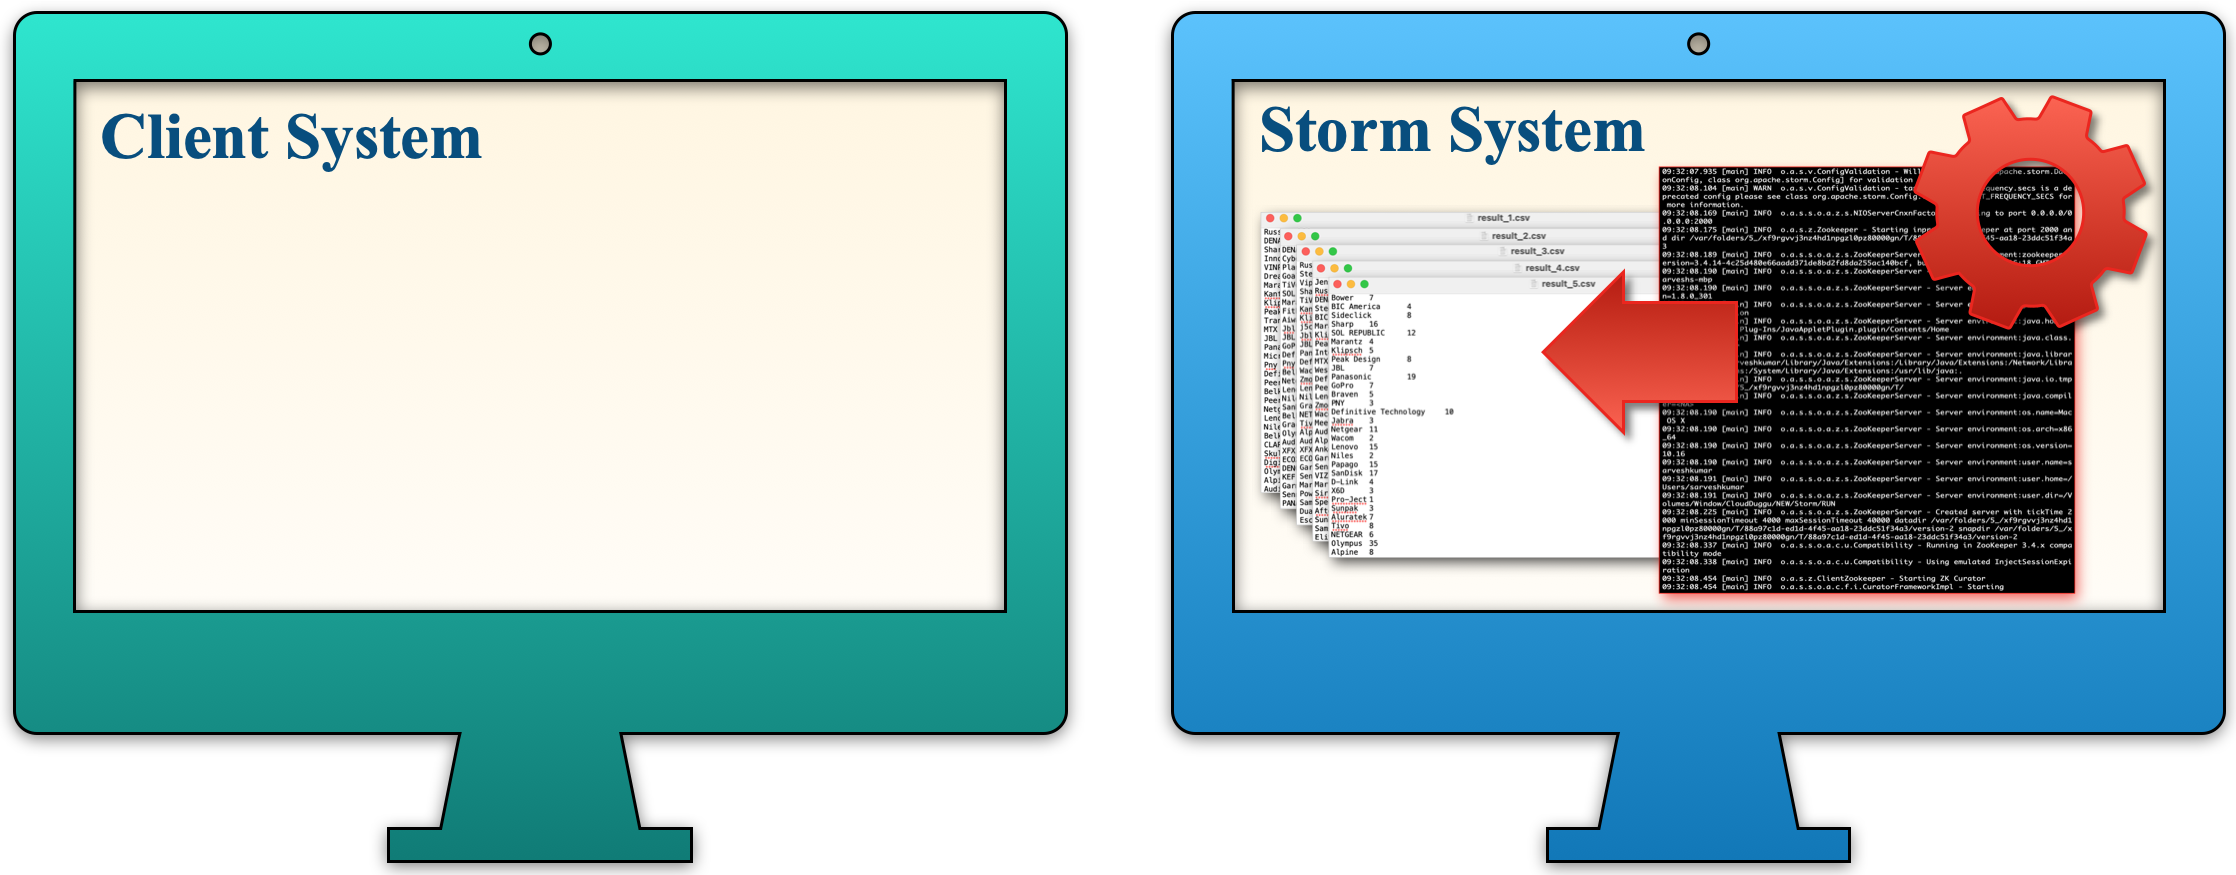 |
| d. Once the result file is created then the Storm System sends that result file to the Client System and the Client System displays the results in a chart format. | 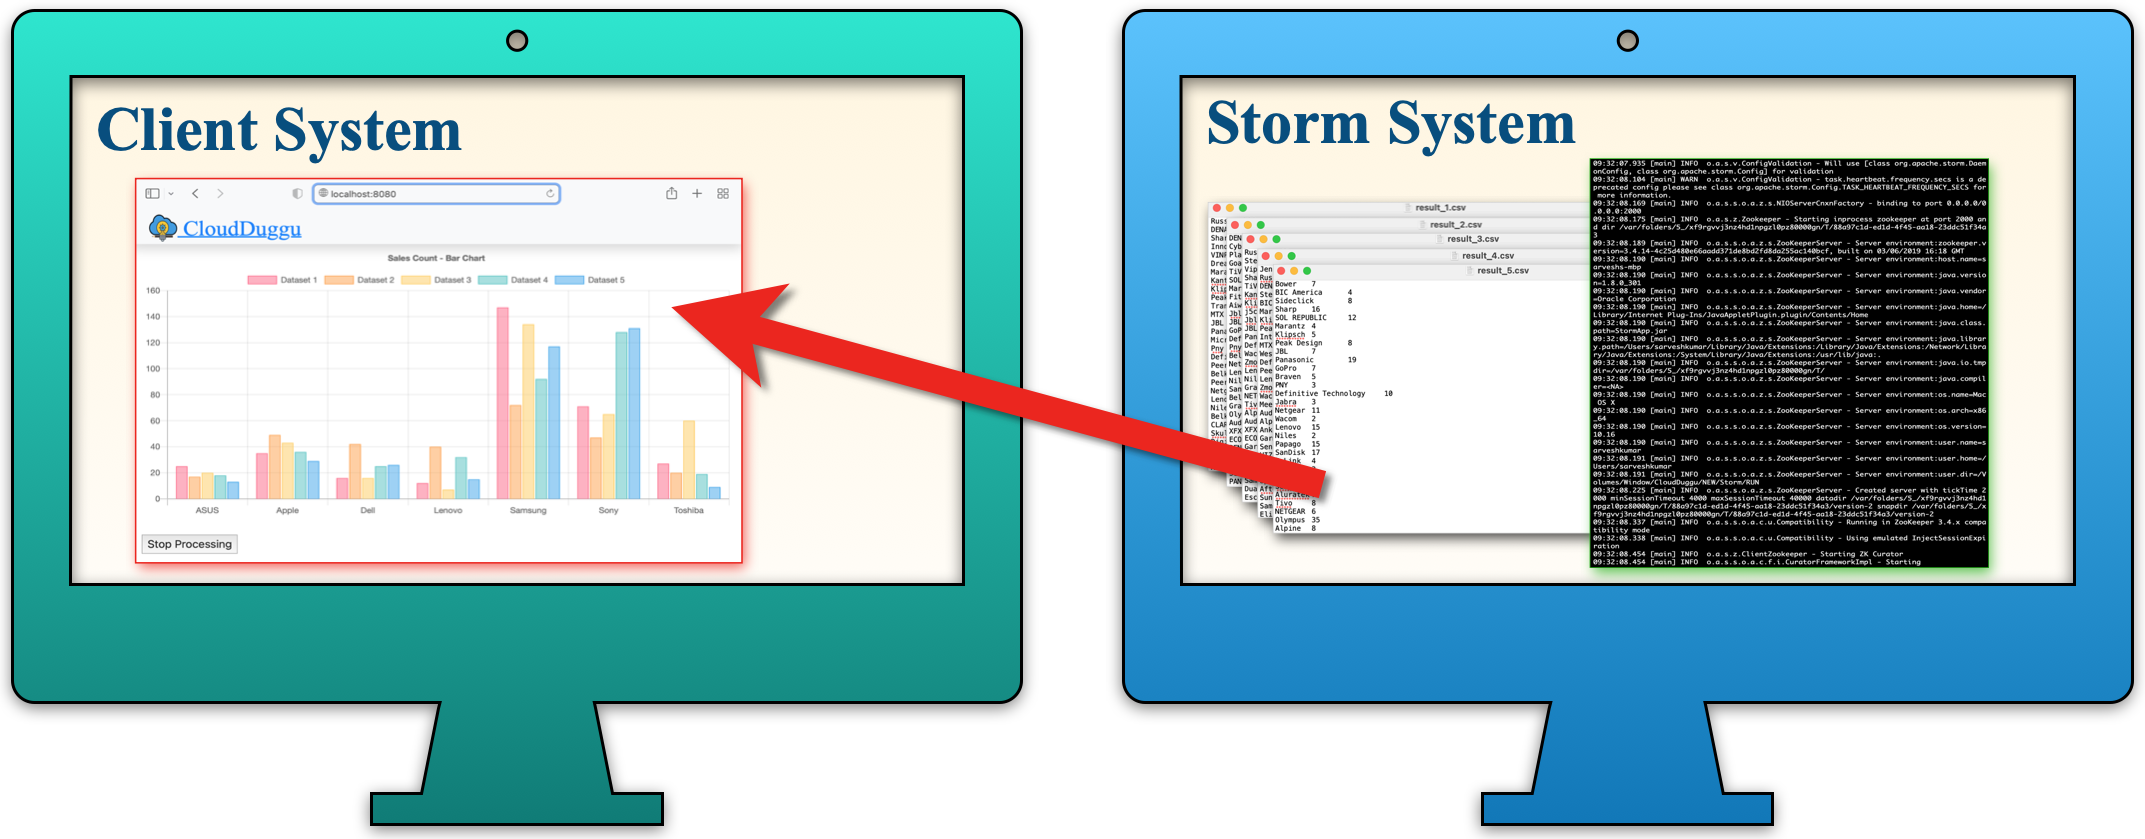 |
2. Building Of Project
To run this project you can install VM (Virtual Machine) on your local system and configured Storm on that. After this configuration, your local system will work as a Client System and VM will work as a Storm System. Alternatively, you can take two systems that are communicating with each other and on one of the systems, Storm is configured.
Let us see this project in detail and run it using the below steps.
| a. The Client System | ||
|---|---|---|
| It is an example of the Spring Boot JAVA Framework. When we will build this project then it will create a "client.jar" executable file. | 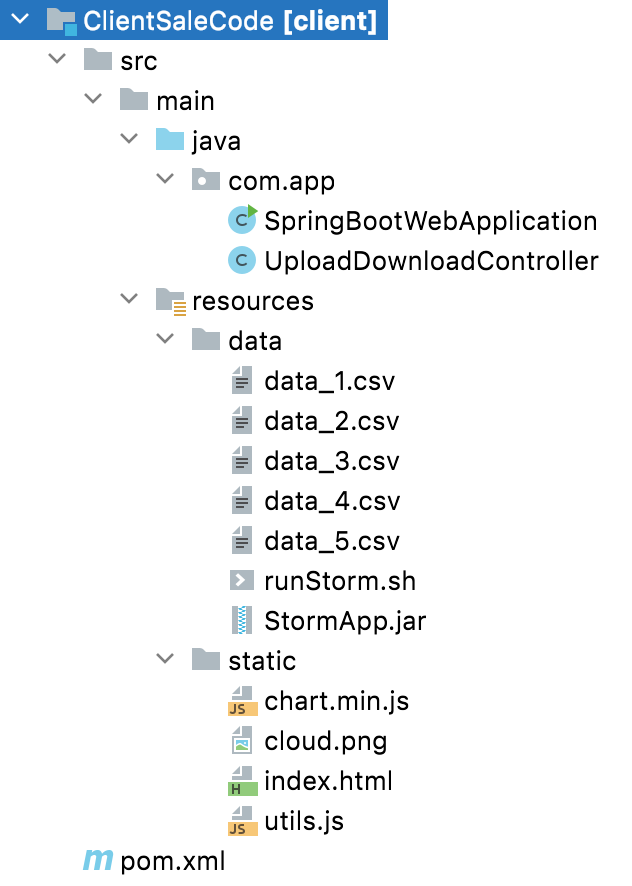 |
|
| It has java code, data files, and static HTML pages. | ||
| Java code has 2 files, SpringBootWebApplication.java and UploadDownloadController.java | ||
| SpringBootWebApplication.java is the main project file, which is responsible for building code and running it on an embedded server. | ||
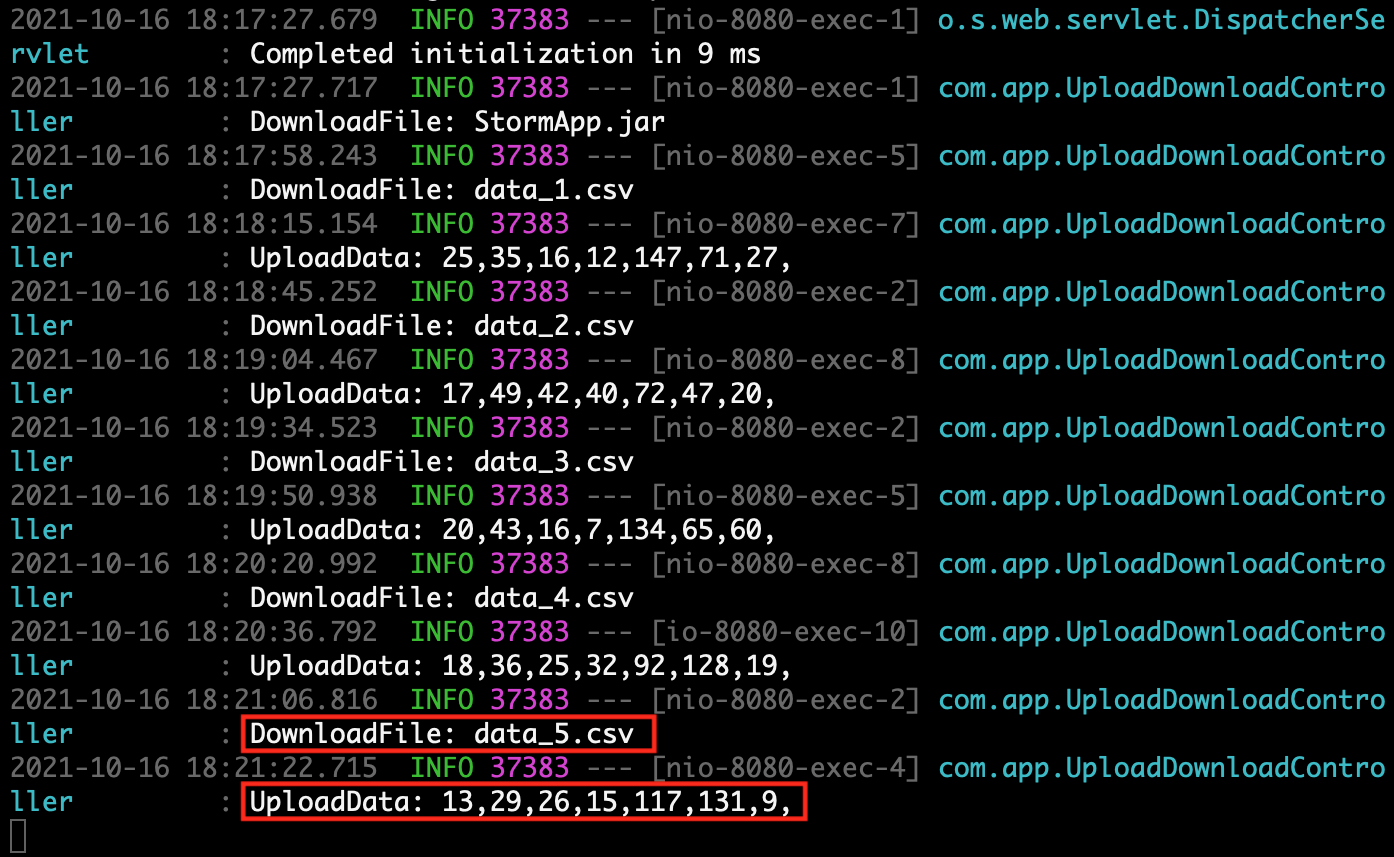
| UploadDownloadController.java is used to provide download & upload URL HTTP services. For downloading data files it uses the download client URL and for uploading result files it uses the upload client URL. | ||
| data folder has sales data CSV files (data_1.csv, data_2.csv, data_3.csv ...) for Storm application. Also, contain Storm application executable jar and shell script file (runStorm.sh) which help to download data files and execute storm application jar. | ||
| The Static folder has HTML page code (index.html). This is the main client view page which shows the Storm process result data. | ||
| pom.xml is a project build tool file. This file has java dependencies and builds configuration details. | ||
| For creating the “client.jar” file we use the command "mvn clean package". | ||
| Click Here To Download the "ClientSaleCode" project zip file. | ||
| a. The Storm System | ||
|---|---|---|
| It is an example of the JAVA Ant Project. When we will build this project then it will create a "StormApp.jar" executable jar file. | 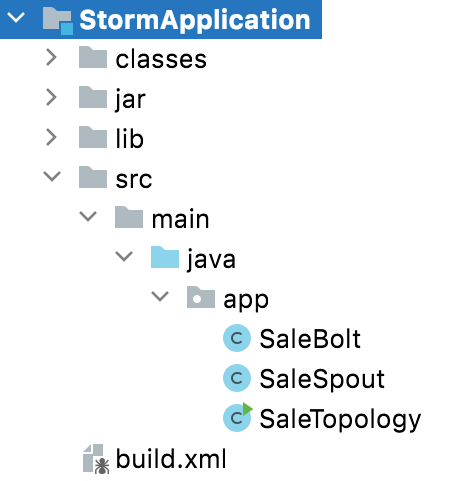 |
|
| It has three java code files and one build.xml file and a dependencies jar file in the lib folder. The project also has two additional folders (classes, jar) that contain files created at build time. | ||
One of the java code files is SaleTopology.java. In this code file, the TopologyBuilder object is created which adds spout and bolt reference and LocalCluster is created in which passes config and TopologyBuilder object reference.
|
||
The Second java code file is SaleSpout.java. In this code, the file filter sales data and collect data into the SpoutOutputCollector object.
|
||
The third java code file is SaleBolt.java. In this code, the file fetch all collected sales data from Tuple and stores it as a group in the Map object.
|
||
| build.xml has a build file. Which is used to create an executable jar file. | ||
| Dependencies Library JARs folder (lib) has all storm jars and other jars which help to build the Storm application jar. | ||
| pom.xml is a project build tool file. This file has java dependencies and builds configuration details. | ||
| For creating the “StormApp.jar” file we use the command "ant clean compile jar". | ||
| Click Here To Download the "StormApplication" project zip file. | ||
3. Run The Project
| a. Client System | b. Storm System | |
|---|---|---|
| 1. | Download client.jar in the Client System. Click Here To Download the "client.jar" file. |
Download runStorm.sh Linux shell script file in the Storm System which helps to download data file then run StormApp.jar file and update result file to the Client System. Click Here To Download the "runStorm.sh" file. |
|

|
|
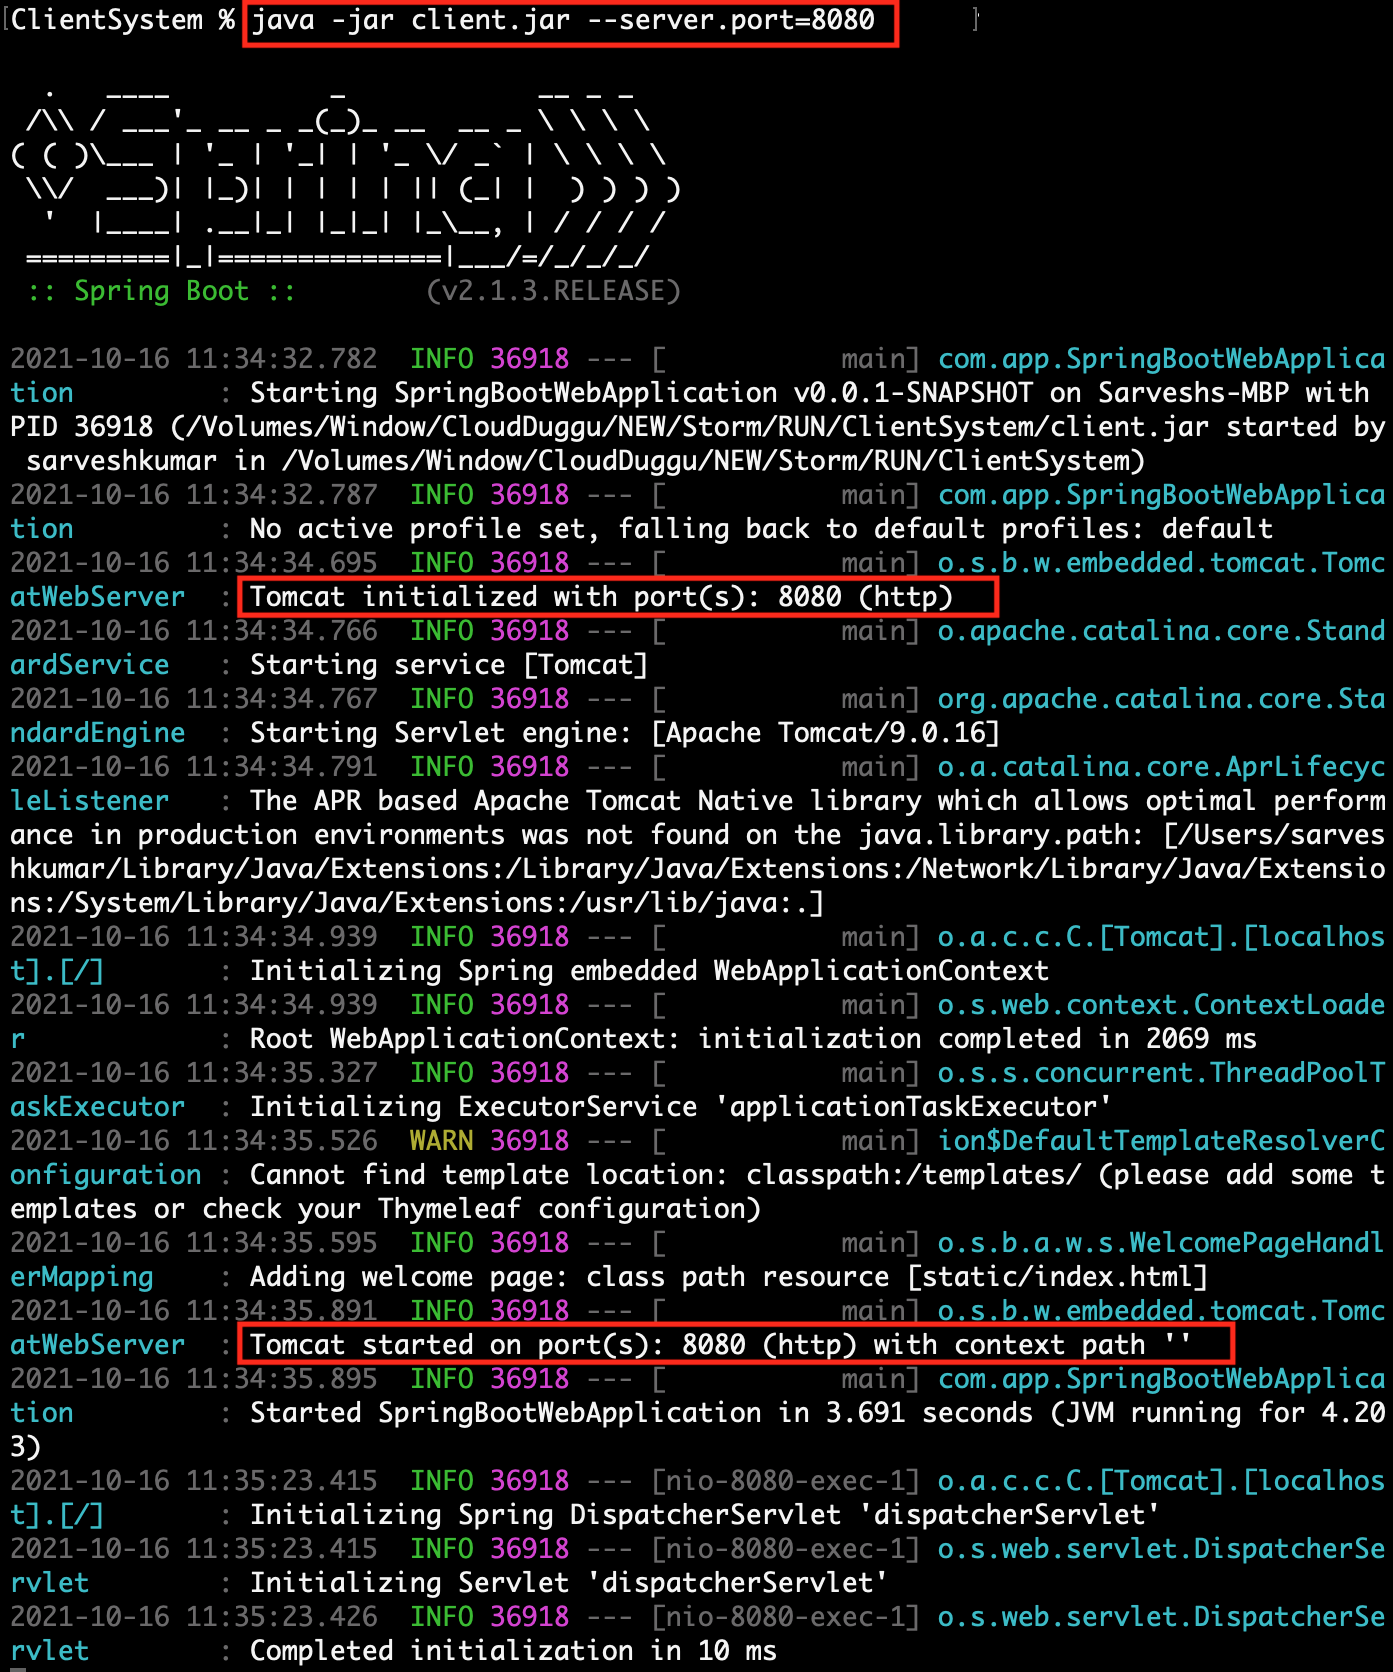
| 2. | Run client.jar in the client system. At execution time pass server port 8080.
Here we can use a different port if the port already uses in the client system.java -jar client.jar --server.port=8080
|
|
 |
||
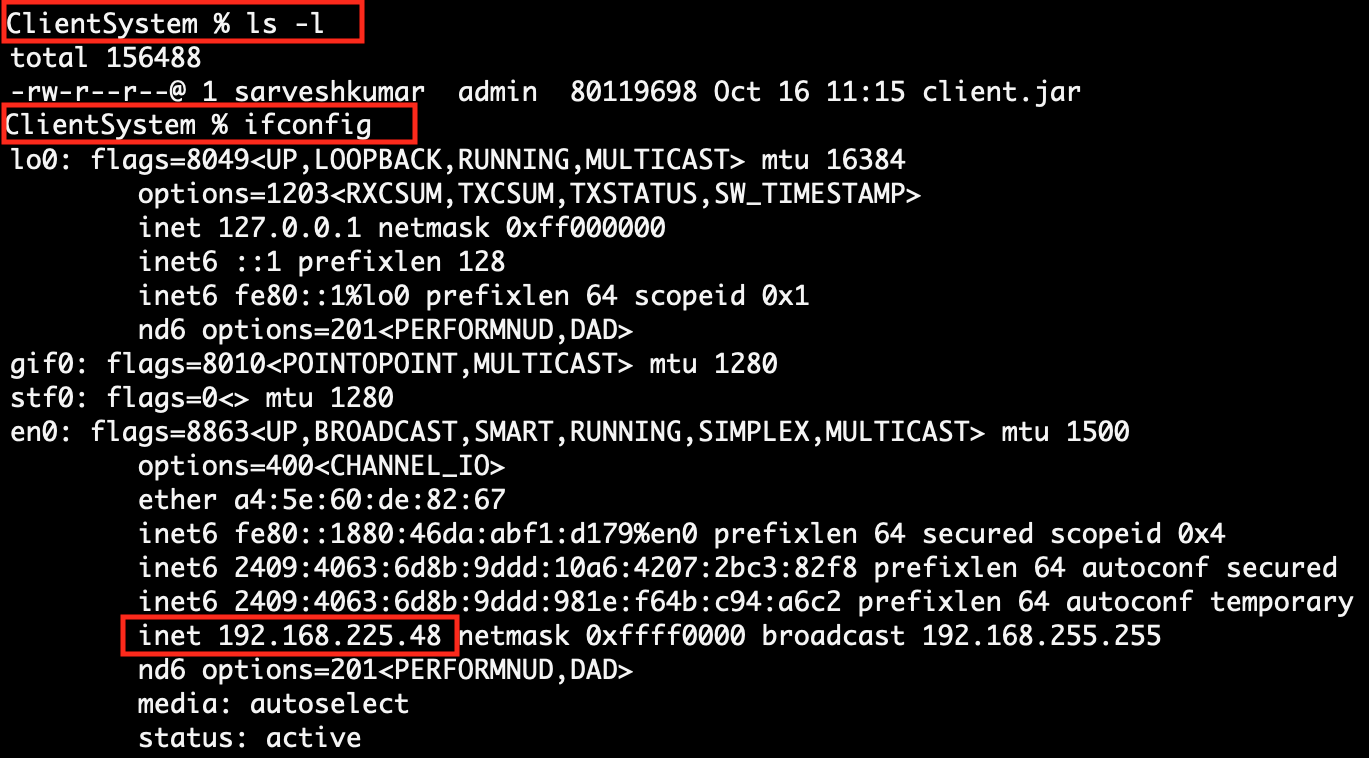
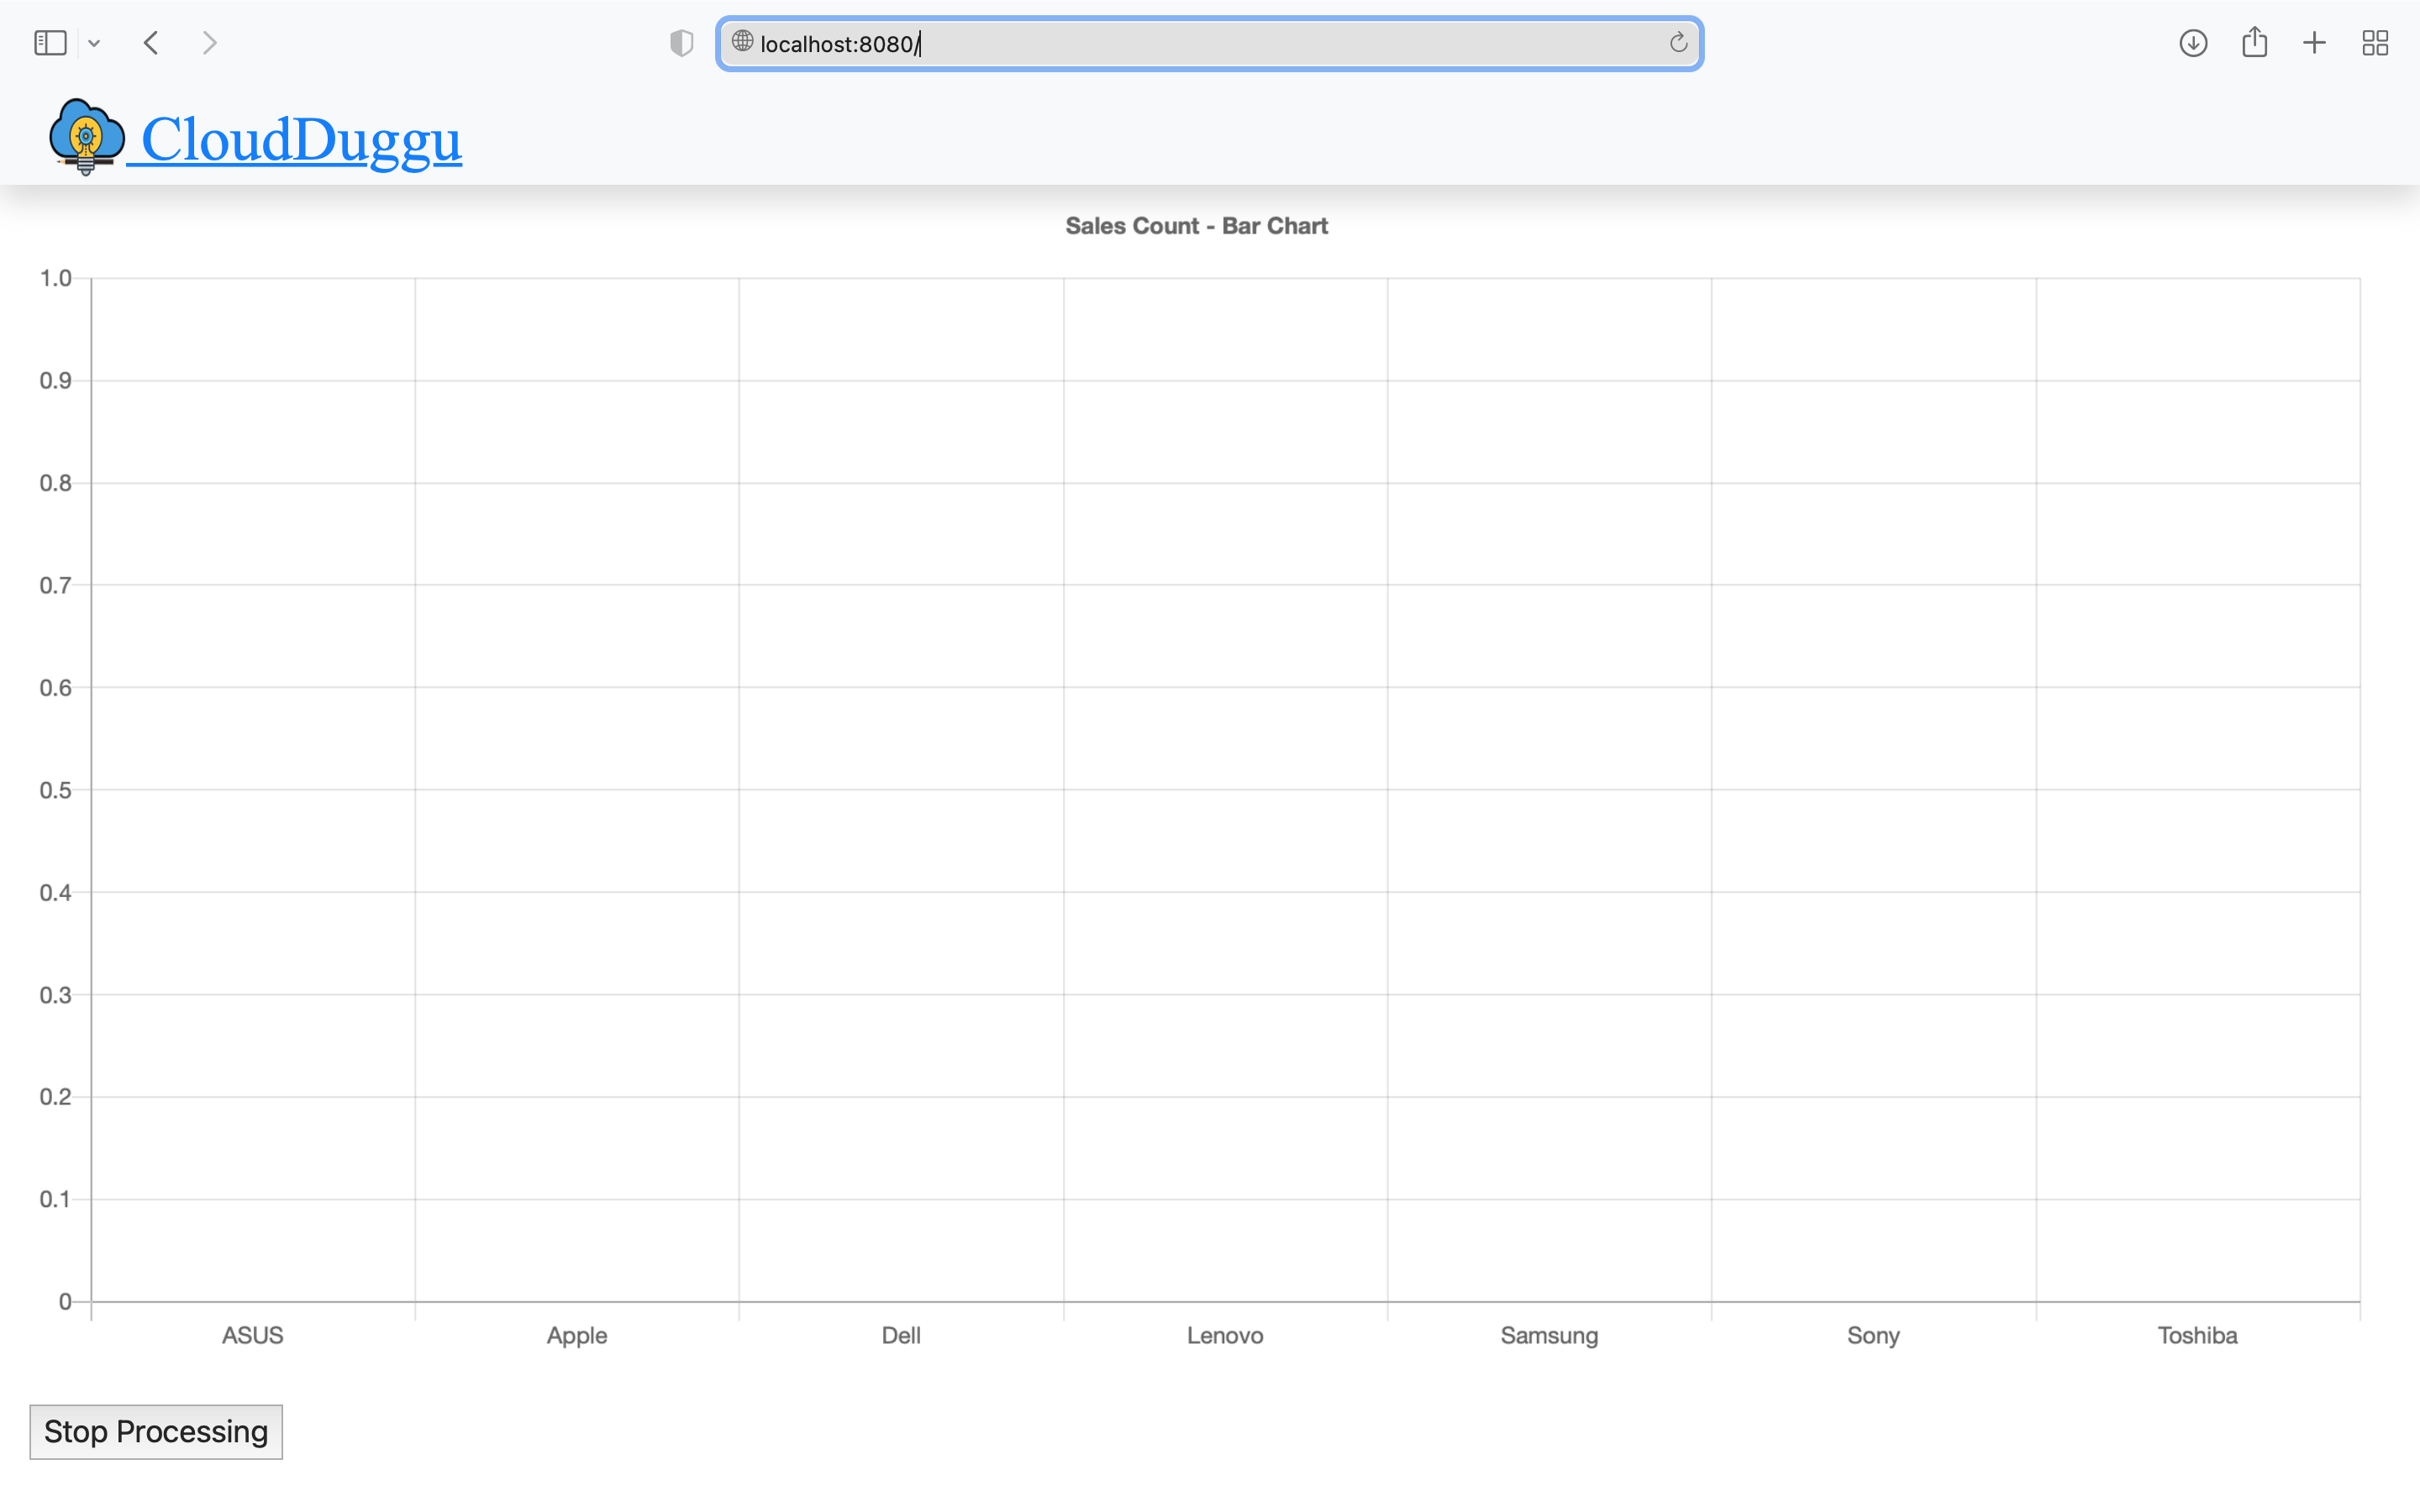
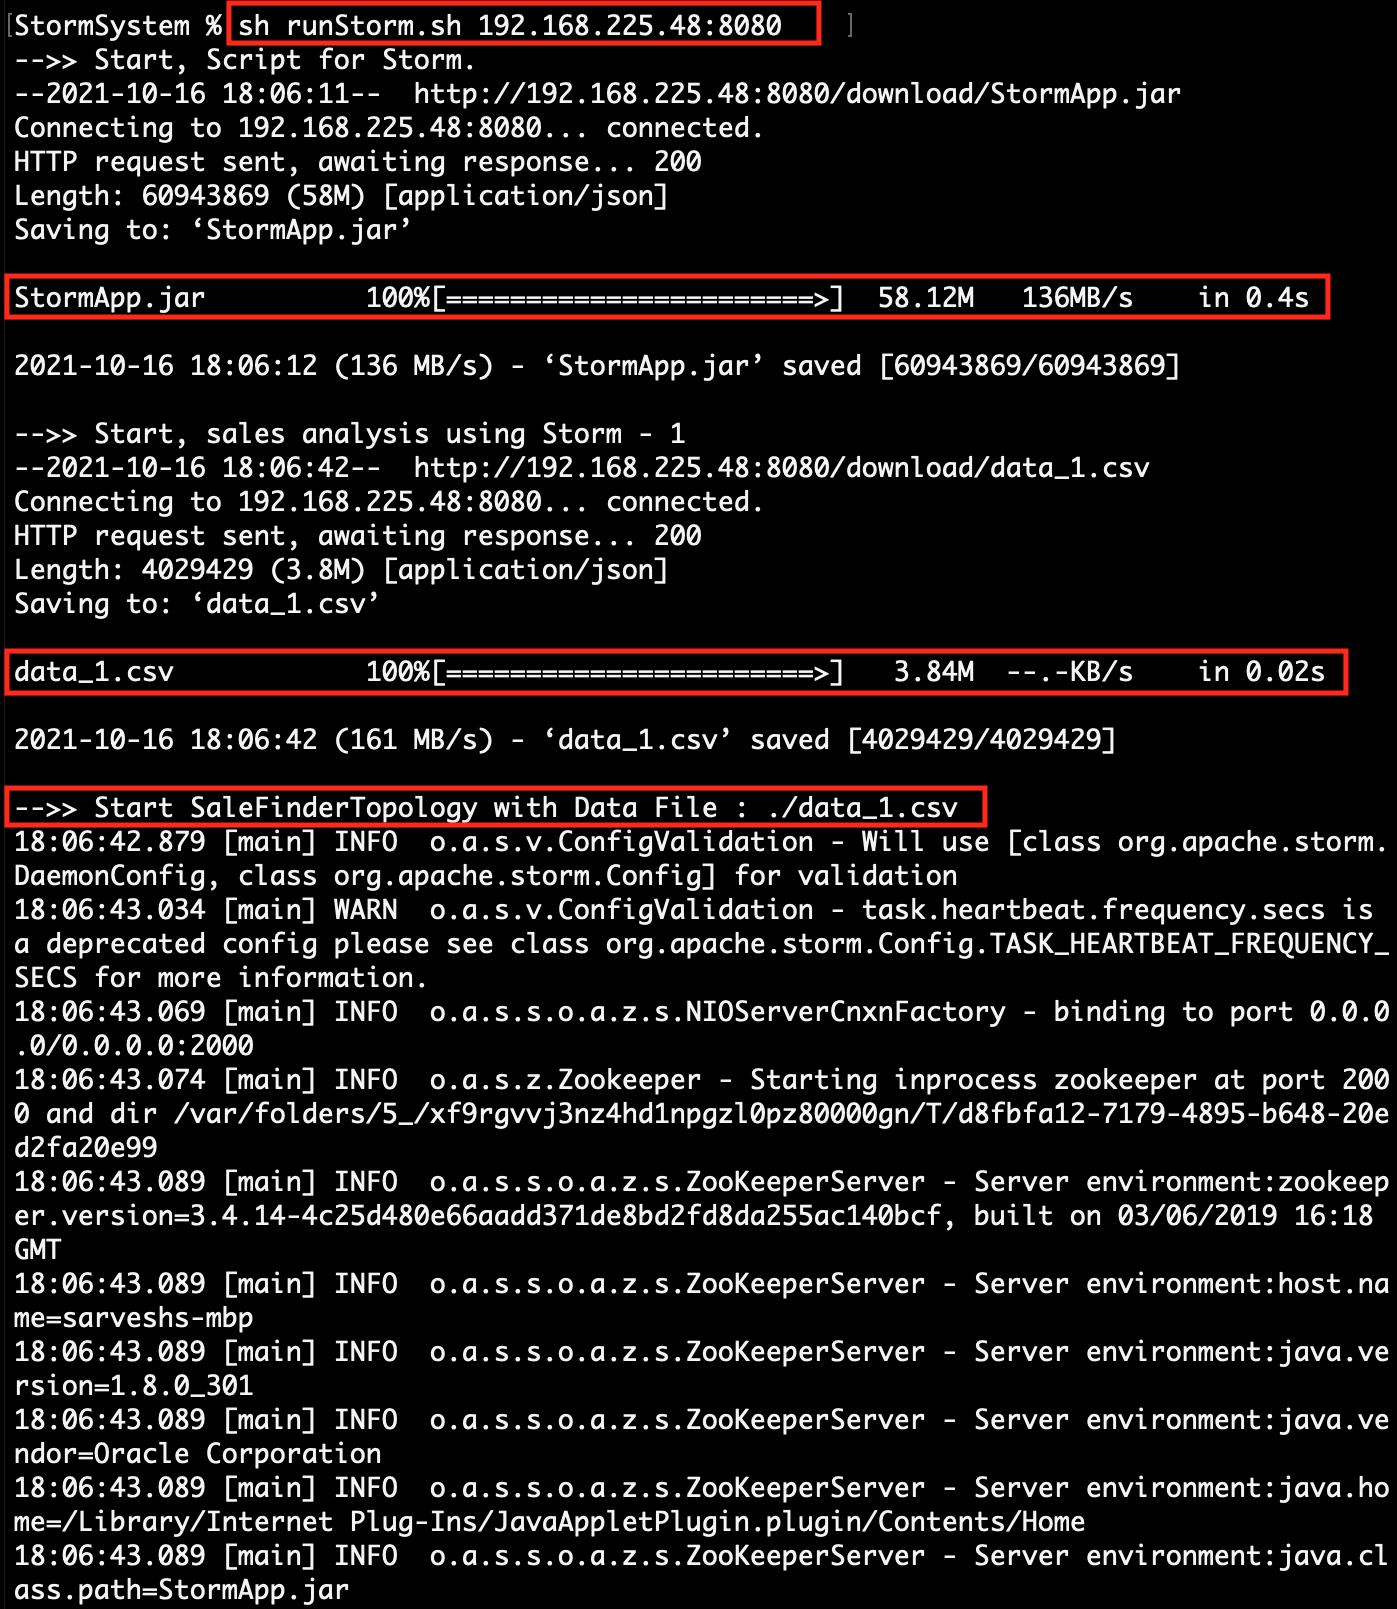
| 3. | Check the Client page on the browser using URL: http://localhost:8080 | Execute the script file runStorm.sh. At the time of running the script, pass the client-IP-address and client-port-number together as one argument value.
[ sh runStorm.sh <client-ip>:<client-port> ] sh runStorm.sh 192.168.225.48:8080
|
 |
 |
|
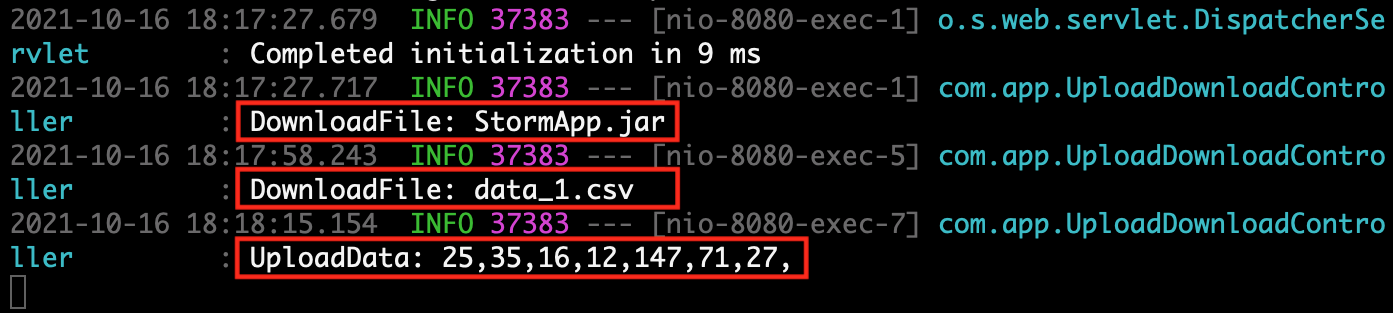
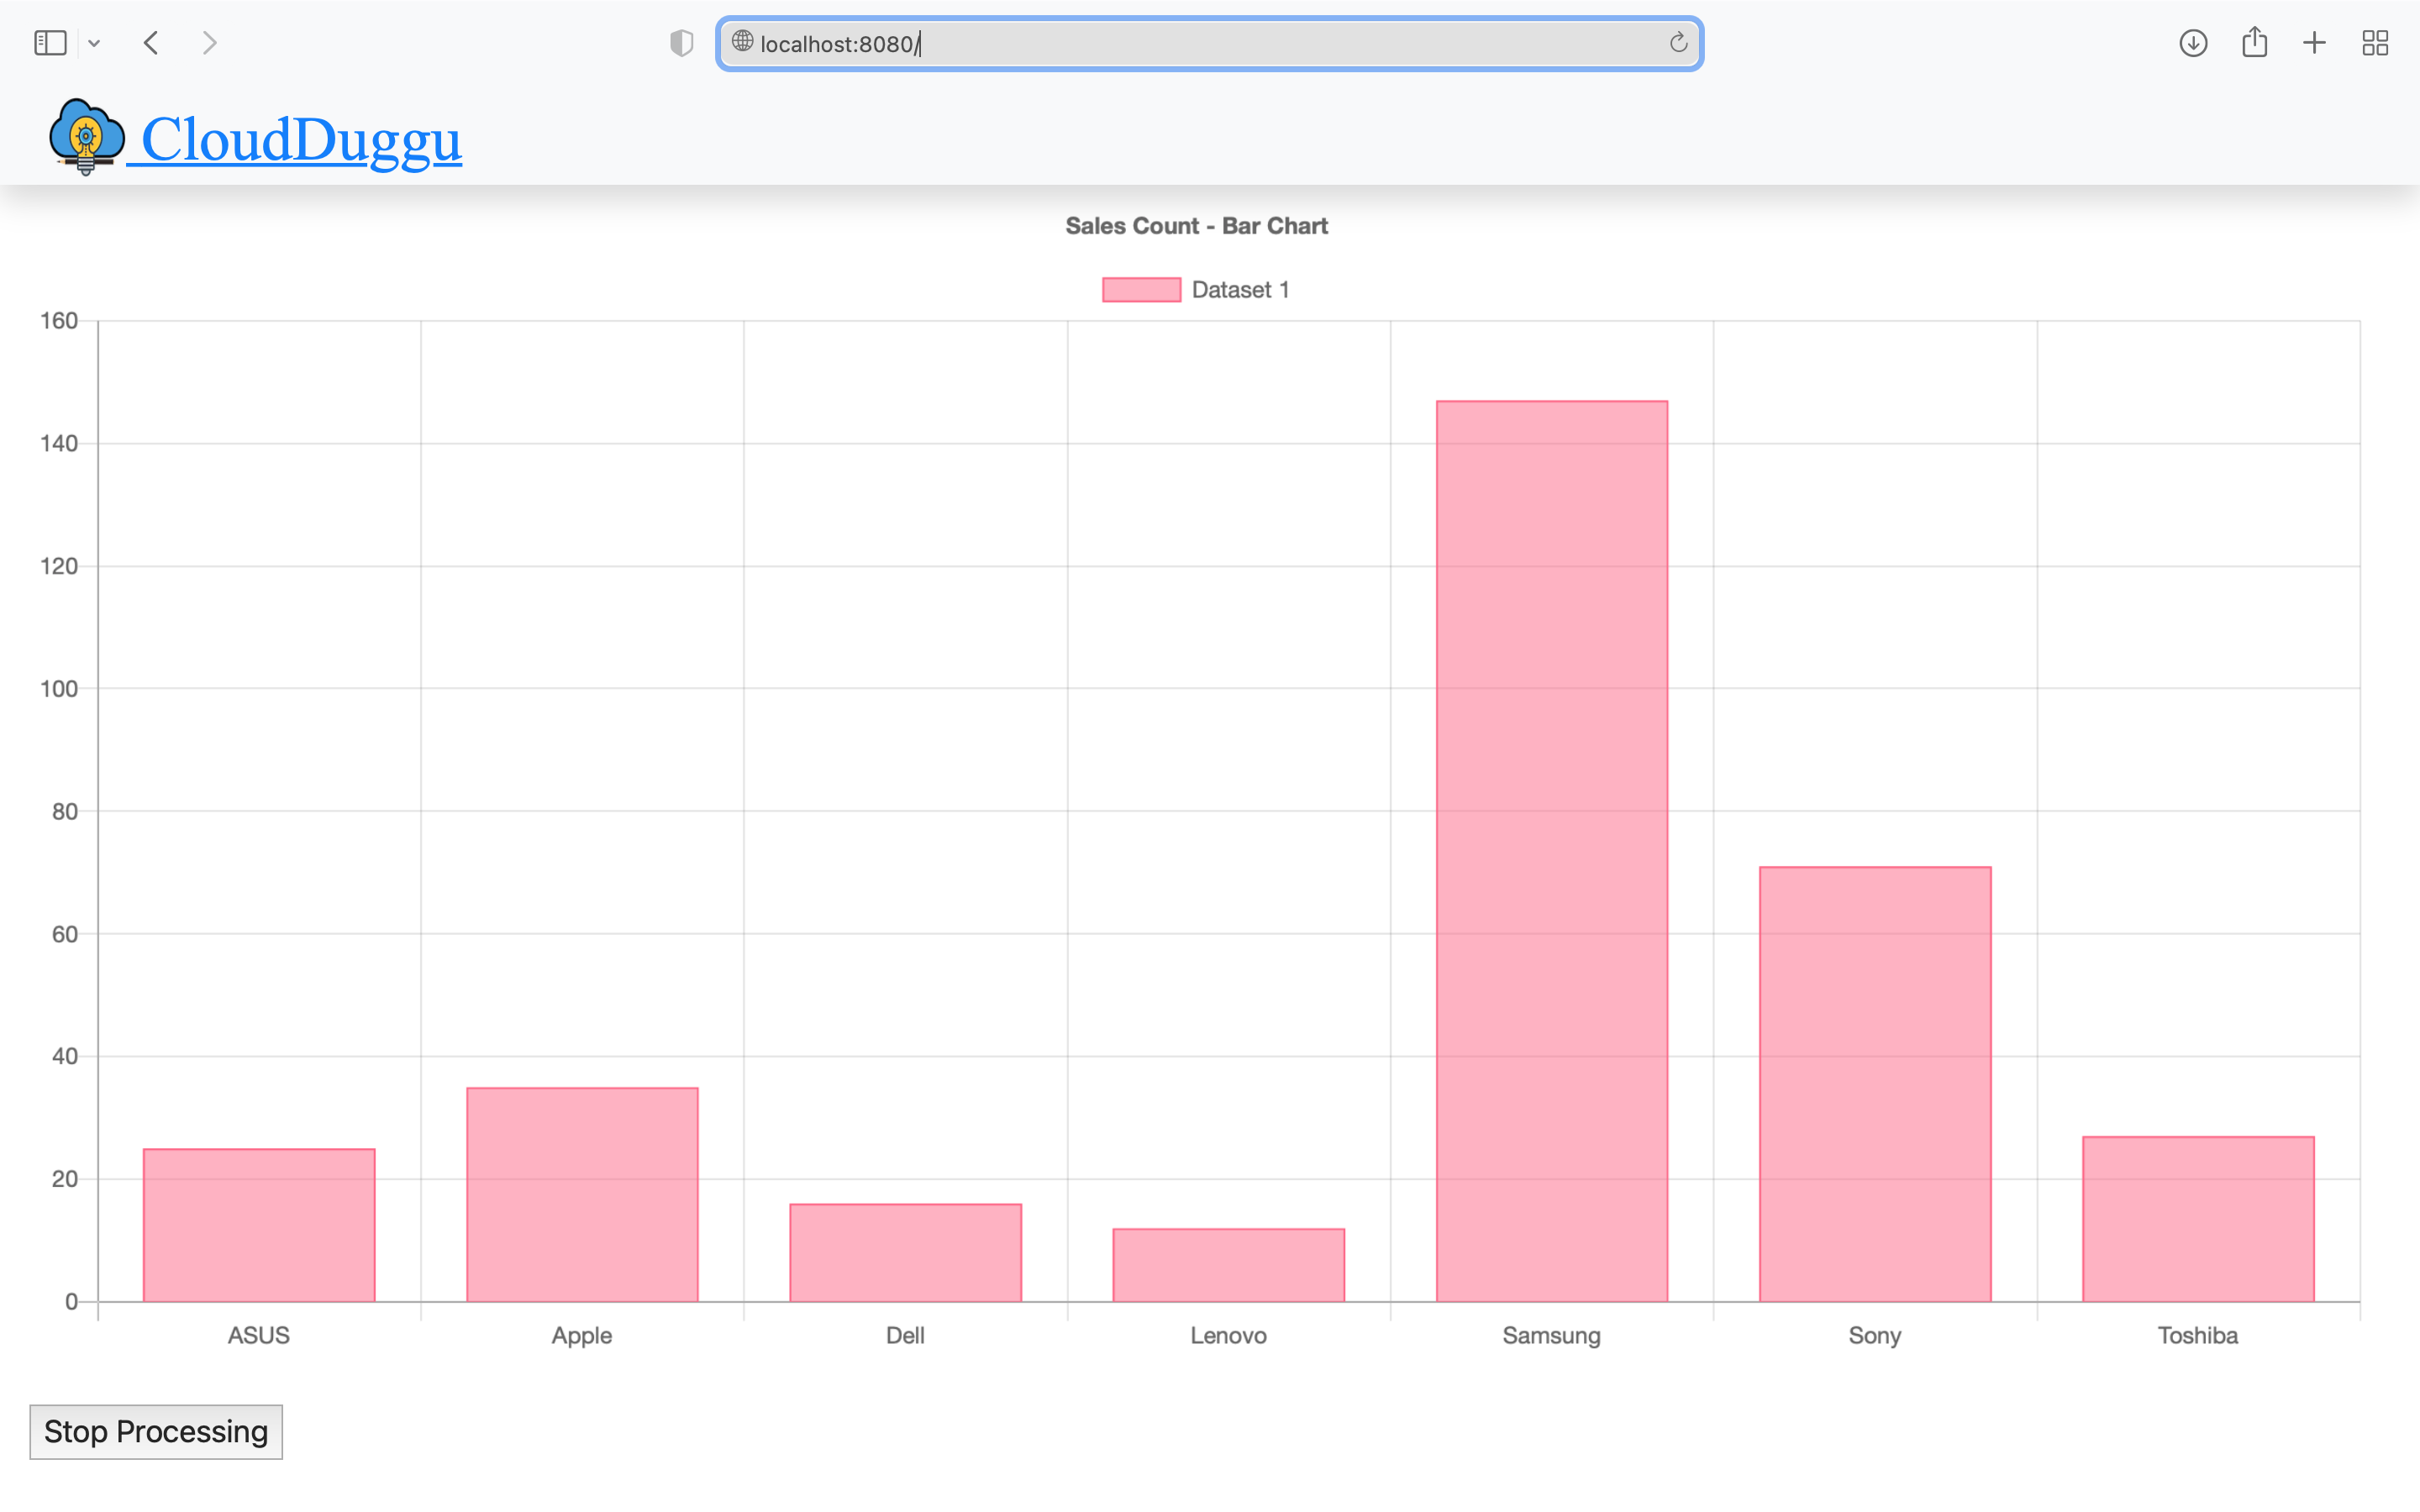
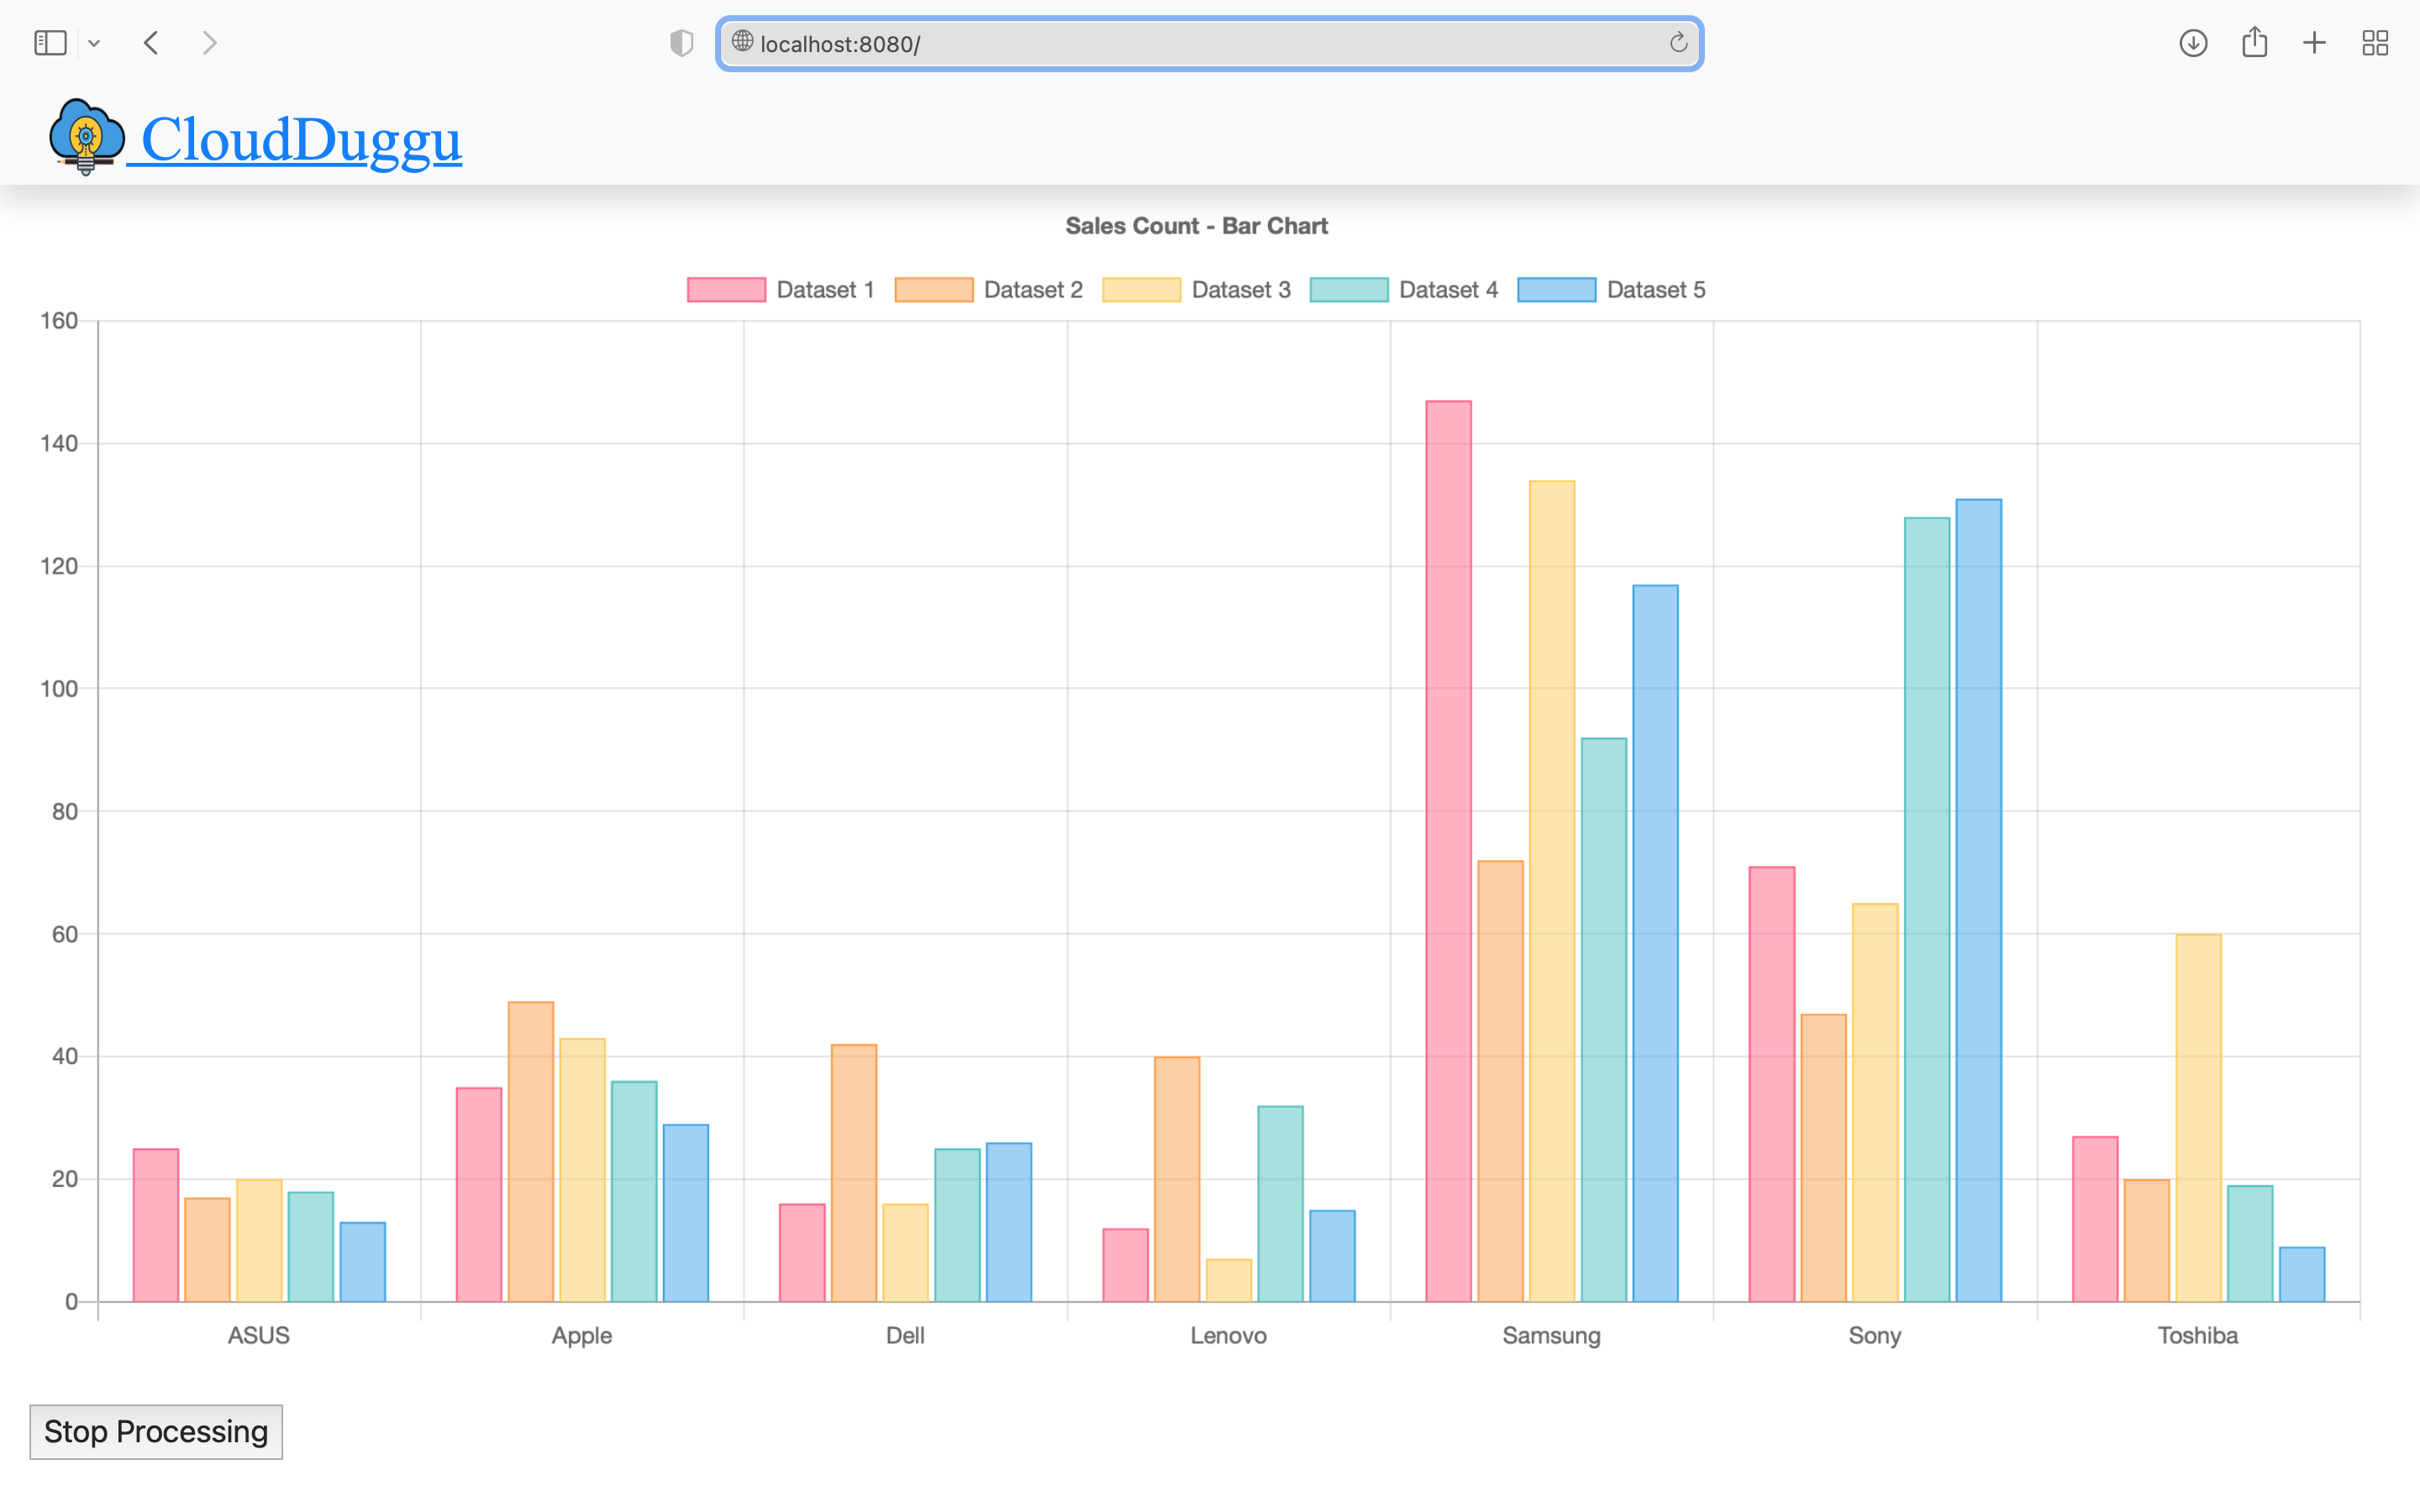
| 4. | The Client System is ready to download data files and upload result files. After the updating result by the Storm System, the Client System automatically shows result data in chart format on the browser page (http://192.168.225.48:8080). |
The Storm System continues to download data files in a loop from the Client System and process it through Storm Project Application and accordingly upload the result data file to the Client System. |
|
|
|
| 5. | The Client System collects all results data from the result file which is uploaded by the Storm System. | The Storm System executes all data files and updates the result file to the Client System accordingly as processed. |
 |
 |
|
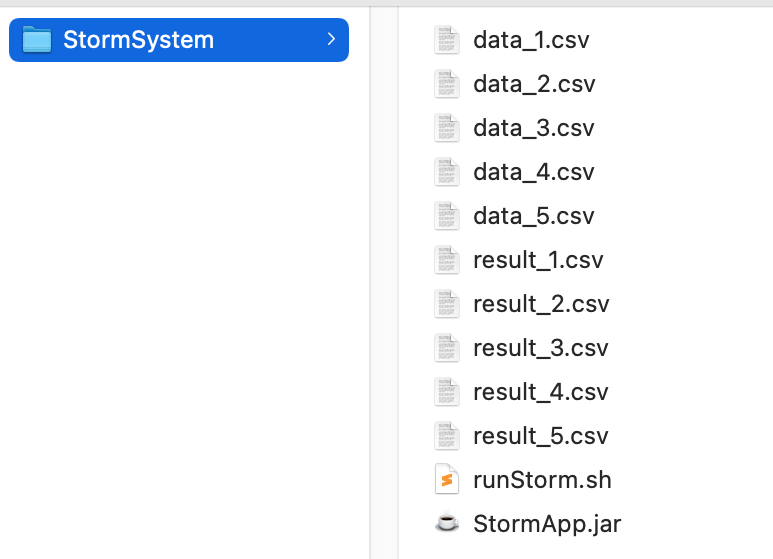
| 6. | The Client System is showing only a few selected sales data results on the browser view page because it is not possible to show all the data in the chart. That's why the client system filters the sales data from the uploaded result file and passes that filtered data to view on the page. | The Storm System local directory at the final result. |
 |
 |
4. Project Files Description In Details
(i). runStorm.sh
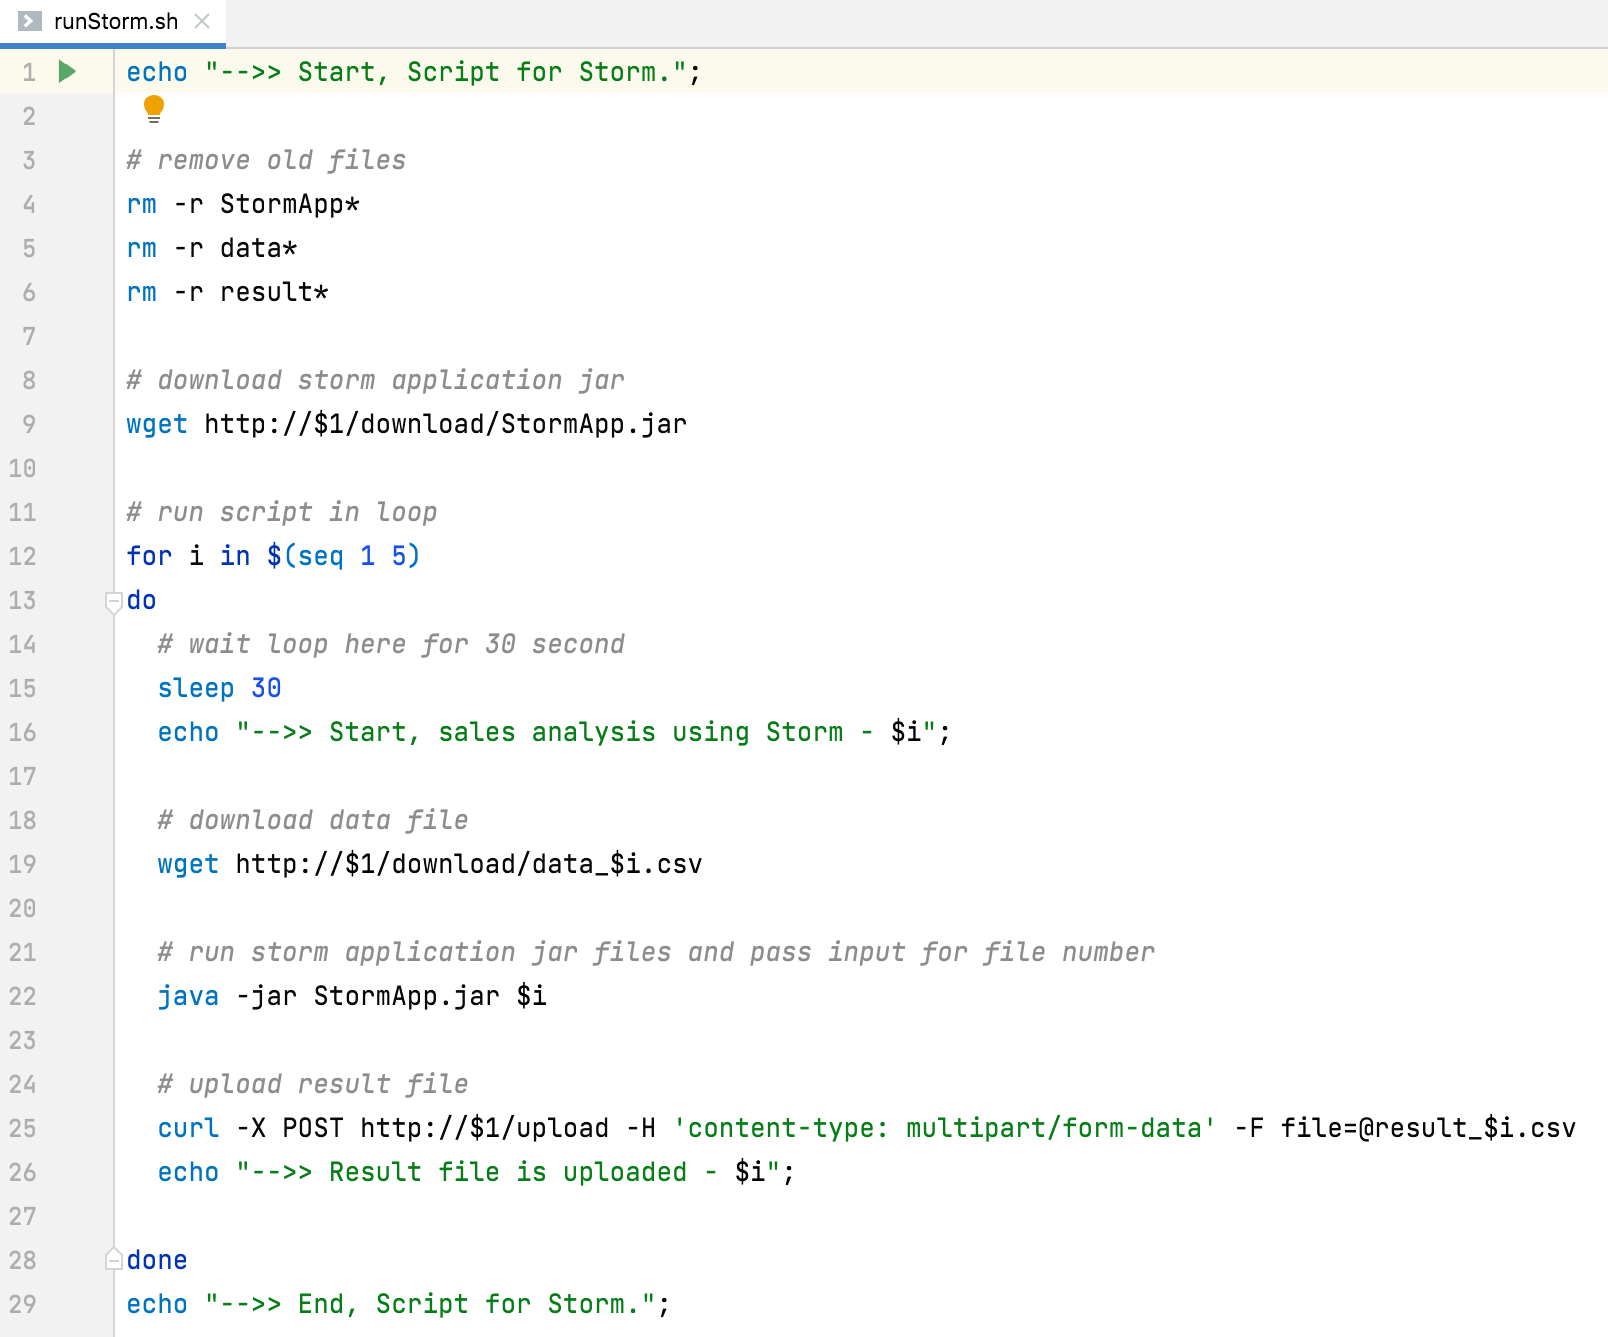
Using this script file (runStorm.sh) we can easily execute Storm services on the Storm System.
The following is the line-by-line explanation of the runStorm.sh script file.
runStorm.sh file has Linux shell scripts.
(Line 4, 5 & 6) Remove the old existing files from the Storm System local directory.
(Line 9) Download Storm Project Application executable jar (StormApp.jar) from the Client System.
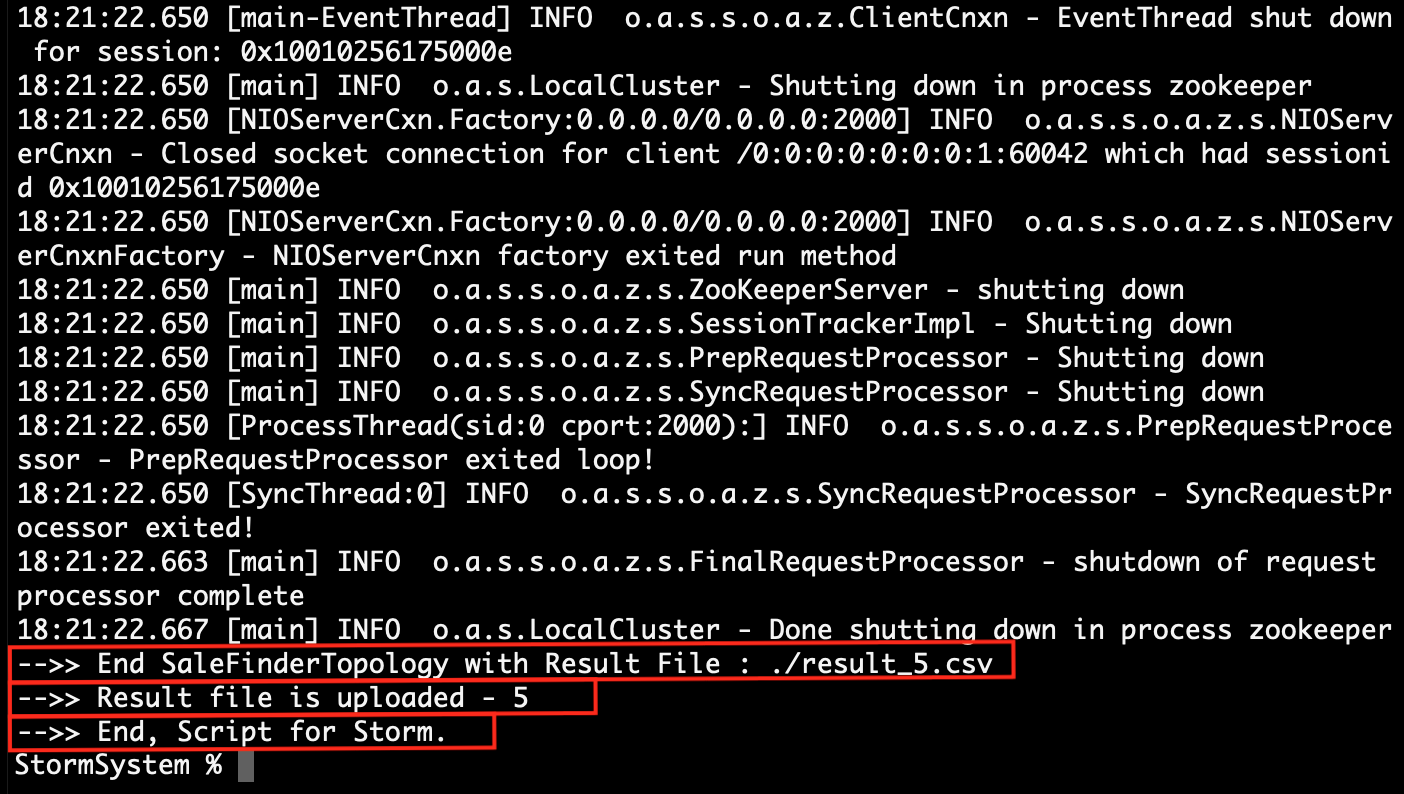
(Line 12) Execute the loop in the local Storm System. This project is decided to only process 5 raw sale data files, that's why it executes the loop for 5 times only.
(Line 19) Download data files from the Client System and use that file by the Storm Application for sales analysis.
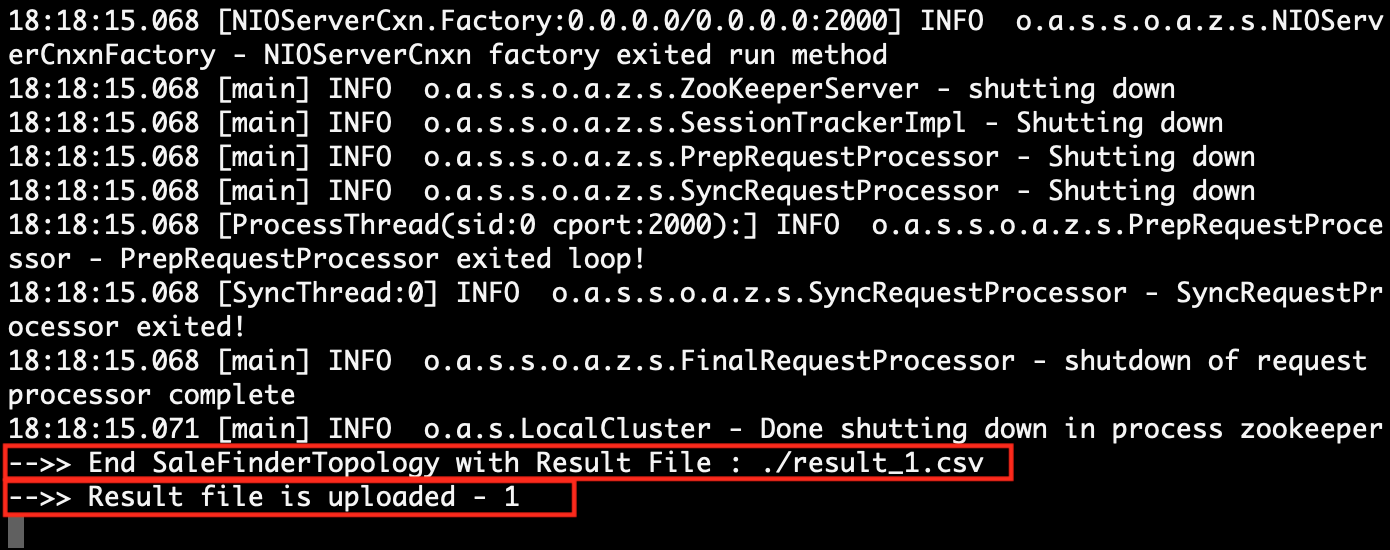
(Line 22) Execute Storm Project Application jar and start sale data analysis. After successfully execution, running the storm application create a result file on the same directory.
(Line 25) After the successful creation of the result file, the Storm System uploads the result file to the Client System.
The Storm Project ends here finally.
:) ...enjoy the Storm project.