Apache Hive DML stands for (Data Manipulation Language) which is used to insert, update, delete, and fetch data from Hive tables. Using DML commands we can load files into Apache Hive tables, write data into the filesystem from Hive queries, perform merge operation on the table, and so on.
The following list of DML statements is supported by Apache Hive.
Let us see each of the DML commands in detail.
1. Load Command
The load command is used to move datafiles into Hive tables. Load operations are pure copy/move operations.
- During the LOAD operation, if a LOCAL keyword is mentioned, then the LOAD command will check for the file path in the local filesystem.
- During the LOAD operation, if the LOCAL keyword is not mentioned, then the Hive will need the absolute URI of the file such as hdfs://namenode:9000/user/hive/project/data1.
- During LOAD operation, if the OVERWRITE keyword is mentioned, then the contents of the target table/partition will be deleted and replaced by the files referred by the file path.
- During LOAD operation, if the OVERWRITE keyword is not mentioned, then the files referred to by the file path will be appended to the table.
To perform load operation first we will create a table with the name “user_data” and then we will load “u.data” data from the ml-100k.zip dataset.
You can download the ml-100k.zip dataset from the below link and save it in your HIVE_HOME directory. We have saved this dataset under the below directory.
/home/cloudduggu/hive/examples/files/ml-100k/
Dataset Download Link:
$wget http://files.grouplens.org/datasets/movielens/ml-100k.zip
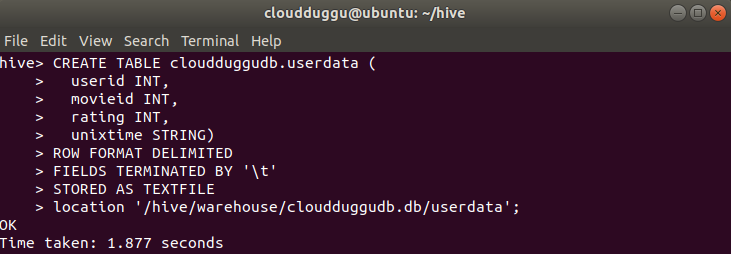
Create Table Statement:
CREATE TABLE cloudduggudb.userdata (
userid INT,
movieid INT,
rating INT,
unixtime STRING)
ROW FORMAT DELIMITED
FIELDS TERMINATED BY '\t'
STORED AS TEXTFILE
location '/hive/warehouse/cloudduggudb.db/userdata';
Command Output:
Load Table Syntax:
LOAD DATA [LOCAL] INPATH 'filepath' [OVERWRITE] INTO TABLE tablename [PARTITION (partcol1=val1, partcol2=val2 ...)]
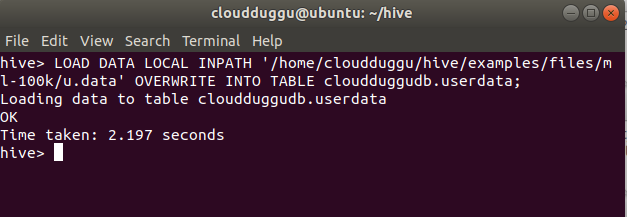
Load Table Statement:
LOAD DATA LOCAL INPATH '/home/cloudduggu/hive/examples/files/ml-100k/u.data' OVERWRITE INTO TABLE cloudduggudb.userdata;
Command Output:
2. Select Command
userid INT,
movieid INT,
rating INT,
unixtime STRING)
ROW FORMAT DELIMITED
FIELDS TERMINATED BY '\t'
STORED AS TEXTFILE
location '/hive/warehouse/cloudduggudb.db/userdata';
Load Table Syntax:
LOAD DATA [LOCAL] INPATH 'filepath' [OVERWRITE] INTO TABLE tablename [PARTITION (partcol1=val1, partcol2=val2 ...)]
Load Table Statement:
LOAD DATA LOCAL INPATH '/home/cloudduggu/hive/examples/files/ml-100k/u.data' OVERWRITE INTO TABLE cloudduggudb.userdata;
Command Output:
2. Select Command
Command Output:
2. Select Command
The Select statement project the records from the table.
Select Command Syntax:
SELECT [ALL | DISTINCT] select_expr, select_expr, ...
FROM table_reference
[WHERE where_condition]
[GROUP BY col_list]
[ORDER BY col_list]
[CLUSTER BY col_list
| [DISTRIBUTE BY col_list] [SORT BY col_list]
]
[LIMIT [offset,] rows]
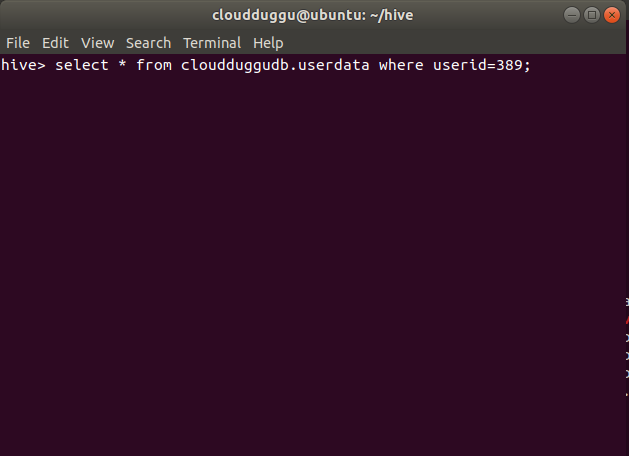
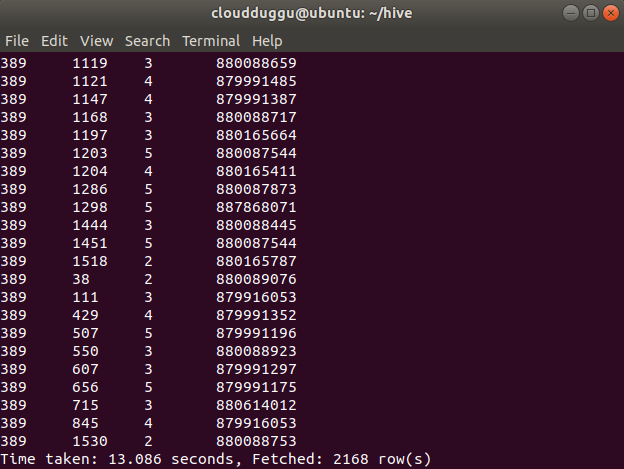
Select Command Statement:
SELECT * FROM cloudduggudb.userdata WHERE userid=389;
Command Output:
3. Insert into Command
FROM table_reference
[WHERE where_condition]
[GROUP BY col_list]
[ORDER BY col_list]
[CLUSTER BY col_list
| [DISTRIBUTE BY col_list] [SORT BY col_list]
]
[LIMIT [offset,] rows]
Command Output:
3. Insert into Command
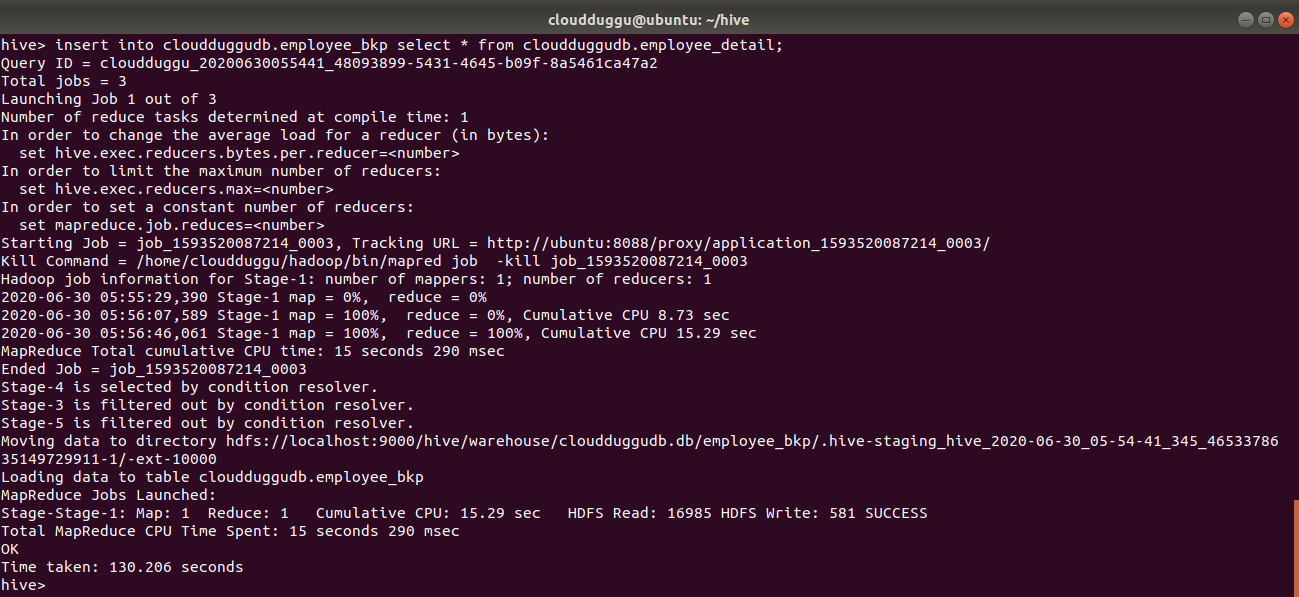
The Insert into command appends data from one table to another table.
We have created two tables to show this example. The name of the first table is “cloudduggudb.employee_detail” and the name of the second table is “cloudduggudb. employee_bkp”.
We have inserted data into cloudduggudb.employee_detail using load command now we will copy the same data into cloudduggudb. employee_bkp using INSERT INTO command.
Create Table Statement:
CREATE TABLE IF NOT EXISTS cloudduggudb.employee_detail ( eid int, name String,
salary String, destination String)
COMMENT 'Employee details'
ROW FORMAT DELIMITED
FIELDS TERMINATED BY ' '
LINES TERMINATED BY '\n'
STORED AS TEXTFILE
location '/hive/warehouse/cloudduggudb.db/employee_detail';
Load Data Statement:
LOAD DATA LOCAL INPATH '/home/cloudduggu/hive/examples/files/customers.txt' OVERWRITE INTO TABLE cloudduggudb.employee_detail;
Create Table Statement:
CREATE TABLE IF NOT EXISTS cloudduggudb.employee_bkp ( eid int, name String,
salary String, destination String)
COMMENT 'Employee details'
ROW FORMAT DELIMITED
FIELDS TERMINATED BY ' '
LINES TERMINATED BY '\n'
STORED AS TEXTFILE
location '/hive/warehouse/cloudduggudb.db/employee_bkp';
salary String, destination String)
COMMENT 'Employee details'
ROW FORMAT DELIMITED
FIELDS TERMINATED BY ' '
LINES TERMINATED BY '\n'
STORED AS TEXTFILE
location '/hive/warehouse/cloudduggudb.db/employee_detail';
Create Table Statement:
CREATE TABLE IF NOT EXISTS cloudduggudb.employee_bkp ( eid int, name String,
salary String, destination String)
COMMENT 'Employee details'
ROW FORMAT DELIMITED
FIELDS TERMINATED BY ' '
LINES TERMINATED BY '\n'
STORED AS TEXTFILE
location '/hive/warehouse/cloudduggudb.db/employee_bkp';
salary String, destination String)
COMMENT 'Employee details'
ROW FORMAT DELIMITED
FIELDS TERMINATED BY ' '
LINES TERMINATED BY '\n'
STORED AS TEXTFILE
location '/hive/warehouse/cloudduggudb.db/employee_bkp';
After both table creations, let us use the INSERT INTO command to append data into cloudduggudb.employee_bkp.
Insert Into Syntax:
INSERT INTO TABLE tablename1 [PARTITION (partcol1=val1, partcol2=val2 ...)] select_statement1 FROM from_statement;
Insert Into Statement:
INSERT INTO cloudduggudb.employee_bkp SELECT * FROM cloudduggudb.employee_detail;
Command Output:
4. Insert Overwrite Command
Command Output:
4. Insert Overwrite Command
The Insert overwrites perform the overwriting of the existing content of the table.
In this example we will use both tables which we used in the INSERT INTO section and overwrite the content of "cloudduggudb.employee_bkp" with "cloudduggudb.employee_detail".
Insert Overwrite Syntax:
INSERT OVERWRITE TABLE tablename1 [PARTITION (partcol1=val1, partcol2=val2 ...) [IF NOT EXISTS]] select_statement1 FROM from_statement;
Insert Overwrite Statement:
INSERT OVERWRITE TABLE cloudduggudb.employee_bkp SELECT a.* FROM cloudduggudb.employee_detail a;
Command Output:

5. Insert Values Command
Command Output:
5. Insert Values Command
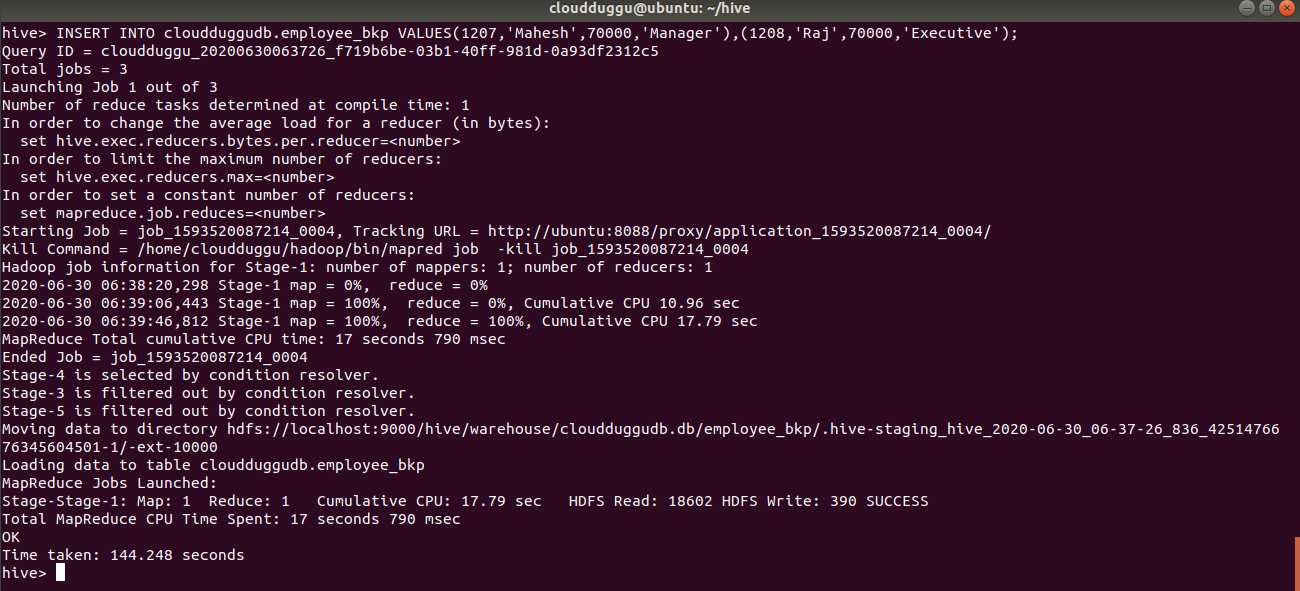
By using the Insert Values command we can manually insert records in the existing table. We will use the “cloudduggudb.employee_bkp” table and insert 2 records in that.
Insert Values Syntax:
INSERT INTO TABLE tablename [PARTITION (partcol1[=val1], partcol2[=val2] ...)] VALUES values_row [, values_row ...];
Insert Values Statement:
INSERT INTO cloudduggudb.employee_bkp VALUES(1207,'Mahesh',70000,'Manager'),(1208,'Raj',70000,'Executive');
Command Output:
6. Delete Command
Command Output:
6. Delete Command
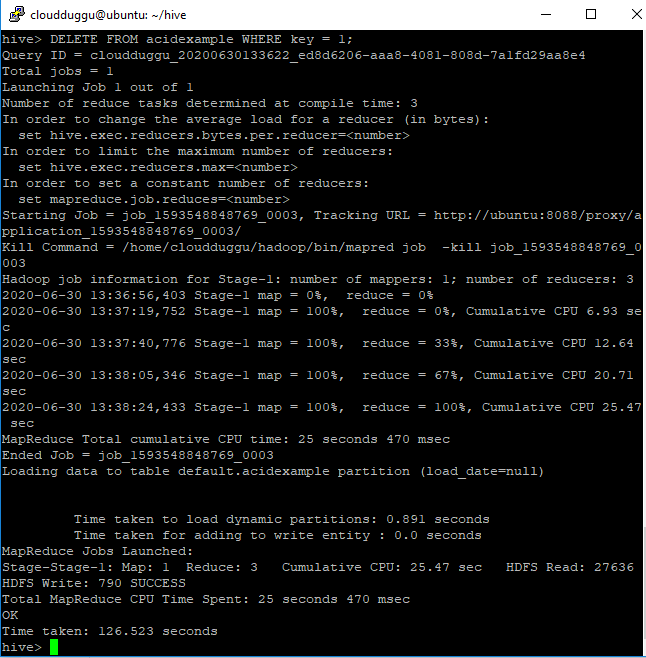
The Delete command is used to delete data from the table. If we supply where clause then it will delete that particular record only.
To perform Delete/Update operations in Apache Hive we need to follow the below points while creating a table otherwise delete/update statements with fail with error 10297.
Note: In Apache Hive, We can perform a DELETE statement on those tables which follow the ACID property.
Please follow the below points while creating the ACID enable table in Apache Hive.
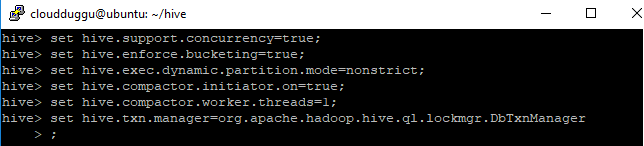
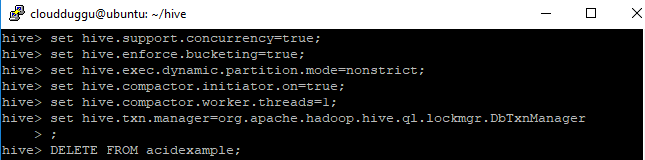
- Before performing the create, delete, update table we should enable the ACID property using the below parameters on Hive prompt.
- hive>set hive.support.concurrency=true;
- hive>set hive.enforce.bucketing=true;
- hive>set hive.exec.dynamic.partition.mode=nonstrict;
- hive>set hive.compactor.initiator.on=true;
- hive>set hive.compactor.worker.threads=1;
- hive>set hive.txn.manager=org.apache.hadoop.hive.ql.lockmgr.DbTxnManager;
- File format should be ORC which can be defined with TBLPROPERTIES(‘transactional’=’true’).
- The table should be created with CLUSTERED BY followed by Buckets.
Now we will enable ACID property and create a table. After table creation, we will insert data.
Create Table Statement:
CREATE TABLE acidexample (key int, value int)
PARTITIONED BY (load_date date)
CLUSTERED BY(key) INTO 3 BUCKETS
STORED AS ORC TBLPROPERTIES ('transactional'='true');
Insert Table Statement:
INSERT INTO acidexample partition (load_date='2016-03-01') VALUES (1, 1);
INSERT INTO acidexample partition (load_date='2016-03-02') VALUES (2, 2);
INSERT INTO acidexample partition (load_date='2016-03-03') VALUES (3, 3);
Delete Command Syntax:
DELETE FROM tablename [WHERE expression];
Delete Command with where Statement:
DELETE FROM acidexample WHERE key = 1;
Command Output:
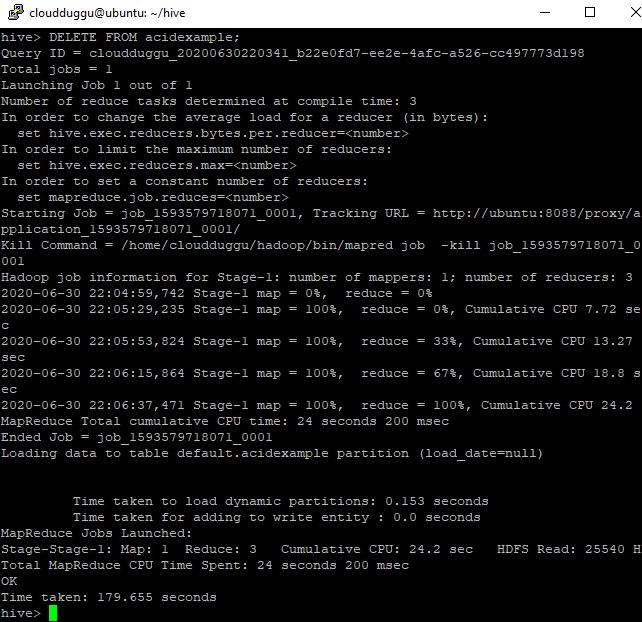
Delete Statement:
DELETE FROM acidexample;
Command Output:
7. Update Command
PARTITIONED BY (load_date date)
CLUSTERED BY(key) INTO 3 BUCKETS
STORED AS ORC TBLPROPERTIES ('transactional'='true');
Delete Command Syntax:
DELETE FROM tablename [WHERE expression];
Delete Command with where Statement:
DELETE FROM acidexample WHERE key = 1;
Command Output:
Delete Statement:
DELETE FROM acidexample;
Command Output:
7. Update Command
Command Output:
Delete Statement:
DELETE FROM acidexample;
Command Output:
7. Update Command
Command Output:
7. Update Command
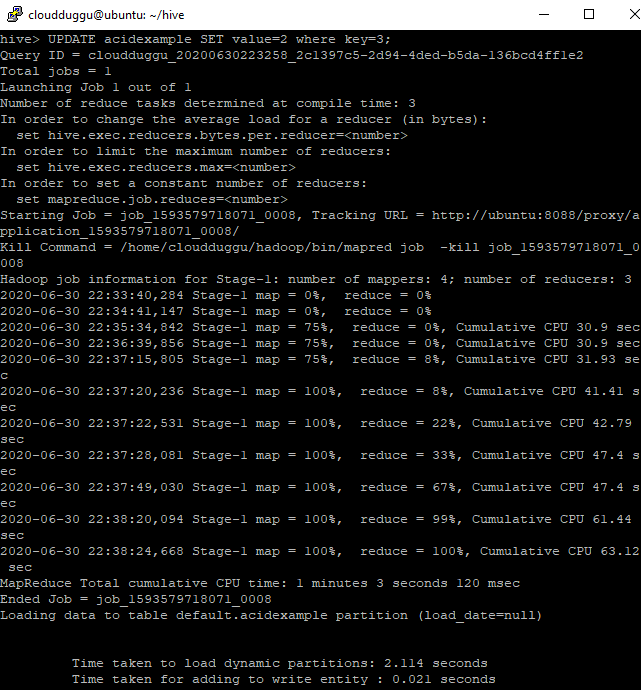
The Update command updates the existing records if where clause is supplied otherwise it will delete table data. We can’t perform update command on Partitioning and Bucketing columns.
Note: In Apache Hive, We can perform an UPDATE statement on those tables which follow the ACID property.
Update Command Syntax:
UPDATE tablename SET column = value [, column = value ...] [WHERE expression];
Update Statement:
UPDATE acidexample SET value=2 where key=3;
Command Output:

8. Export Command
Update Statement:
UPDATE acidexample SET value=2 where key=3;
Command Output:
8. Export Command
8. Export Command
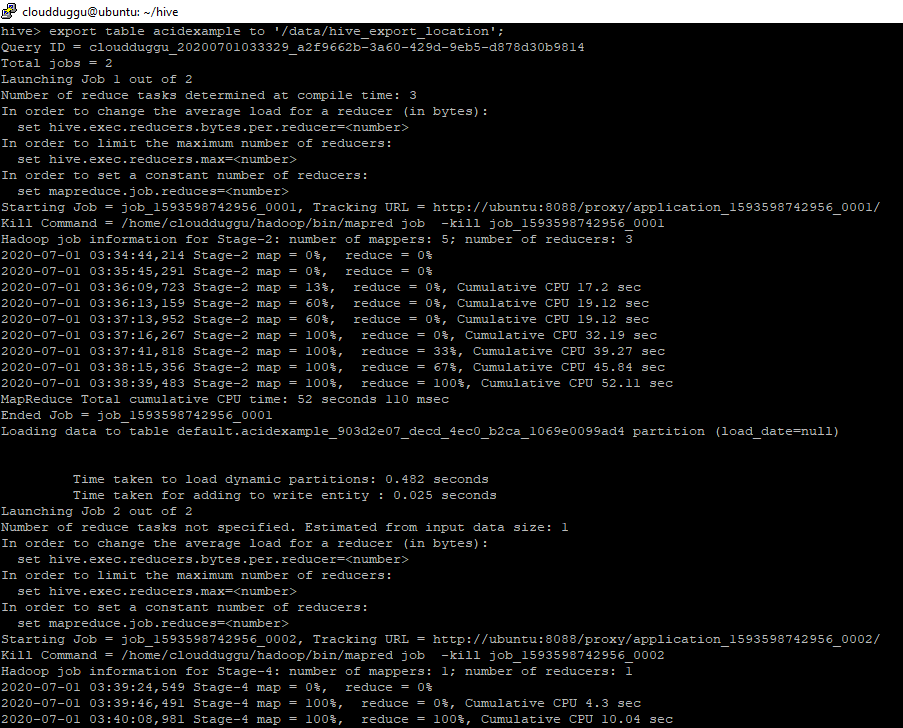
The Apache Hive EXPORT command is used in case we need to exports the table's metadata to some other location.
To perform this activity we have created a directory “hive_export_location“in HDFS under /data/ hive_export_location and exporting table “acidexample”.
Export Command Syntax:
EXPORT TABLE tablename [PARTITION (part_column="value"[, ...])]
TO 'export_target_path' [ FOR replication('eventid') ]
Export Statement:
export table acidexample to '/data/hive_export_location';
Command Output:
TO 'export_target_path' [ FOR replication('eventid') ]
Command Output:
After export, we can verify _metadata and data subdirectory of table “acidexample” in HDFS.

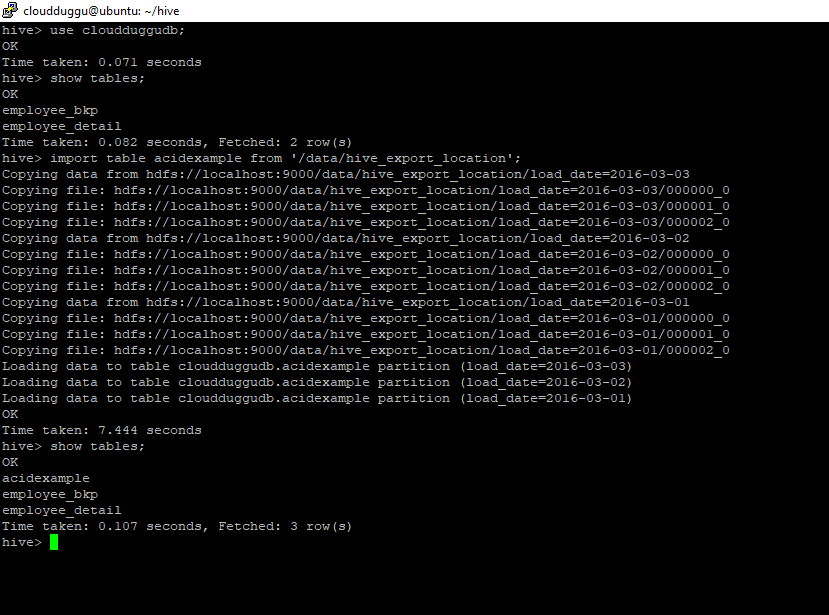
9. Import Command
Apache Hive IMPORT command imports the data from a specific location into Hive tables.
To perform this activity we will copy table “acidexample” data from HDFS location “data/ hive_export_location” into the “cloudduggudb” database.
Import Command Syntax:
IMPORT [[EXTERNAL] TABLE new_or_original_tablename [PARTITION (part_column="value"[, ...])]]
FROM 'source_path'
[LOCATION 'import_target_path']
Import Statement:
import table acidexample from '/data/hive_export_location';
Command Output:
FROM 'source_path'
[LOCATION 'import_target_path']