1. Project Idea
1. We have taken an example of Employee-Relationship Data flow for this Spark GraphX Project.
2. In this project, we have used a self-made Employee-Relationship CSV data file for graphical evaluation.
3. Spark GraphX java project will run on Spark system and it will have graph data building logic.
4. Spring Java Client project will run on the Client system and it will show result data in graph and tabular format.
2. Spark GraphX Project Workflow
| a. Start the Client system and Spark system. | 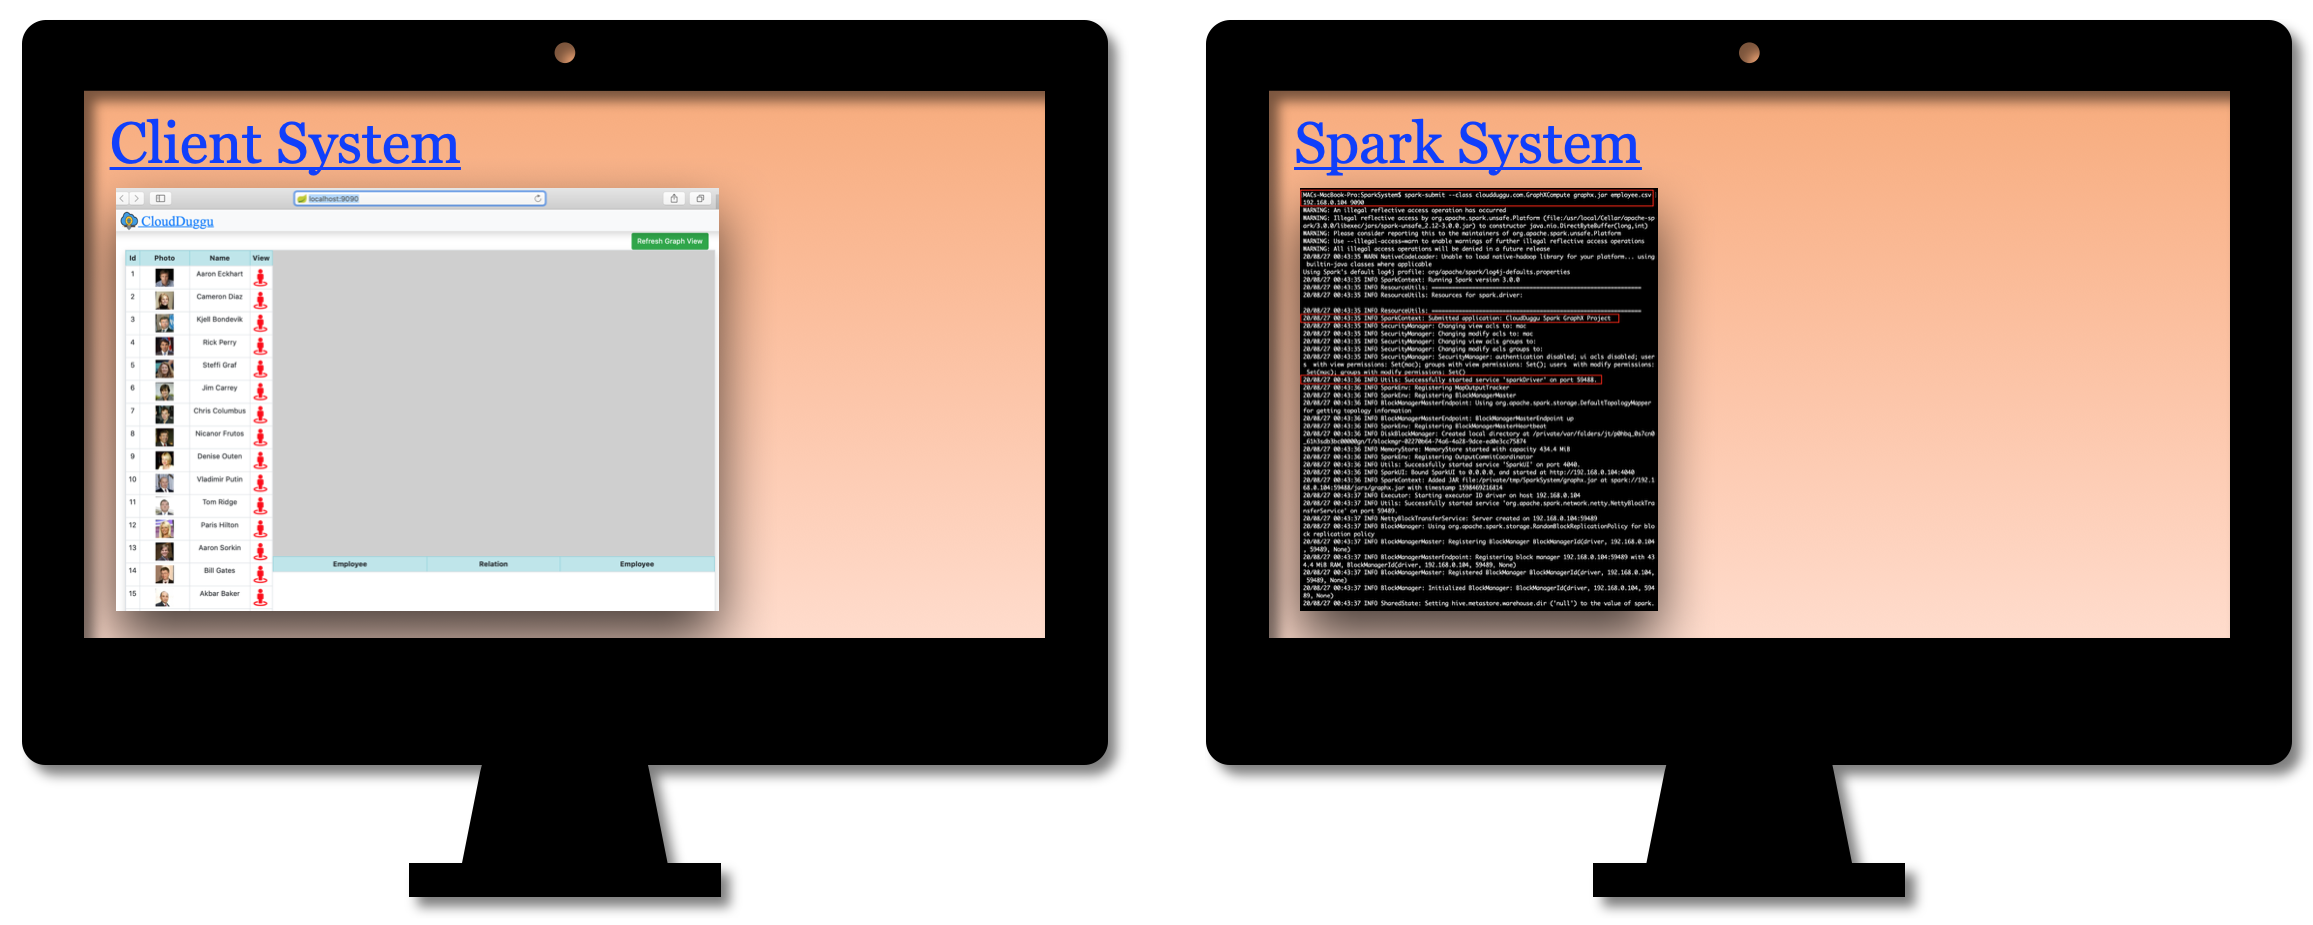 |
| b. The client system generates an employee relation evaluation request to the Spark system. | 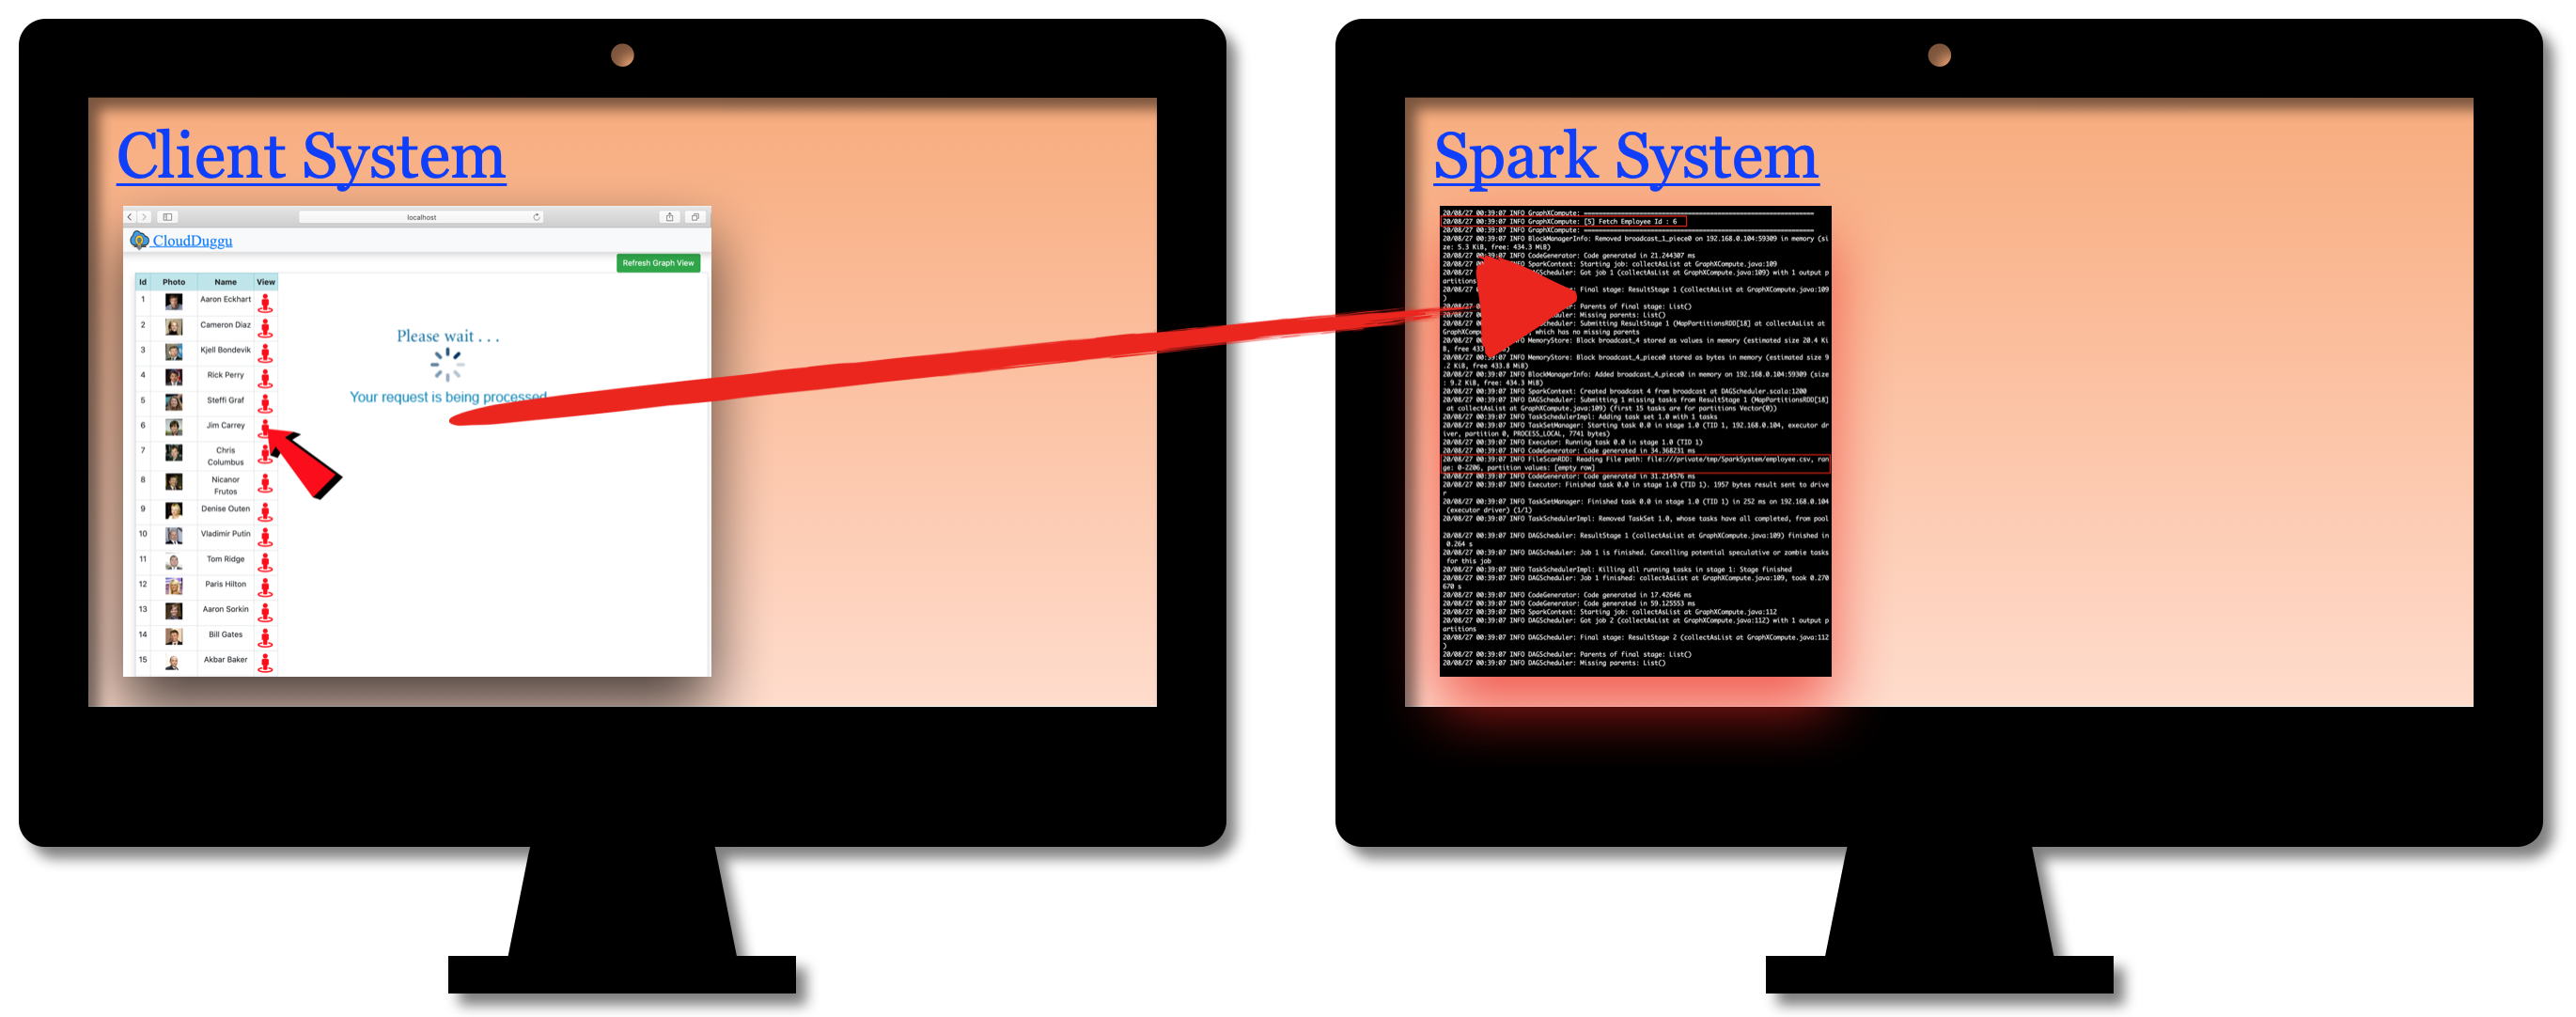 |
| c. Spark system process client request and after successful execution of the program, Spark will upload the result to Client System. | 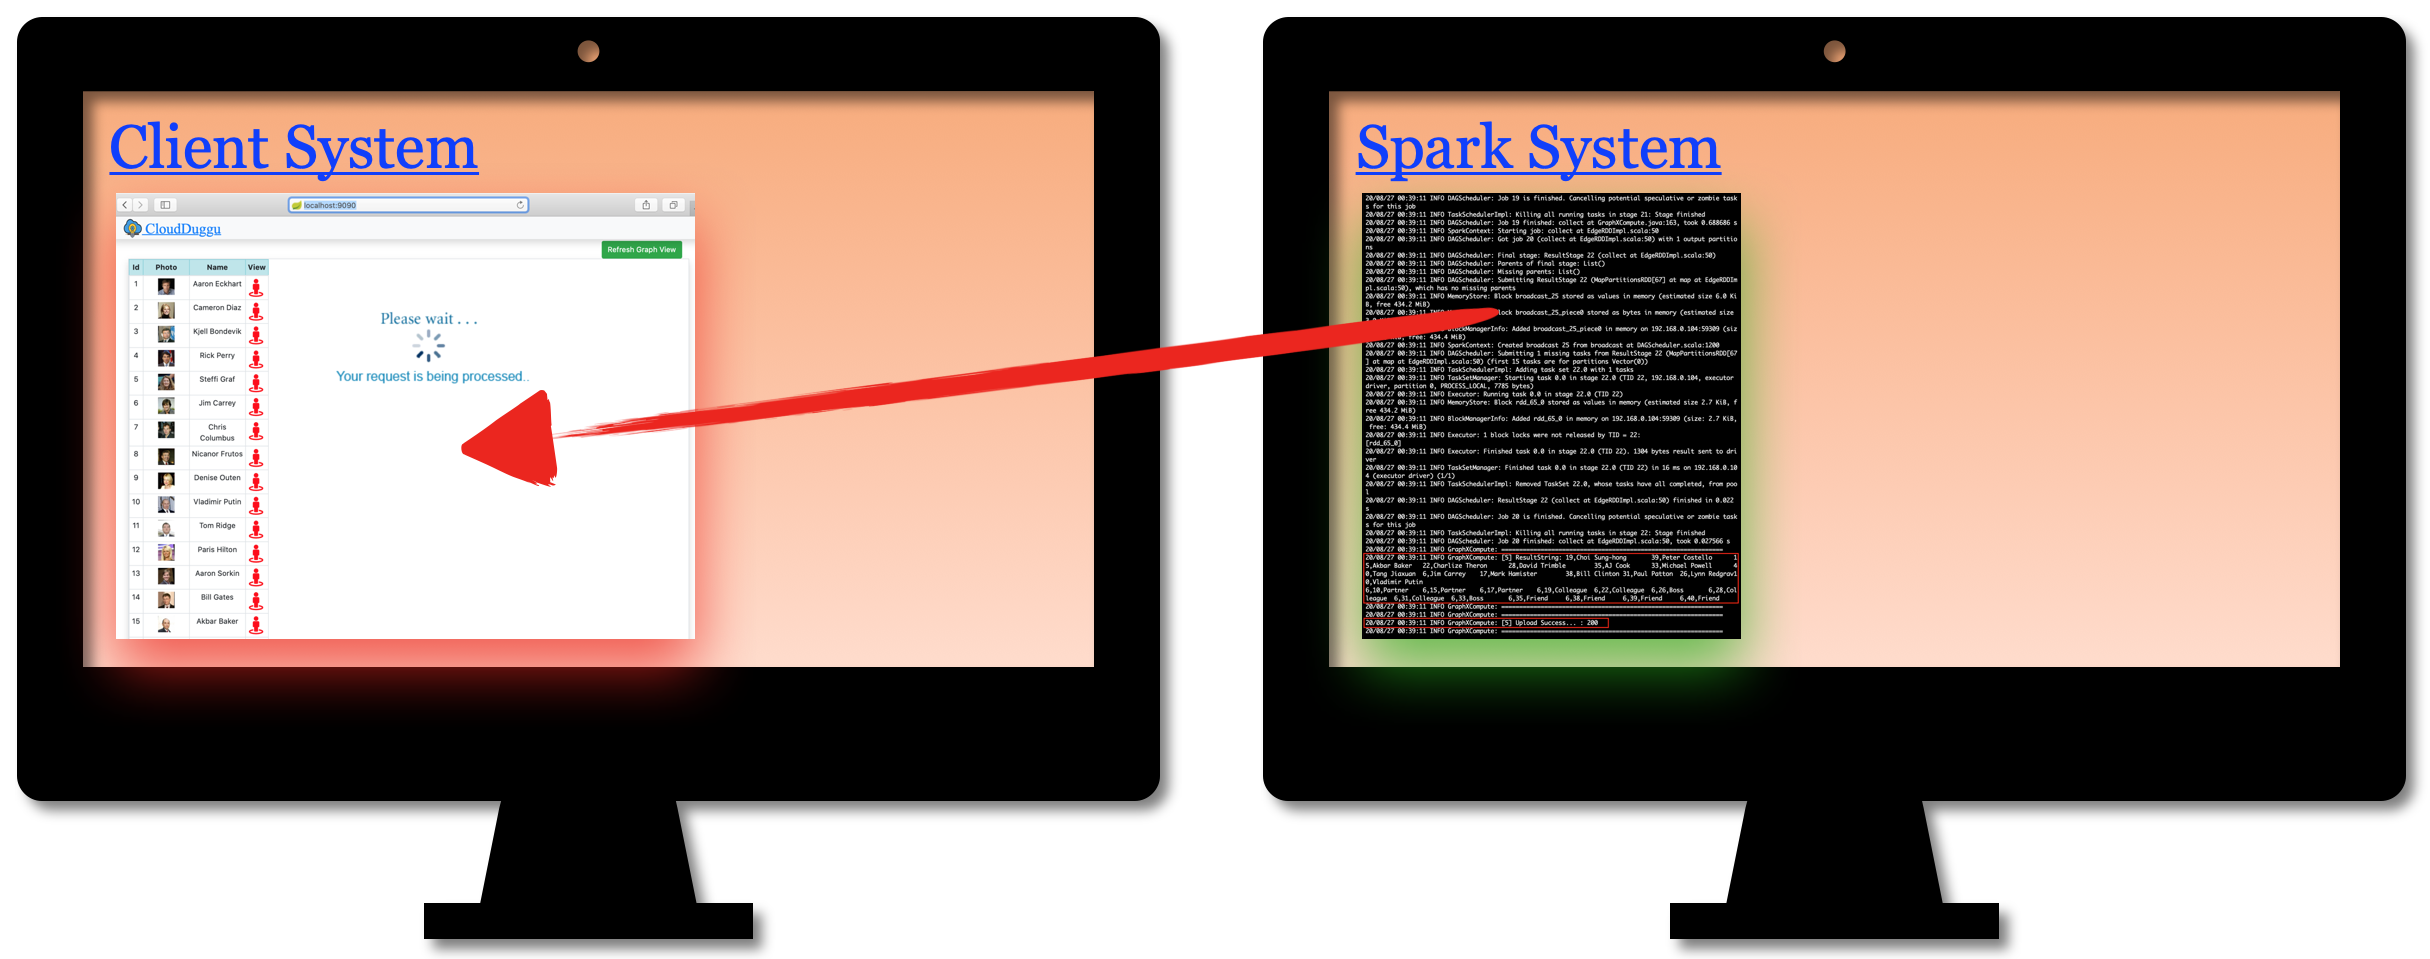 |
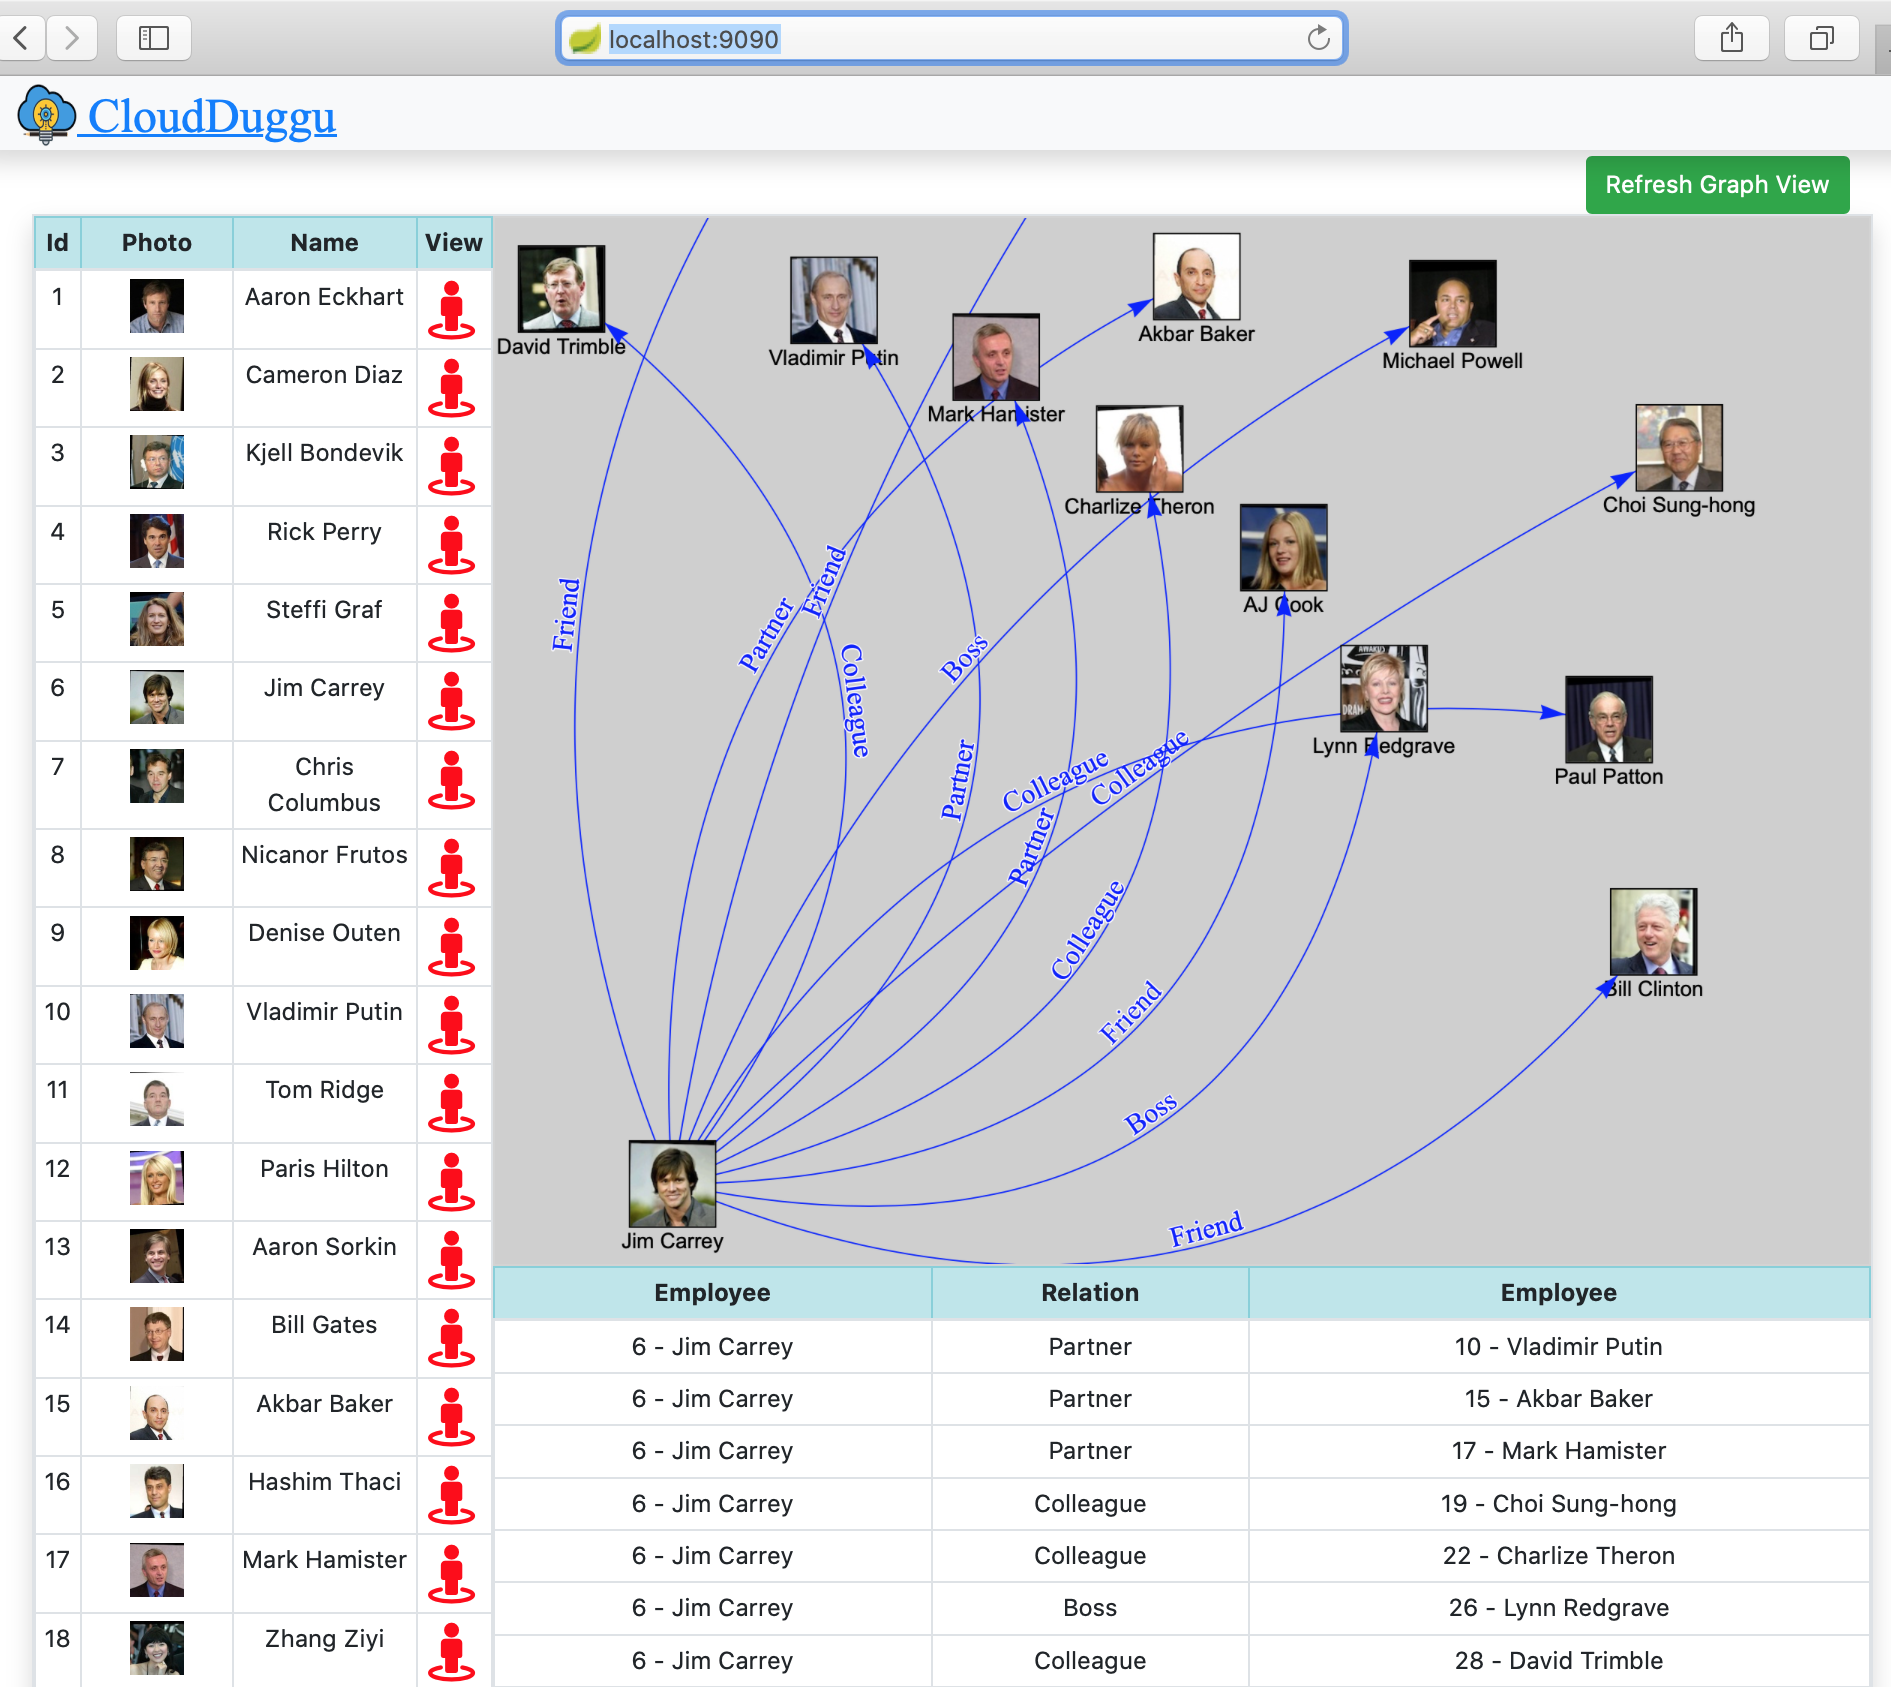
| d. After uploading the successful result to the Client system, it will show the result in graph and table format. | 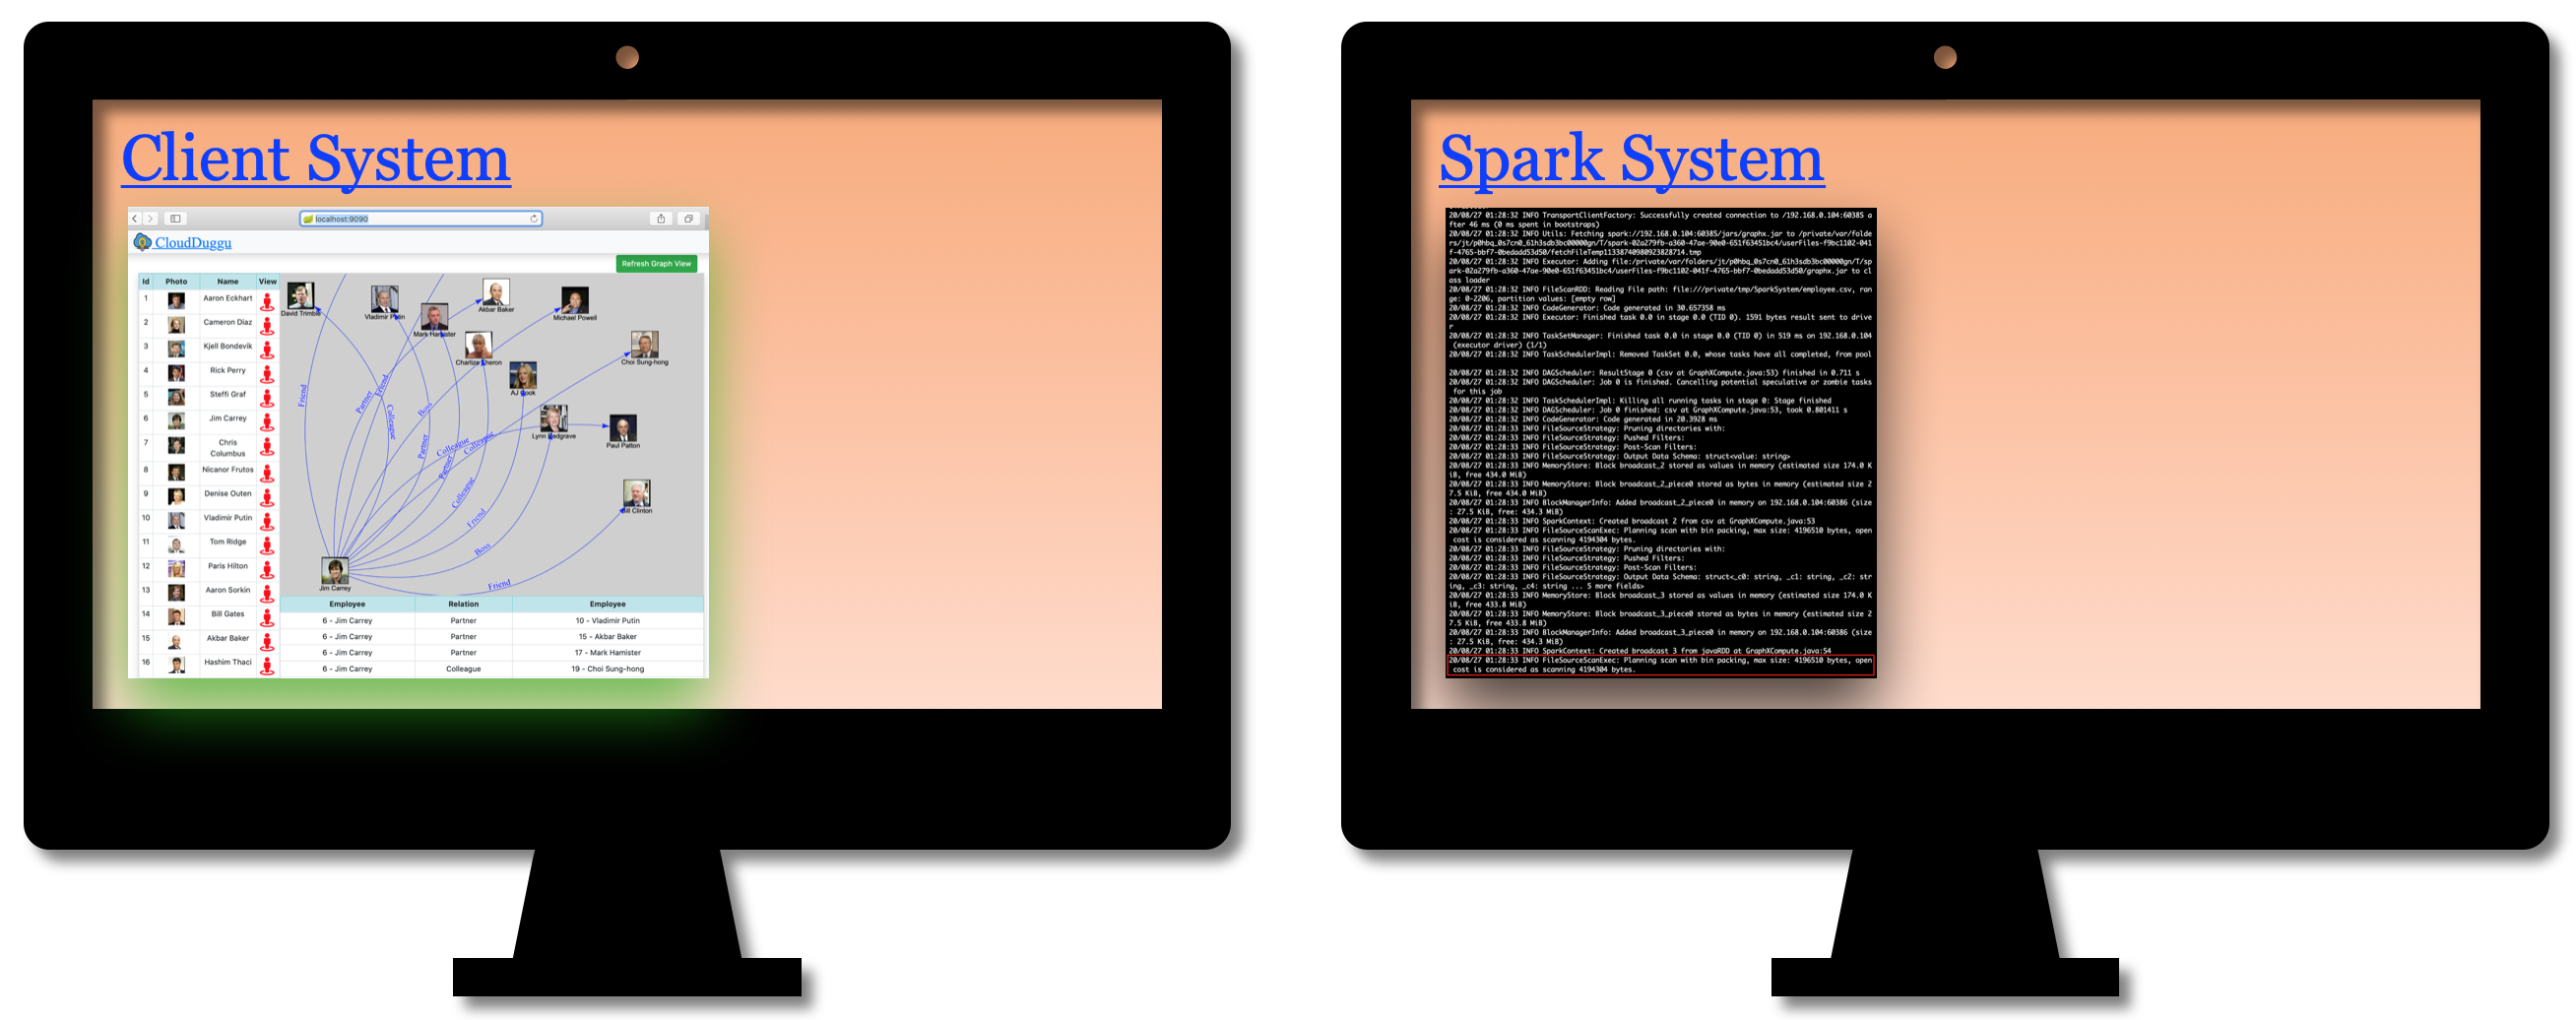 |
3. Building Of Project
To run this project you can install VM (Virtual Machine) on your local system and configured Spark on that. After this configuration, your local system will work as a client system and Spark VM will work as a Spark system. Alternatively, you can take two systems which are communicating with each other and on one of the system Spark is configured.
Let us see this project in detail.
| a. Client System | ||
|---|---|---|
| It is an example of the Spring Boot JAVA Framework. When we will build this project then it will create a "client.jar" executable file. |  |
|
| It has java code, spark executable jar, data files, and static pages (HTML, javascript, image). | ||
| Java code has 2 files, ClientSpringBootWebApplication.java and UploadDownloadController.java | ||
| ClientSpringBootWebApplication.java is the main project file, which is responsible for building code and running it on an embedded server. | ||
| UploadDownloadController.java is used to provide download & upload URL HTTP services for the Spark system. | ||
| data folder has employee-relationship data file (employee.csv) and executable spark project (graphx.jar) file. | ||
| the static folder has HTML pages and dependent js & image files. This is the main client view page which shows the spark process result. | ||
| pom.xml is a project build tool file. This file has java dependencies and builds configuration details. | ||
| For creating “the client.jar” file, use the command "mvn clean package". | ||
| Click Here To Download "ClientSystem" project zip file. | ||
| b. Spark System | ||
|---|---|---|
| It is a JAVA project, when we will build this project then it will create a “graphx.jar “executable file. | 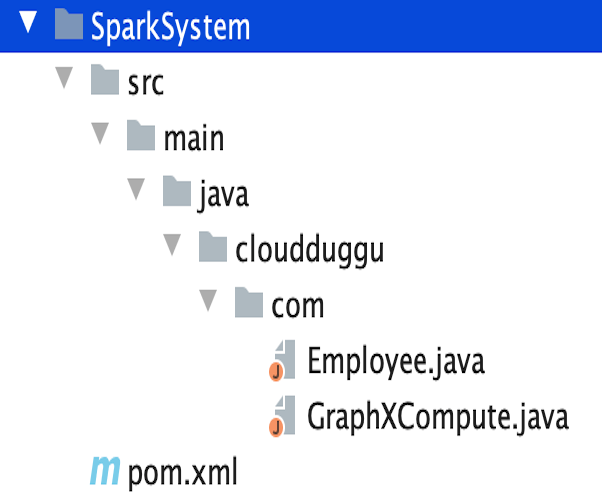 |
|
| Spark project has 2 java files (Employee.java, GraphXCompute.java) and 1 build tool file (pom.xml). | ||
| Employee.java file uses to create employee-relationship dataset object after reading employee.csv file. |
||
| GraphXCompute.java is the main code file which is responsible to create spark graph object and compute client request. | ||
Main Code, 1- create employee dataset object. 2- create a vertex rdd object. 3- create edge rdd object. 4- create a graph object from vertex and edge.
|
||
| pom.xml contains external code dependencies and main class details. | ||
| For creating "the graphx.jar" file, use the command "mvn clean package". | ||
| Click Here To Download "SparkSystem" project zip file. | ||
4. Run The Project
| a. Client System | b. Spark System | |
|---|---|---|
1. |
Verify Java is installed into the Client system. |
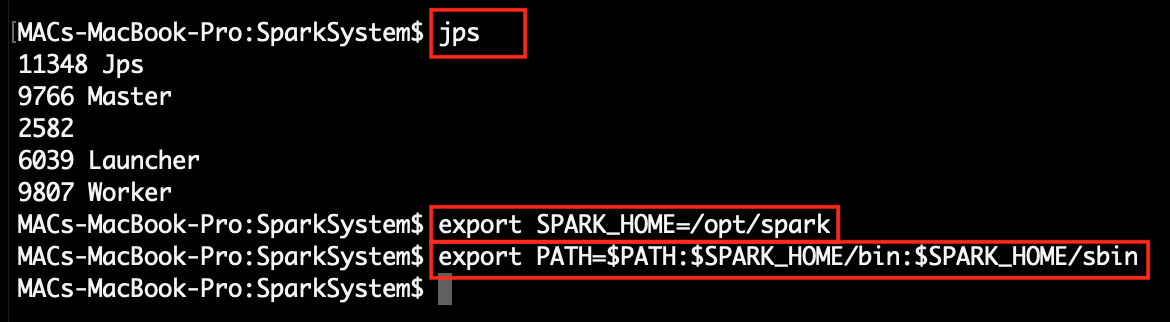
Verify spark services are running on the Spark system. Also, check the export variable path for spark commands. |
 |
 |
|
2. |
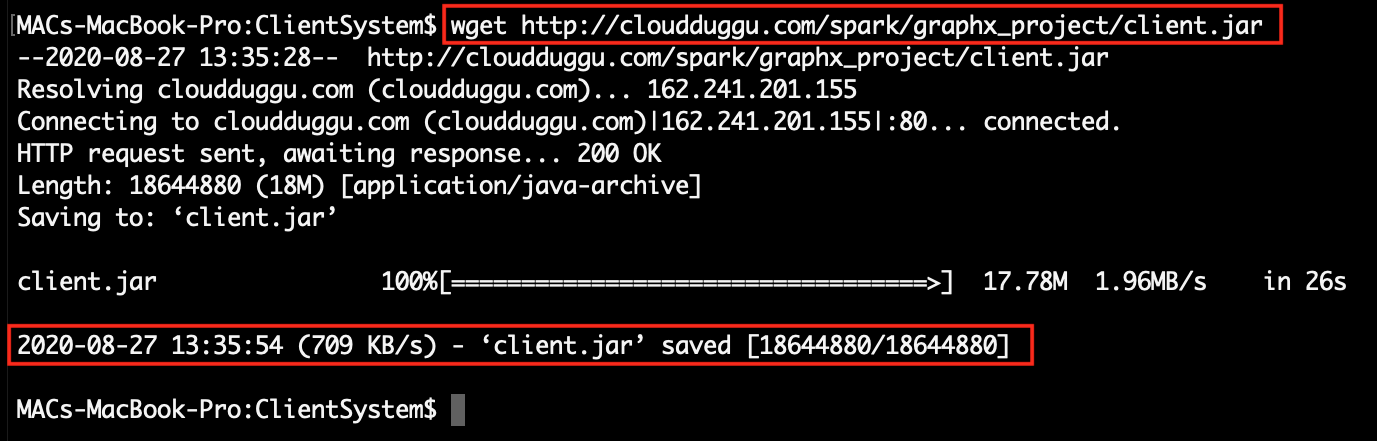
Download client.jar in the Client system. Click Here To Download "client.jar" executable jar file. |
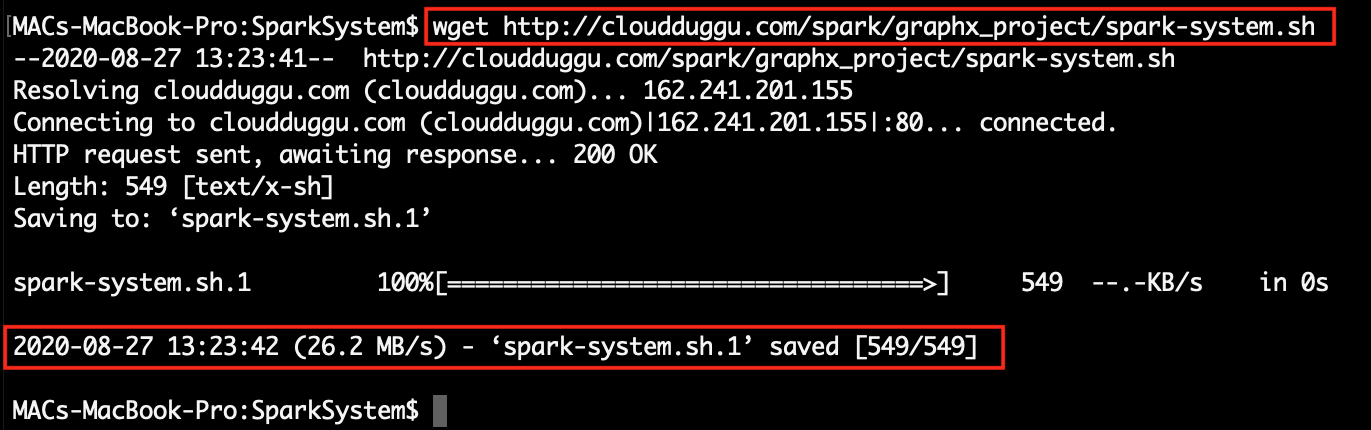
Download spark-system.sh shell script file in the Spark system. Click Here To Download "spark-system.sh" shell script file. |
 |
 |
|
3. |
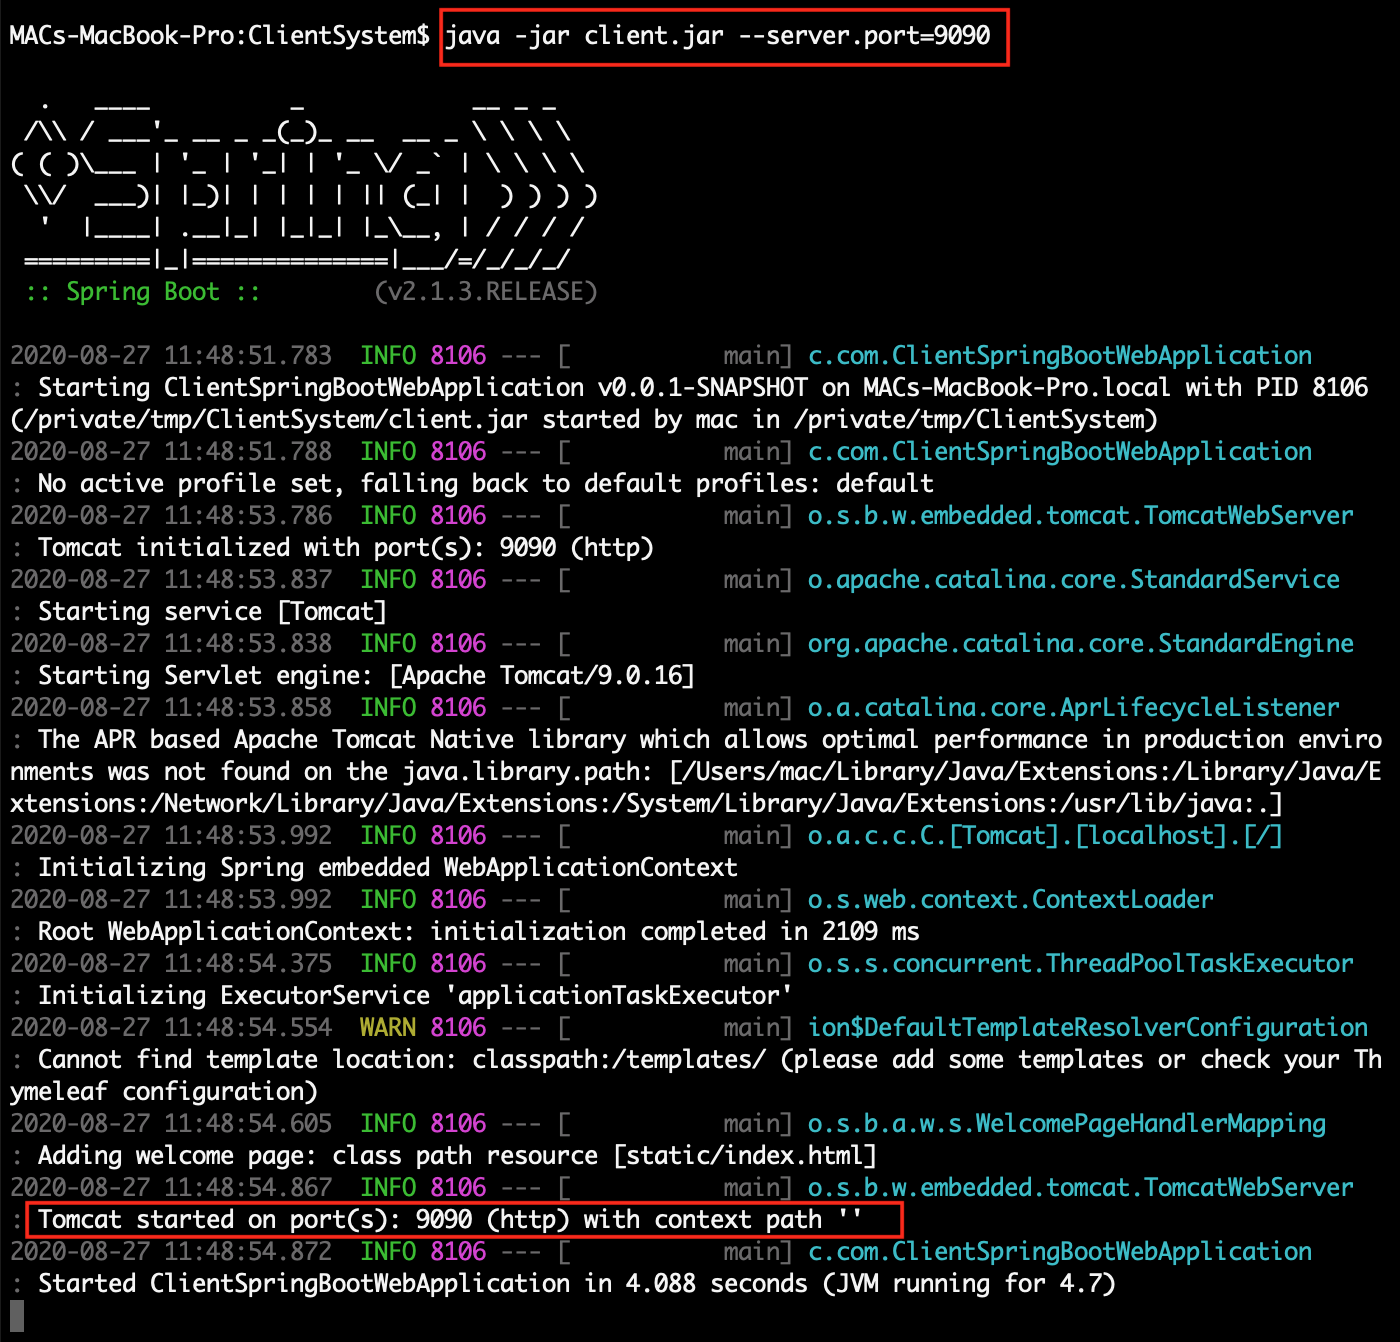
Run client.jar in the client system. At execution time pass server port 9090. Here we can use a different port if the port already uses in the client system.
|
|
 |
||
 |
||
4. |
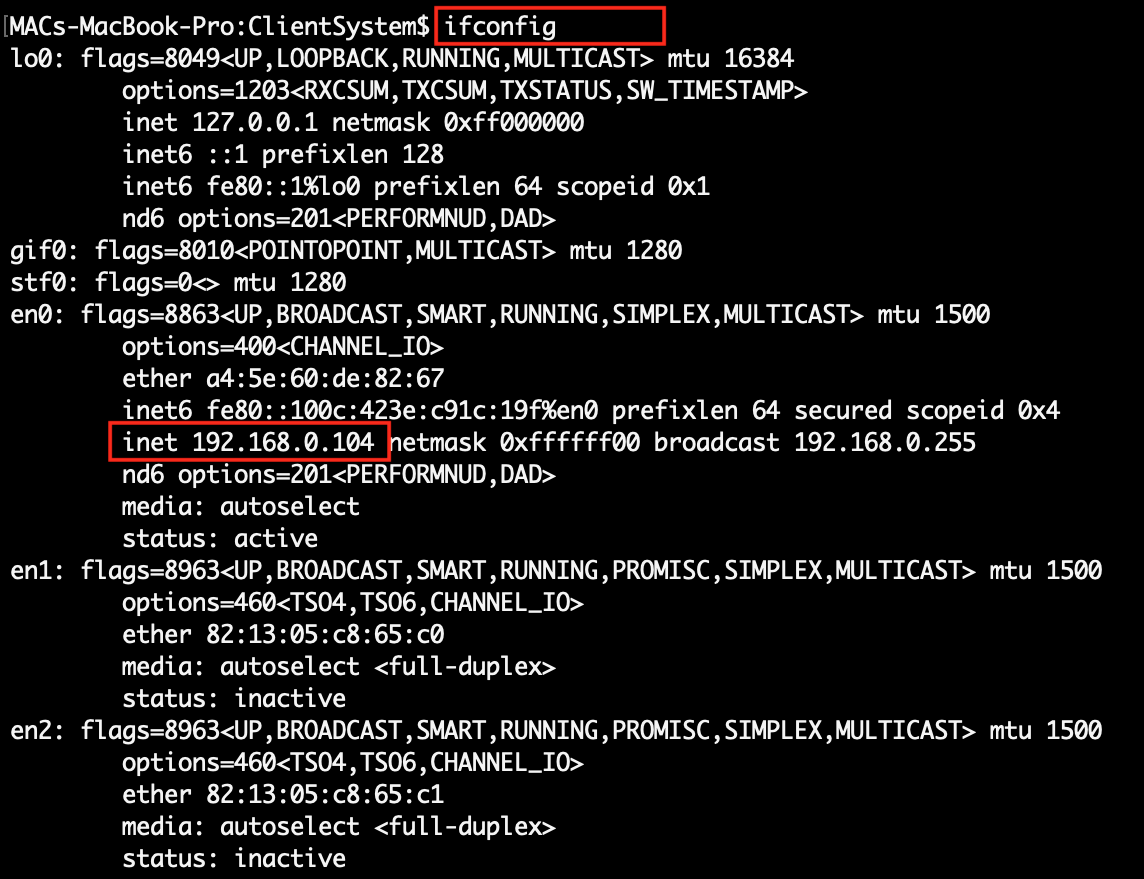
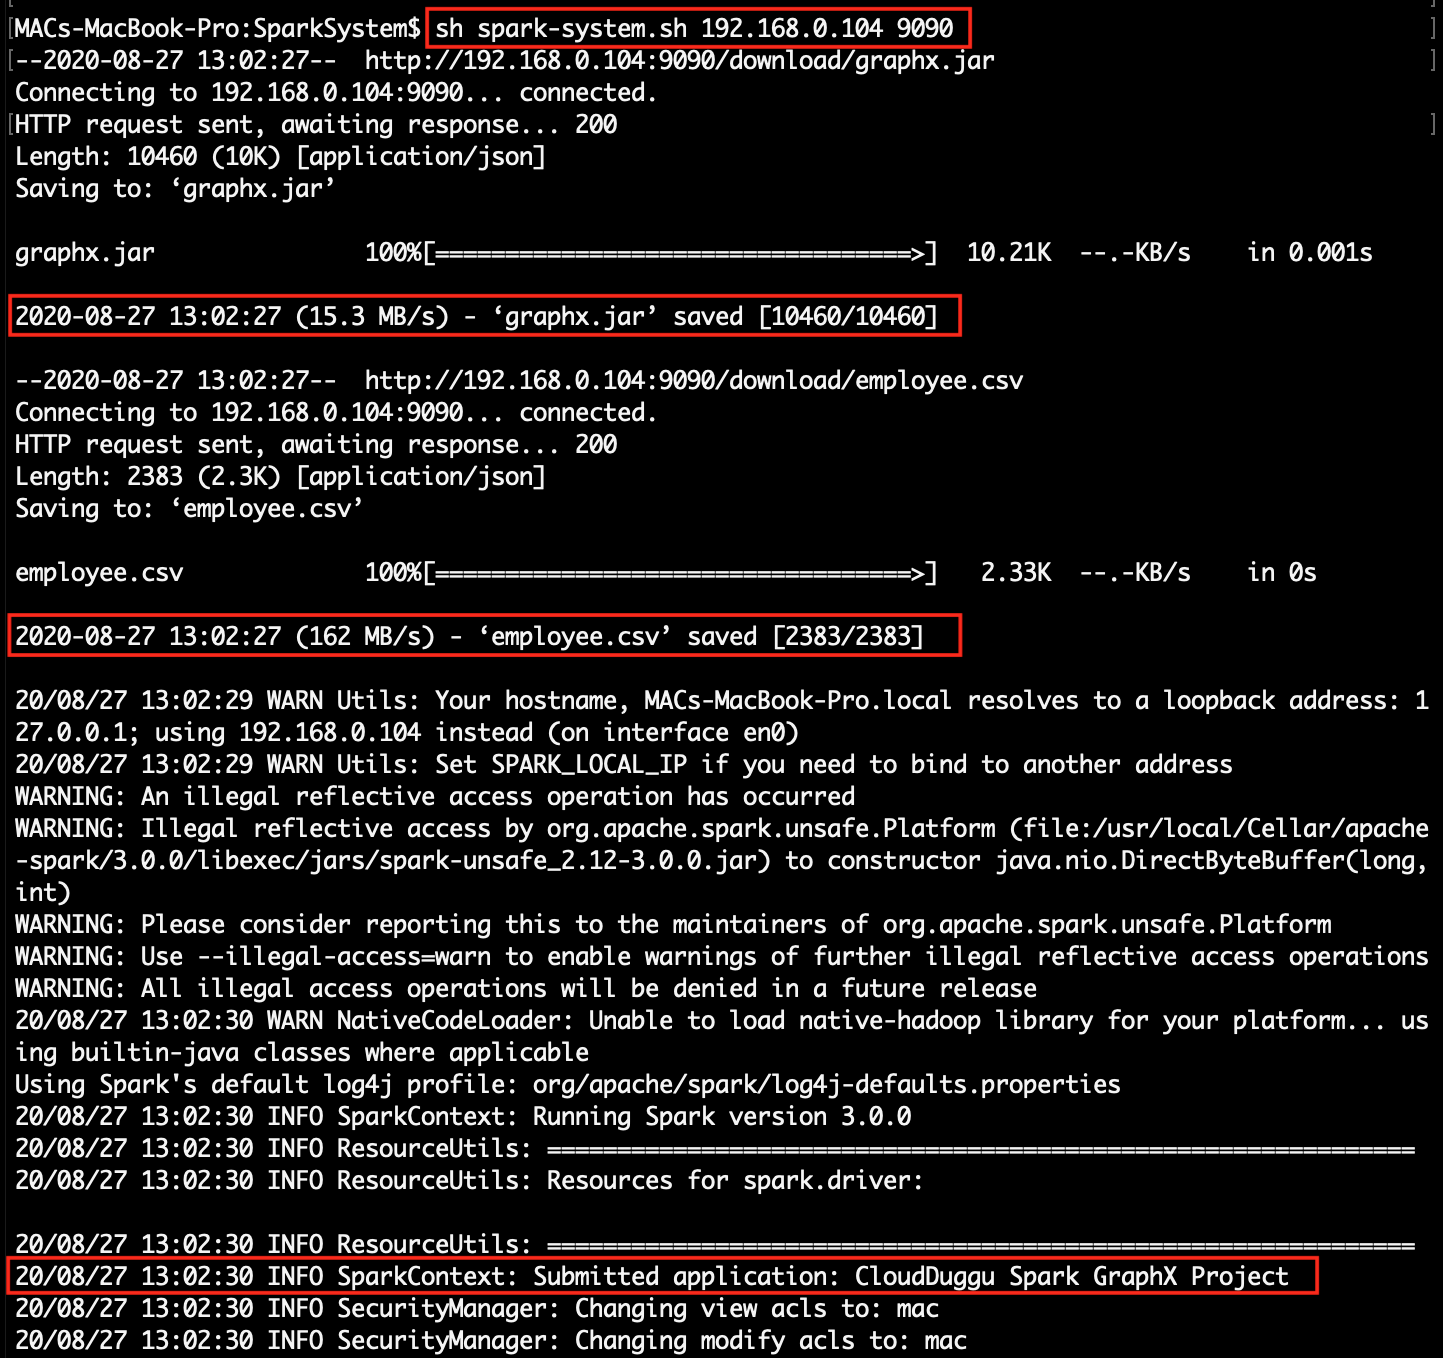
Find the client IP address that is accessible in the Spark system. | Run spark-system.sh shell script in Spark system. At execution time pass client-ip & client-port.
|
 |
 |
|
5. |
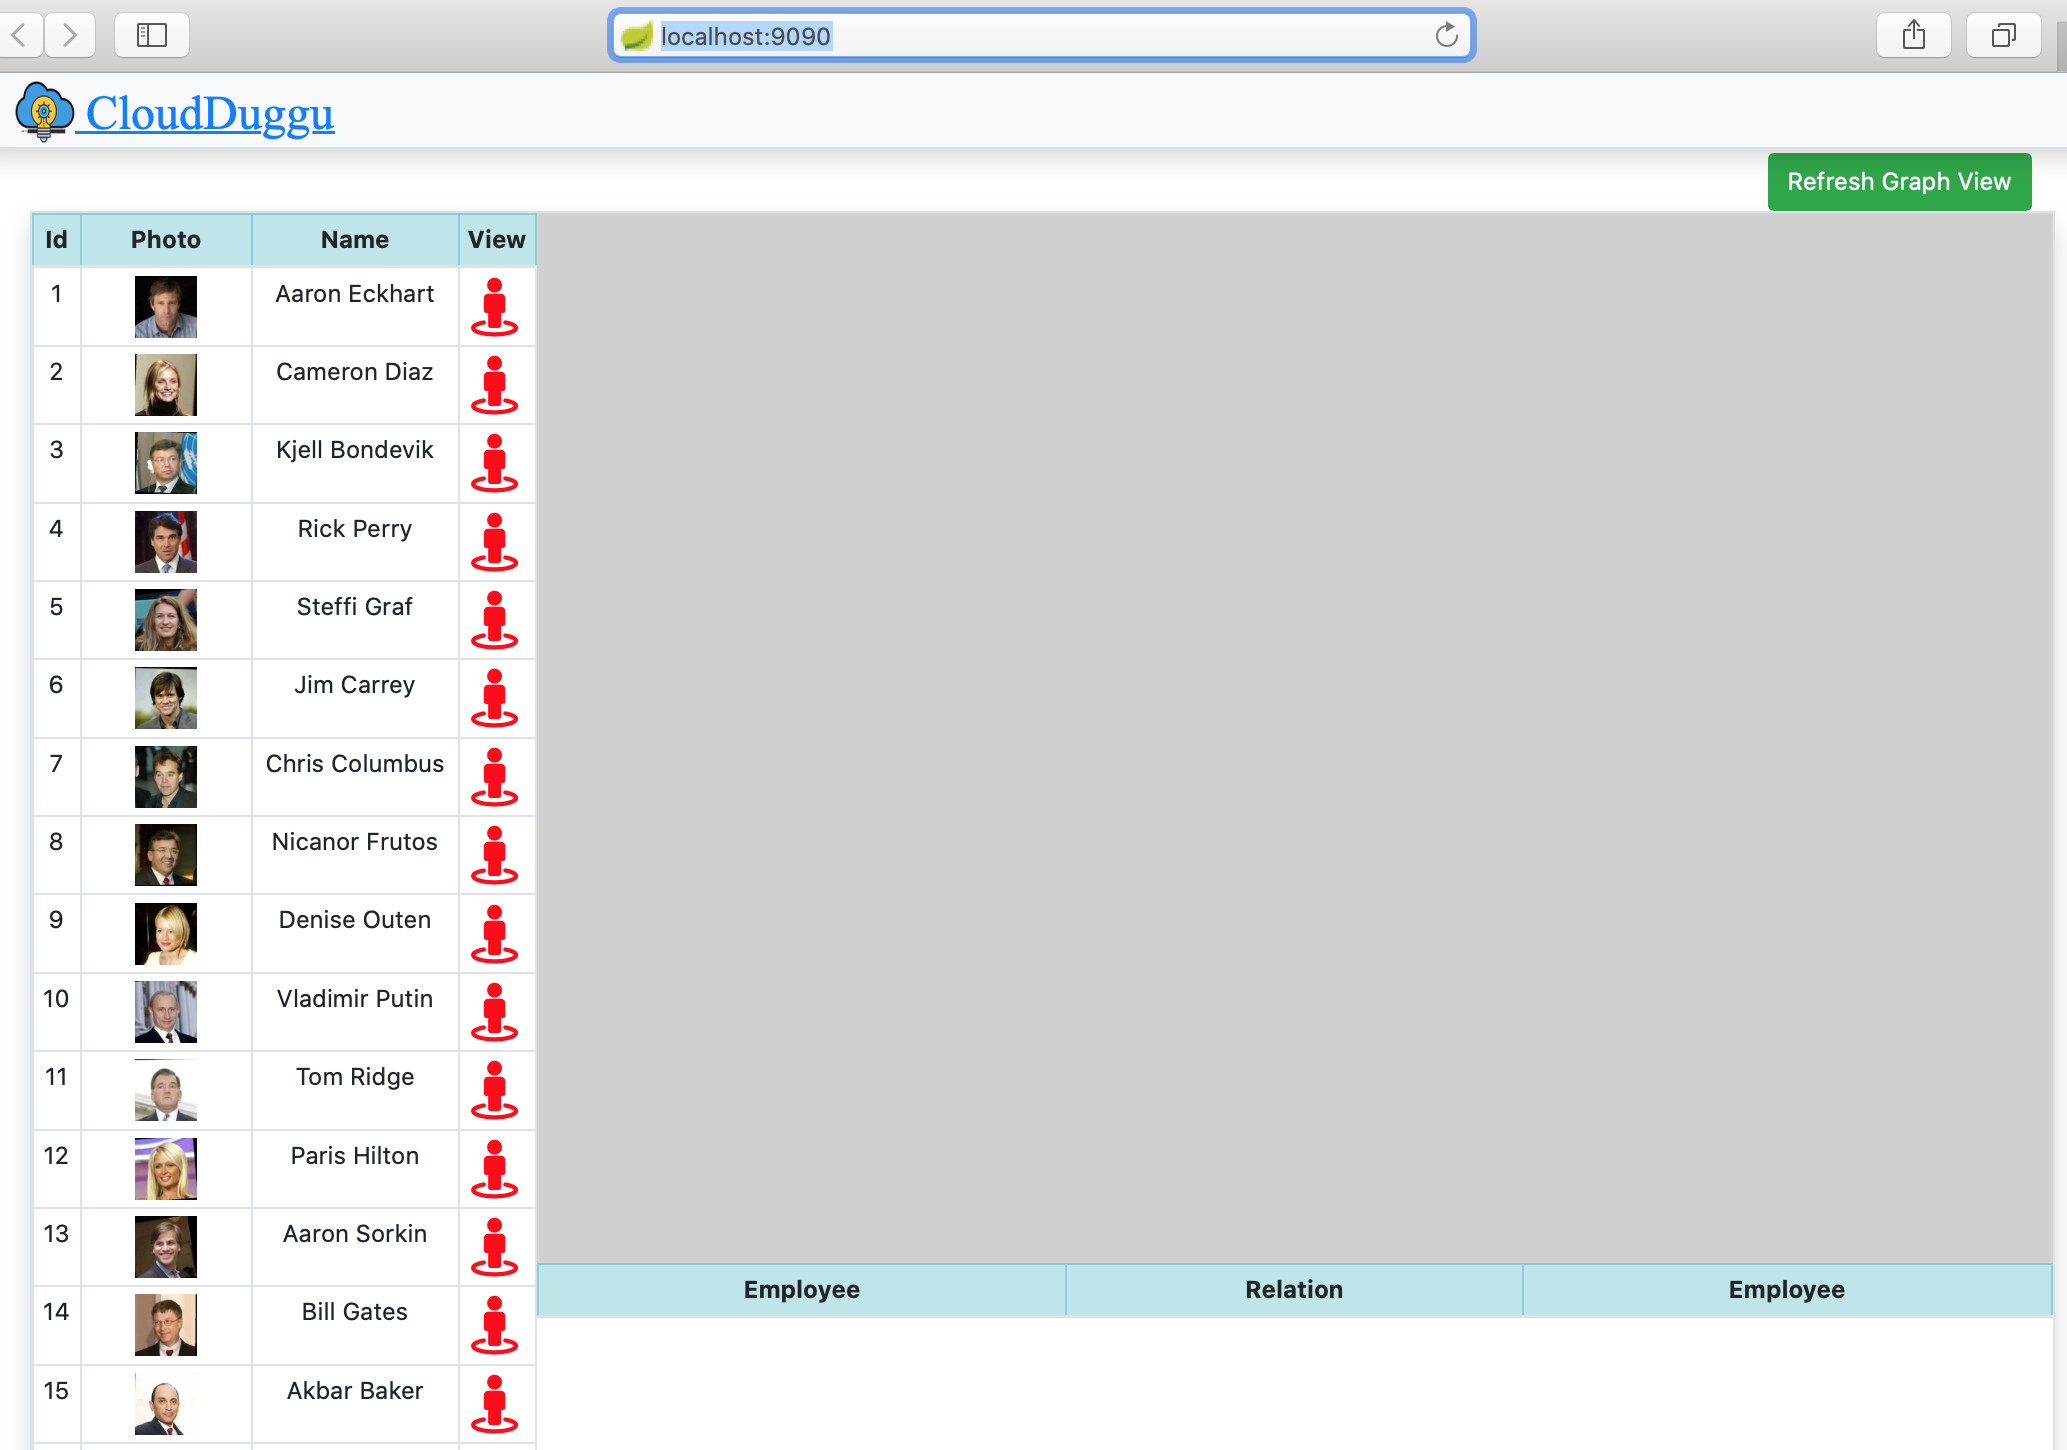
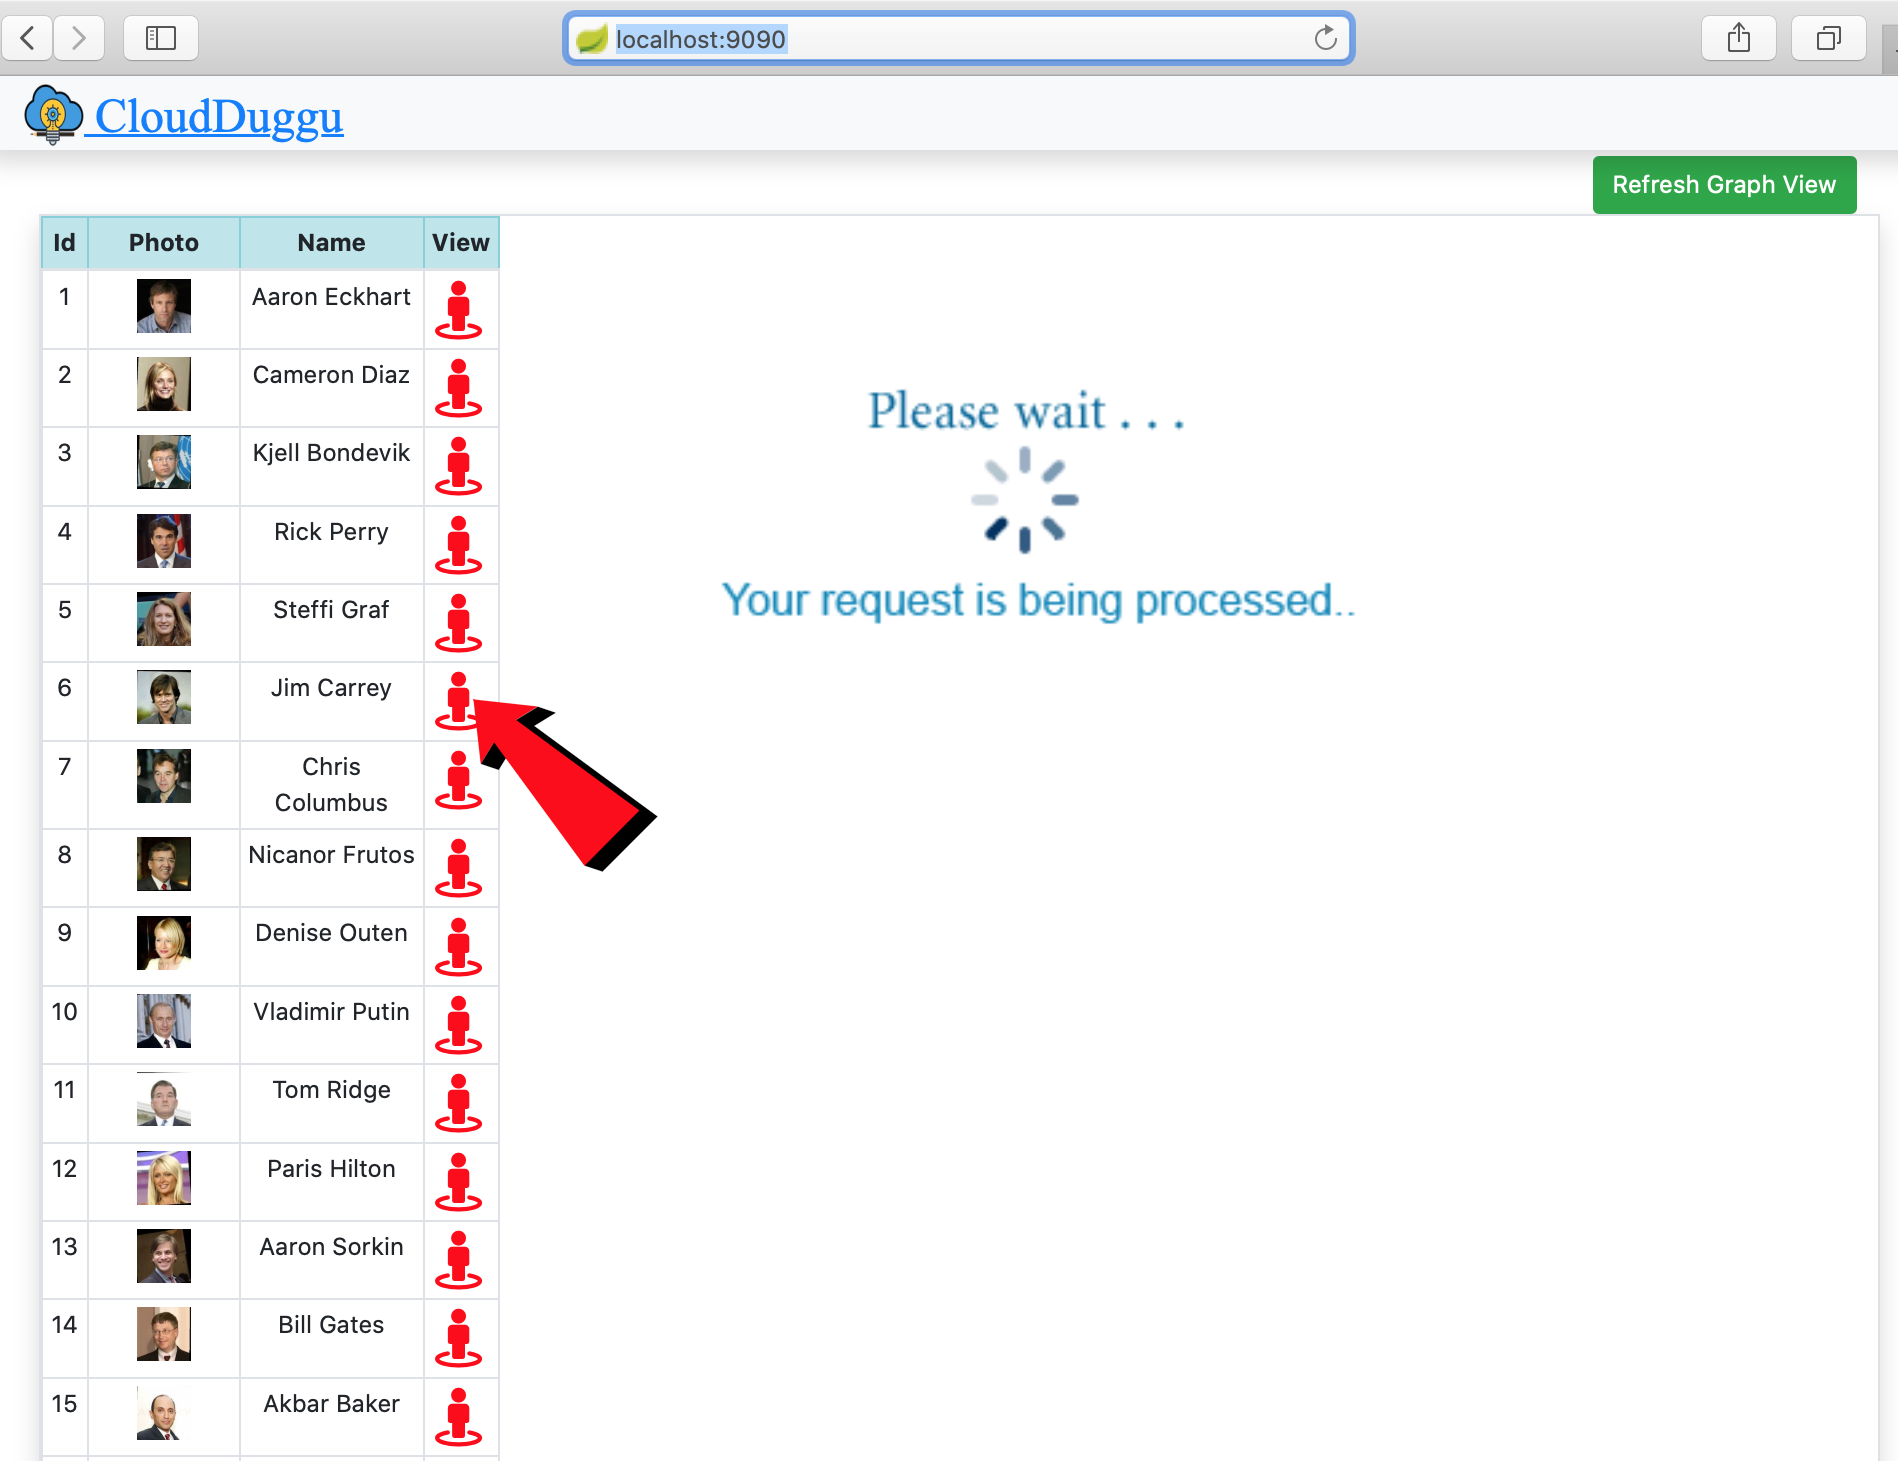
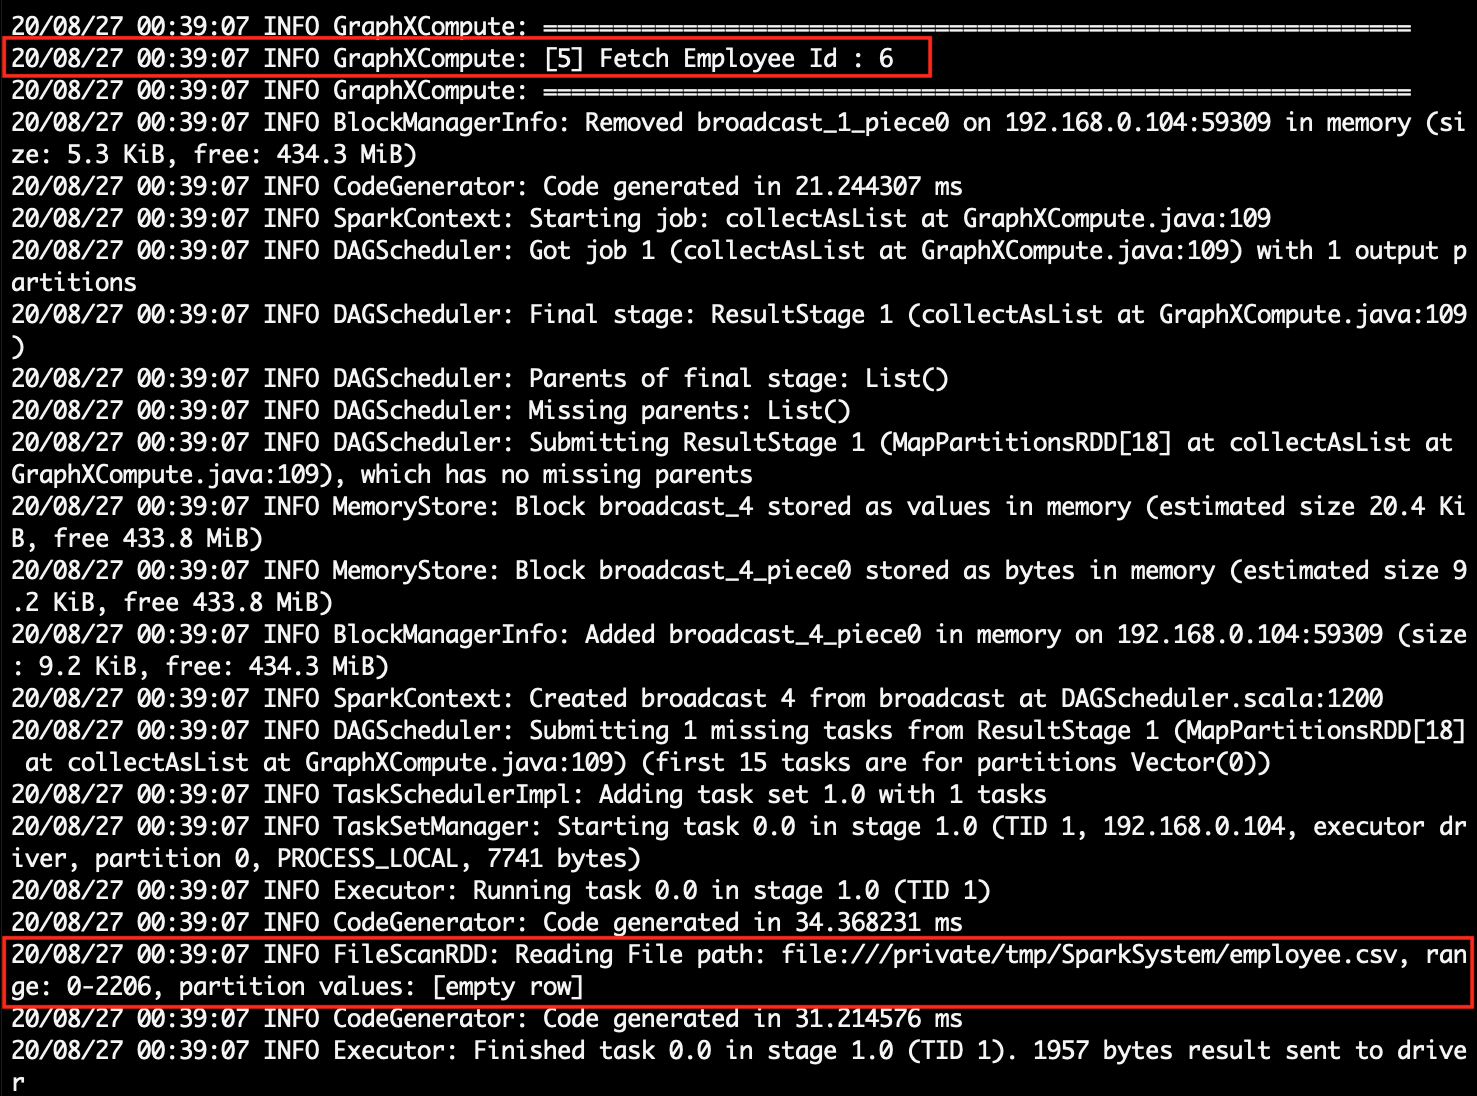
On the client, page click on the icon and generate a request for employee relationship details. | After receiving a request from the Client system, the Spark system will start processing data. |
 |
 |
|
6. |
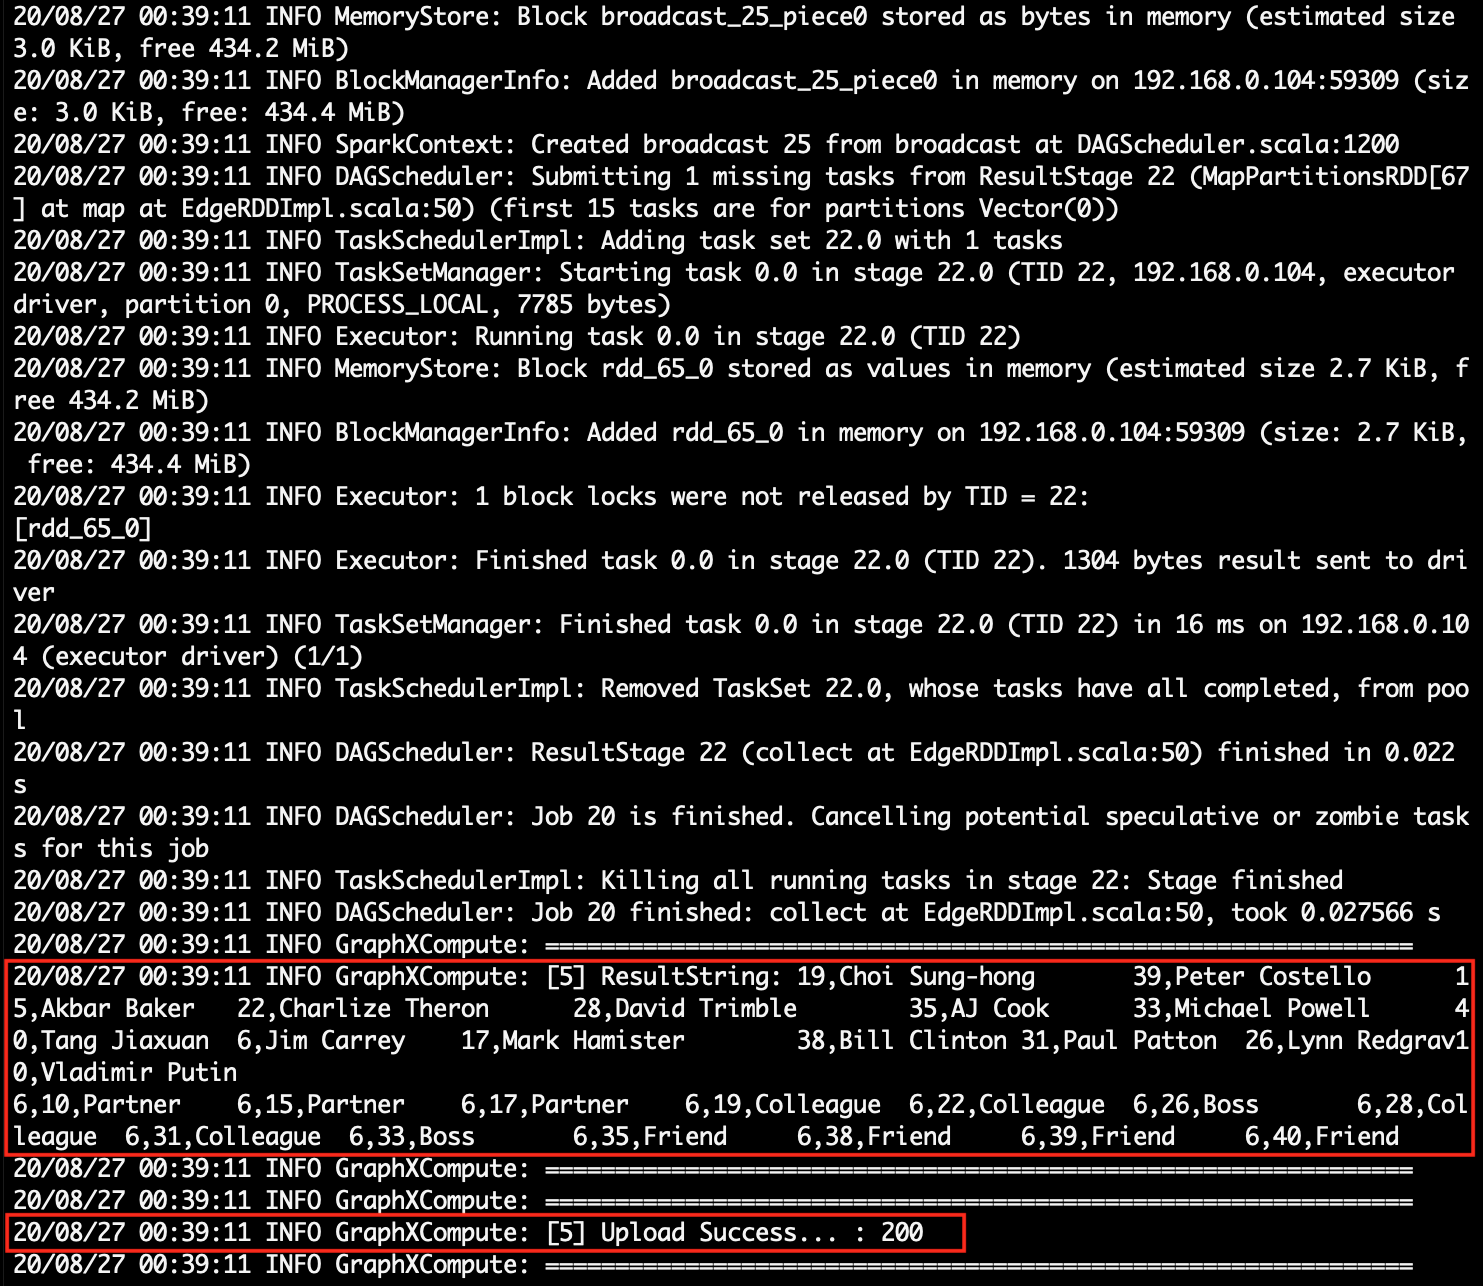
The client system will automatically show the result as soon as the Spark system uploads the result. | Spark system uploads the result after successful execution. |
 |
 |
5. Project Files Description In Detail
(i). spark-system.sh
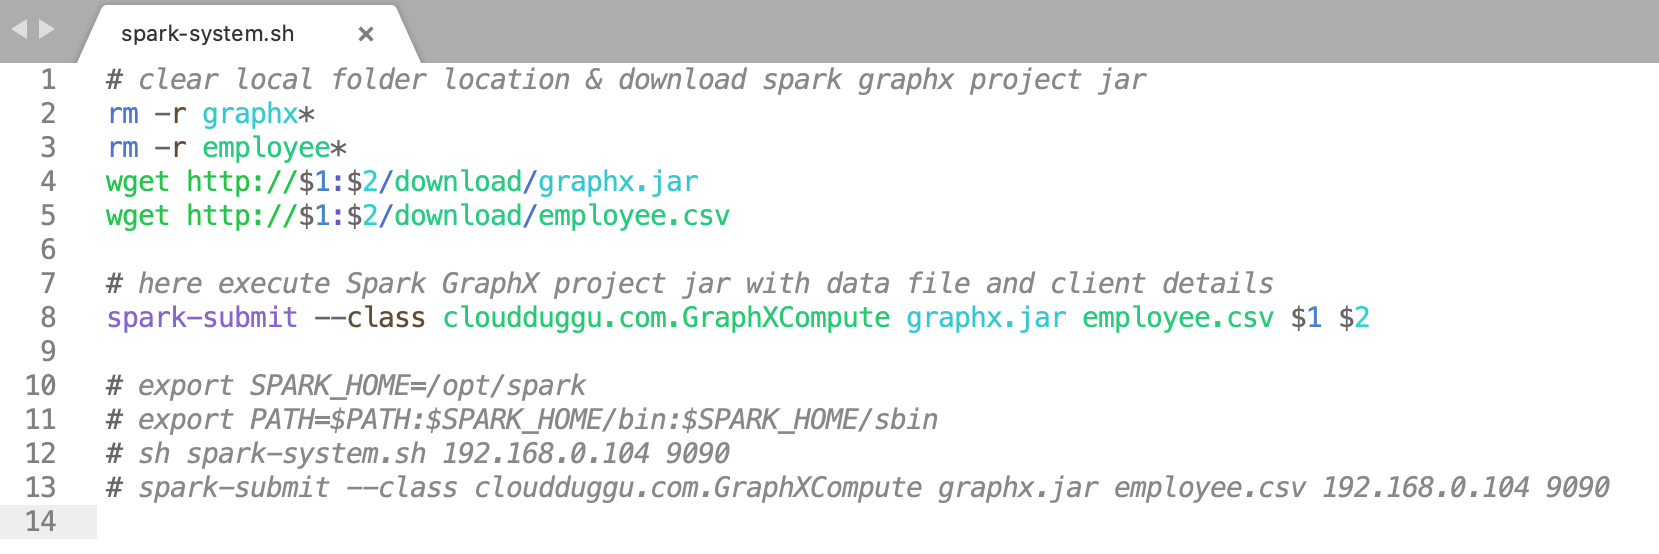
Using a shell script (spark-system. sh) we can easily run the Spark project jar in the Spark system.
spark-system.sh file uses employee data and Spark project jar files. Once the jar file is downloaded then it can be run with input client values.
spark-system.sh file has 2 input variables which are required during runtime.
The first variable is $1, used to obtain the client IP address from the command line.
The second variable is $2, used to obtain the client port number from the command line.
(sh spark-system.sh 192.168.0.104 9090 ): here "sh" is linux command,
"spark-system.sh" is a shell script file name, "192.168.0.104" is a first variable & "9090" is a second variable.
:) ...Enjoy The Spark GraphX Project.